Want to learn how to build a static ecommerce website this year but don’t know where to start? This guide is here to help.
Running an online store in a purely static environment is very possible with the specific tools, so you don’t encounter challenges after static conversion. In this guide, we’ll show you how to create an ecommerce website with Ecwid and Simply Static.
We’ll cover:
- Can an ecommerce site be made static?
- Benefits of a static ecommerce website.
- Step-by-step guide on building a static ecommerce website.
Let’s begin by explaining if a static ecommerce website is feasible in the first place.
Try static WordPress hosting free for 7 days
No credit card. No maintenance. No headaches.
Can an ecommerce website be static?
It’s very possible to create an ecommerce site in a static format. Though it comes with certain limitations, you can easily bypass it by integrating a third-party ecommerce widget into your static site.
To clarify this, let’s start with the barebones concept of a static website and then highlight the challenge in the static setup.
What is a static website?
A static website is made up of web pages with fixed content. These pages are pre-built so that all on-site users can see the same content, layout, and functionalities when they open and interact with the site.
There’s no tailored content, for example, recommendations based on a user’s past activity. That’s because all static site files are pre-built, stored, and served to users as they are. The owner has to update the content manually to change it.
However, it’s important to note that static sites use front-end technologies like HTMLHyperText Markup Language. It’s the standard language for creating web pages., CSSCascading Style Sheet. It’s a language used for describing the look and formatting of a document written in HTML., and JavaScriptA programming language used in web development to create interactive elements on a webpage.. JavaScript adds little interactivity to these pages by enabling features like toggle content, expand and collapse dropdown menus, etc.

What’s the challenge of running traditional ecommerce in a static environment
Traditional ecommerce usually needs to be dynamic to handle real-time interactions like:
- Updating the shopping cart.
- Checking product availability.
- Comments on blog posts that sync up to social media platforms.
- Real-time feeds from social media platforms.
- Processing secure payments.
- Personalizing the online shopping experience.
- And more.
These dynamic features are crucial for a modern ecommerce experience. However, static sites are inherently limited in handling these essential ecommerce features without a significant workaround or server-side scripting.
Because static sites don’t connect to a database, they struggle to deliver the flexible, data-driven experience that most online shoppers expect.
In a purely static setup:
- Shopping carts cannot be updated in real-time.
- Product information like prices or stock availability cannot be adjusted immediately.
- User accounts and custom recommendations are not supported because static pages don’t store or display personalized data.
- Completing the checkout process is challenging, etc.
So, what’s the workaround for this challenge?

Make static ecommerce possible with Ecwid
Ecwid is an ecommerce platform like WooCommerce, Shopify, or Magento. It lets you start an online store, create shop pages, connect to multiple sales channels, and sell your products/services.
This pluginA piece of software that adds specific features to WordPress. even works well with content management systems like WordPress, Wix, and Squarespace.
But what makes it unique? The answer is simple. This plugin lets you add your online store to your static site.
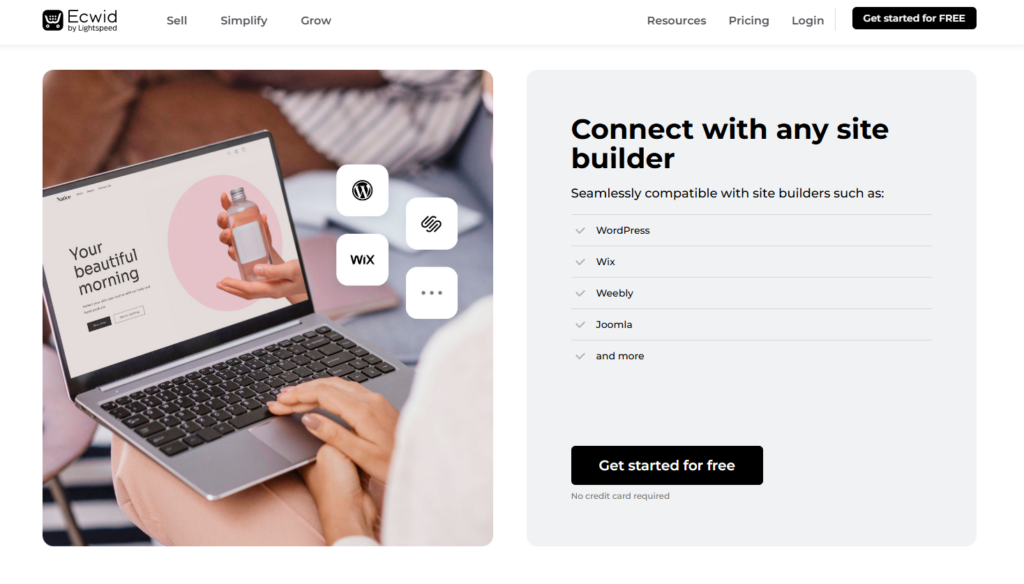
If you’re using WordPress, you’ll need to connect it to your Ecwid account first. Then, create an online store. Of course, the store will be dynamic by default. But you can quickly turn it into its static ecommerce website using a static site generator (SSG) and still have your Ecwid store on it.
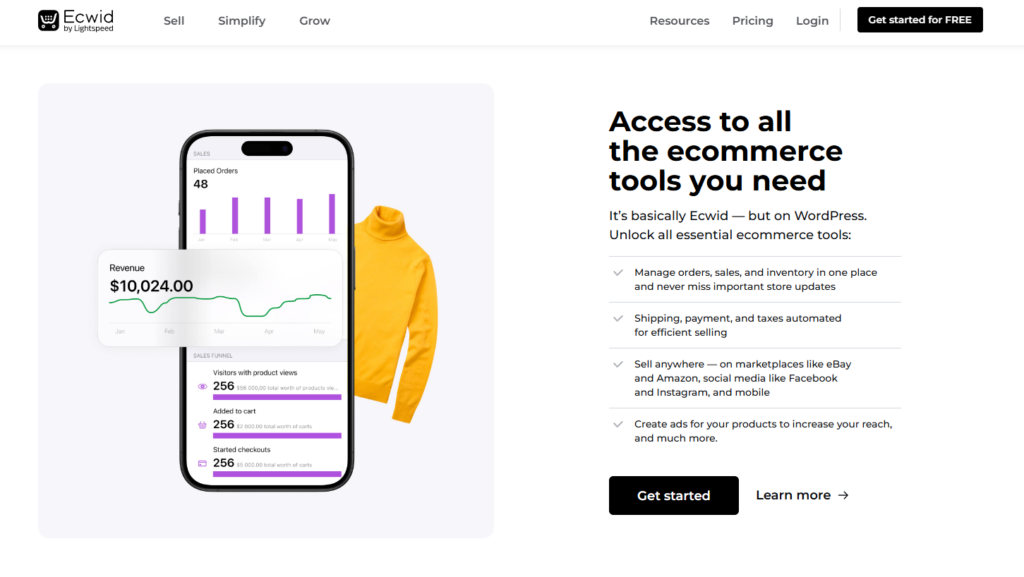
Users can still browse products, view details, and add items to a cart, all within a static framework. Ecwid handles product pages, shopping cart, and checkout, inventory updates, order processing, secure payment processing, and more externally.
Note: This gets more technical if you use modern web development architecture like JAMstack or SSGs like Gatsby, Next.js, Jekyll, or Hugo. The upside is that this architecture allows you to leverage a bit of backend functionality using APIs. This option isn’t beginner-friendly.
So, is the Ecwid plugin for WordPress static site generators for all types of business?
Ideal use cases
SMEs (small and medium-sized enterprises) that don’t need complex, real-time features but want fast, secure, and budget-friendly sites may find a static ecommerce website compelling. These types of business include:
Small catalogs
Smaller product ranges don’t need complete inventory management or real-time updates. Something Ecwid can handle.
Single-product businesses
Small businesses selling one main product, like a fitness startup with a unique yoga mat, can use a static site to focus entirely on promoting this product.
Pre-order, limited edition, or seasonal sellers
Sellers who release products for a limited time, such as a clothing brand launching a special holiday collection, can benefit from the ease of launching and managing a static site. Or create a temporary, high-performing site for pre-order campaigns.
Creators, artists, and authors
Independent creators, like photographers, could showcase their best prints on a static gallery page with Buy Now buttons to sell directly to their fans. The same goes for artists selling prints, musicians offering albums, or authors selling self-published books who want to showcase their work and connect directly with fans.
Service-based business with supplementary products
For example, a personal trainer could use a simple, static online store to sell supplementary products such as branded workout gear or e-books. But keep the main focus on their service, which is fitness coaching.
Next, we’ll look at the benefits of a static ecommerce website that make these use cases (and more) possible.

Benefits of a static ecommerce website
The following are the benefits of creating static ecommerce websites. It results in:
Improved site performance and speed
Static ecommerce sites load much faster than their dynamic counterparts because they don’t rely on server-side processing for each visitor. During the static conversion process, an SSG pre-builds pages, eliminating repeated database calls needed to fetch content dynamicallyActions or processes that occur in real-time, often without requiring a full page reload. For example, a search box that….
A reduced server load will automatically result in faster load times. Increased site speed boosts your site’s performance, search engine rankings (SEO), and the overall customer experience within your site.
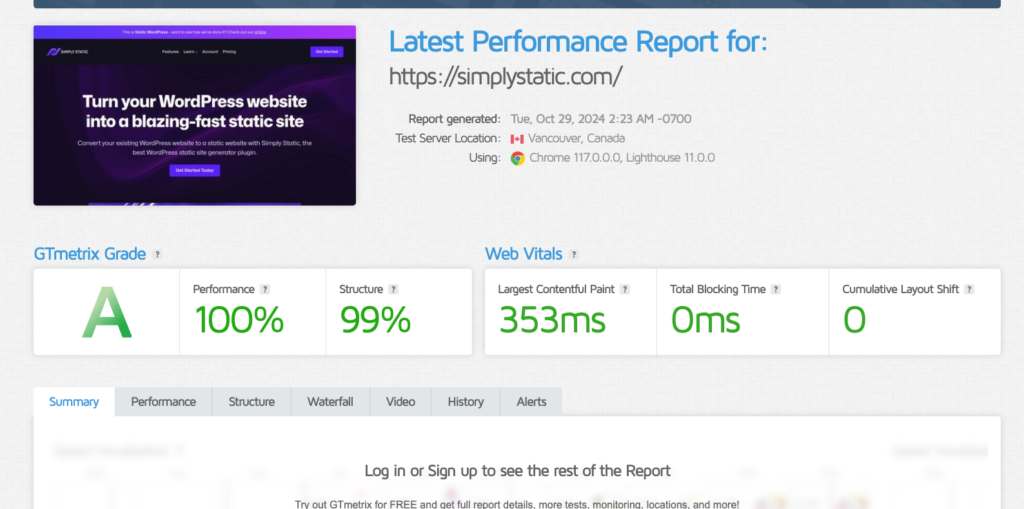
Other performance optimization techniques that boost site performance further include:
- Image compression.
- Deploying via content delivery networks (CDNs).
- Reducing the number of HTTP requests.
- Better caching.
- Enabling GZIP compression.
The combined effort of these techniques boosts ecommerce site performance.
Enhanced security
Static site generators, for example, decouple the WordPress backend from the front end to create a structure similar to a headless CMS. This separation reduces the overall attack surface for malicious hackers. Even if a vulnerability exists on the front end, it likely won’t grant access to the WordPress backend where your content resides.
There are no database or backend scripts to be exploited maliciously. It eliminates threats like SQL injection, server-side request forgery (SSRF), and cross-site scripting (XSS) that typically target databases or dynamic functionality. Deploying on CDNs also adds security layers like DDoS protection.
Read this guide to learn how to use HTTP basic authentication to secure small WordPress projects and restrict access.
Lower maintenance requirements
Static sites generally have fewer moving parts, making them easier to maintain and update. They’re less affected by plugin or theme changes.
When combined with static site generators that use automated build processes, updating product pages or content can be streamlined without managing a complex backend. However, the level of complexity can vary depending on the SSG and the specific workflowIn a software development context, a workflow is a set of processes and tools for automating the deployment and operatio….
Note: Static ecommerce sites still need basic security measures monitoring for potential vulnerabilities.
Additionally, you can still use the WordPress dashboard for content management when updates are needed. Then, the SSG or automated buildsIn the context of Simply Static, builds are the process of creating a static version of your WordPress website. can regenerate static pages and quickly deploy.
Cost efficiency
Static sites only need basic file storage and delivery. This allows them to run on inexpensive hosting platforms or even free hosting solutions (like GitHub PagesA hosting service from GitHub for publishing static websites directly from a GitHub repository. or NetlifyA platform for automating web projects that provides hosting and serverless backend services for web applications and st… for small sites).
There’s no database or backend infrastructure to manage, eliminating the costs associated with database management, server configurations, and backend resources. Besides, deploying via CDNs lowers bandwidth costs by delivering content from the nearest location to the user.
Generally, static ecommerce sites can help small businesses save money on hosting, infrastructure, security, and maintenance.
Optimized mobile experience
Because Ecwid is an embeddable solution and is part of your website, the latter also has a responsive design that displays correctly on mobile devices. So, be sure you’ll have a static ecommerce website that appears more aesthetically beautiful on all screen sizes.
Note: Faster load times and responsive design make static ecommerce sites ideal for mobile users. It improves their engagement and can dramatically increase mobile conversion across devices.
According to Think with Google, 74% of people say they’re more likely to return to that site in the future. In contrast, 67% of mobile users say that they’re more likely to buy a site’s product or service when they visit a mobile-friendly site.
With all these in mind, it’s time to walk you through creating a static ecommerce website step-by-step.
How to create a static ecommerce website
In this section, we’ll provide a step-by-step guide for creating a static ecommerce website. First, we’ll build a basic WordPress site and integrate Ecwid to add ecommerce functionality. Finally, we’ll use Simply Static to convert the site to a static format for improved performance and security.

Step 1: Set up a WordPress website
To set up the WordPress site effectively, we’ll need WordPress hosting, basic authentication, a subdomain, themes, and plugins.
Some of these requirements prepare your WordPress site for static conversion later on. So, follow these steps to set up and configure WordPress efficiently.
Install WordPress
- Choose WordPress hosting that supports WordPress installations. The provider should have decent power, working WP-cronA function in WordPress that automates scheduled tasks, like publishing scheduled posts or checking for plugin updates. (or having UNIX cronA time-based job scheduler that runs specified actions at certain times or intervals. instead),
- Barebone WordPress without the usual bandaids (serverside-caching, complex firewalls, or proxy setups).
- Daily managed backups.
- Easy to use SSLSecure Sockets Layer. A technology that encrypts the data transferred between a user and a website..
The rest of the setup is covered by Simply Static. You can choose a fancy managed hosting provider, but static WordPress differs from the average WordPress setup.
- Next, install WordPress using the hosting provider’s installer. You can also download WordPress from WordPress.org and follow their setup instructions.
- After the installation, go to your WordPress dashboard and complete basic settings (like site title, tagline, and timezone) under Settings > General.
- Move the entire website to a subdomain and protect it with basic authentication.
Note: Most hosting providers offer an easy-to-use UIUser Interface. Part of a software application that users interact with, such as buttons, menus, and forms. to set up basic authentication for your website. More on this in step 3.
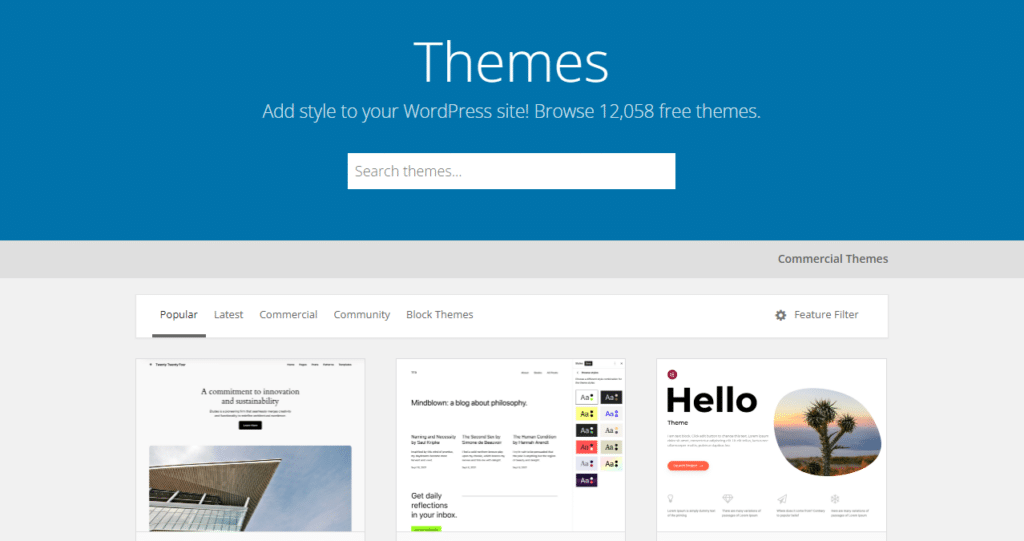
- Then, choose a theme. Go to Appearance > Themes and select a theme that suits your brand style (more on this below).
- Finally, install essential plugins to manage SEO, content, etc., under Plugins > Add New.
Note: See all the plugins that Simply Static works with, in our plugins guide.
Select a lightweight theme template
A WordPress theme determines your site’s design, layout, and style.
However, we recommend choosing a lightweight that won’t slow down your site or add unnecessary elements. Also, find a template that’s compatible with static conversion to ensure your static site will run smoothly afterward.
Themes like GeneratePress or Astra are excellent choices as they are optimized for speed and work well with static site generators. This ensures that your converted static site will run efficiently.
Customize site basics
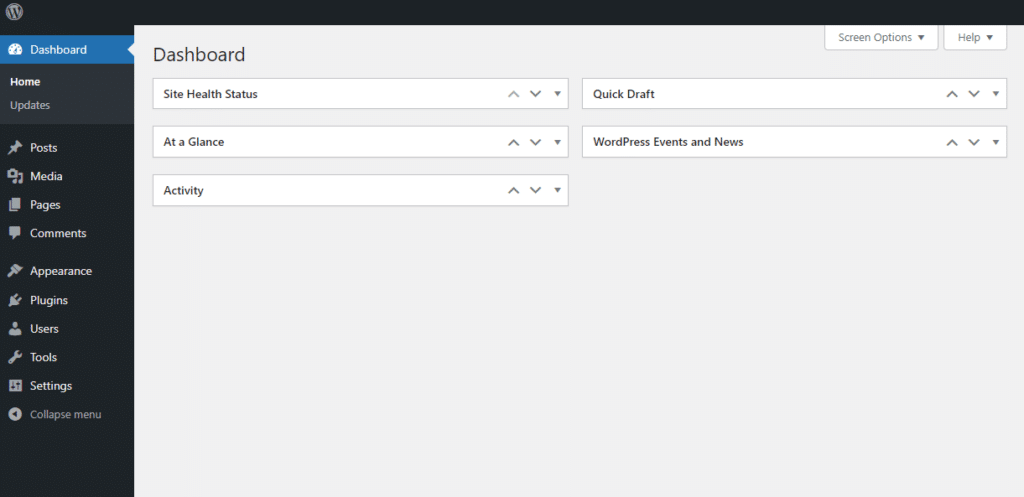
Make sure the following essential customizations within your WordPress dashboard are complete to create a solid foundation for the site.
Settings like:
- Setting up pages: Go to Pages > Add New to create core pages like Home, About Us, product pages, and Contact.
- Organize your menus: Go to Appearance > Menus to organize your navigation and make it easy for users to find key pages.
- Customize appearance: In Appearance > Customize, adjust site colors, fonts, and layout to align with your brand’s look and feel.
Following these steps will give you a fully functioning WordPress site with a solid structure ready for ecommerce integrationThe act of combining different systems, software, or functionalities to work together as a unified whole. and static conversion.
Step 2: Add your ecommerce store with Ecwid
For this tutorial, we’ll install Ecwid using the WordPress.org solution that you’ve self-hosted. Let’s begin by installing Ecwid on your WordPress site.
Install the Ecwid plugin
Since you hosted WordPress by yourself, take the following steps to add Ecwid to your store and activate it:
- Navigate to Plugins > Add New on your WordPress dashboard and search for “Ecwid.”
- Click Install Now next to the Ecwid Ecommerce Shopping Cart plugin, then select Activate once it’s installed.
- Follow the on-screen prompts to either login or create a new Ecwid account to link your store to WordPress.
Generally, if you have an Ecwid account, select the Connect your store option and give the requested permissions to the Ecwid plugin.
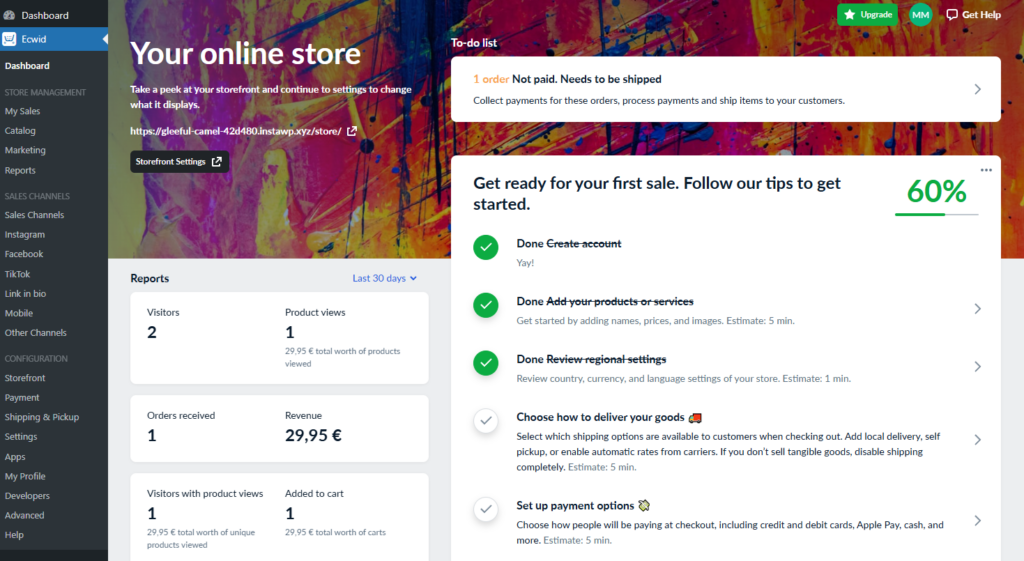
Completing the installation process will add the Ecwid store to an automatically created “Store” page. You can choose to keep your store on this page.
Or add it to one of the pages of your WordPress site in the following steps:
- Open the WordPress page where you want to add the store. Then, click the + button in the upper left corner to add a block.
- Select Store Home Page and click Publish. If you haven’t added your products to the store yet, a few sample products will appear on your storefront for demonstration purposes.
Create your Ecwid store
Next, we need to set up basic store elements, including adding products or services, customizing store settings, setting up payment options, etc.
Ecwid embeds its dashboard directly into your WordPress backend. So, to set up these store elements, go to the Ecwid dashboard on WordPress instead of logging into your Ecwid account.

This is where we’ll do store management, set up sales channels, and customize your shop:
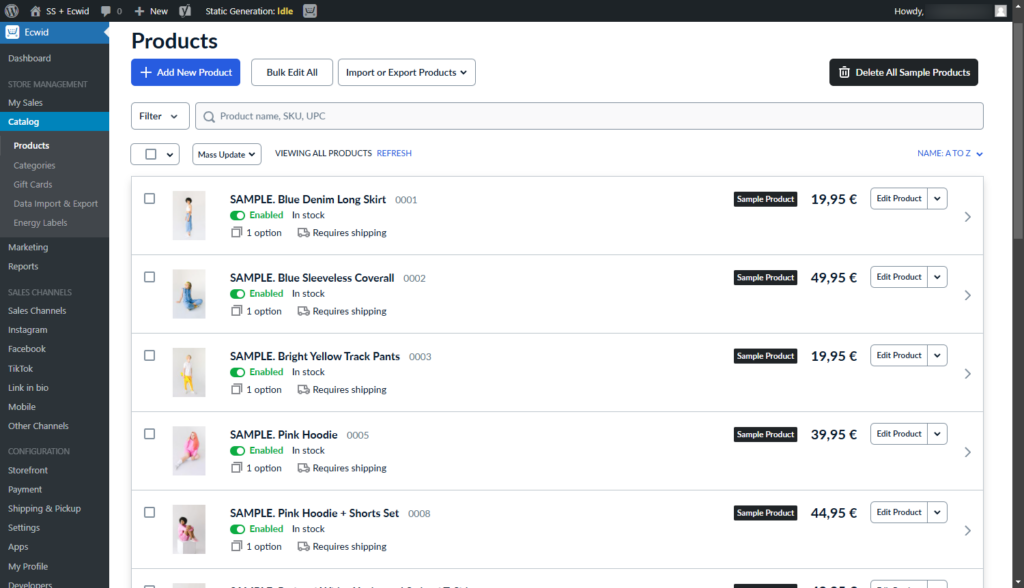
- Under Store management, navigate to Catalog > Products and add your products, including product descriptions, images, and prices. Delete the sample products first.
- In the Catalog > Categories section, you can group your products into various categories.
- Under ConfigurationThe setup process where you specify the settings and options for how a software or system will operate. > Storefront, you can customize your store design and content, set up navigation, and the following pages: single product pages, category, cart, checkout, search, and filter pages.
- The Payment settings under Configuration lets you choose which payment gateways you’d like to offer customers during checkout. Payment options like PayPal, Stripe, etc.
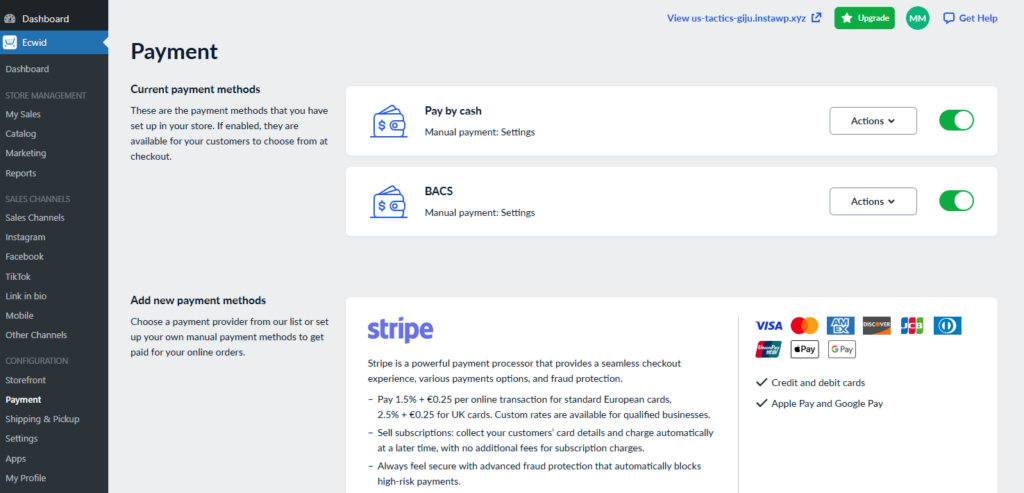
There is much more you can do on the Ecwid dashboard, such as adding shipping and delivery services, as well as configuring other settings like taxes, invoices, legal matters, and more.
Next, let’s see how you can integrate Ecwid’s ecommerce widgets to display product listings, shopping carts, or checkout options seamlessly on your WordPress pages.
How to embed Ecwid widgets to your WordPress pages
Ecwid provides several widgets (also known as Ecwid blocks) that can help you enable full ecommerce functionality on your WordPress site.
- On your WordPress dashboard, open one of the pages you’re working on and would like to add your online store elements.
- Click the + button in the upper left corner to add a new block. This will open an Ecwid section that contains a list of all the available store content blocks.
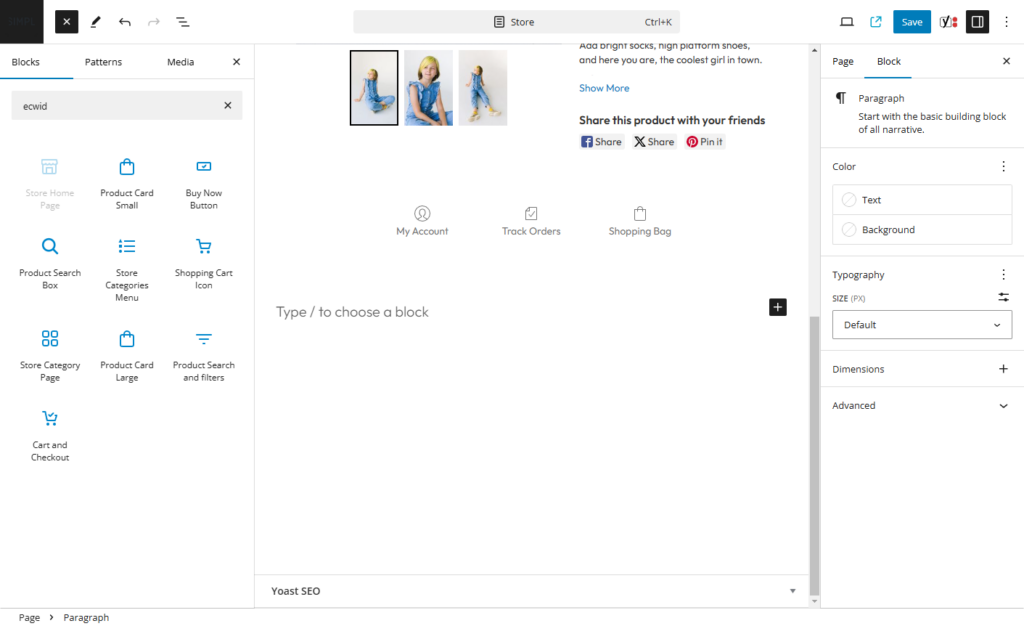
- The Ecwid widgets include:
- Store home page: This allows you to add your entire storefront to any WordPress page
- Product card small: This block is perfect for adding one or more products to a blog post or your homepage.
- Buy Now Button: Use this block to add purchase buttons with a checkout option for specific products.
- Product Search Box: To add a compact search input block to any page
- Store Categories Menu: This adds a categories menu at the top (or bottom) of your page.
- Shopping Cart Icon: To make your shopping cart even more visible and reduce cart abandonment rates.
- Store Category Page: This lets you add a specific store category to any page of your WordPress site. It can be any category that exists in your store.
- Product Card Large: Foror building advanced product pages on your WordPress site.
- Product Search and Filters: These allow advanced search.
- Cart and Checkout: This lets you add the checkout page to any page on your WordPress site.
It will take you some time to set up your ecommerce store fully with Ecwid. Once you’re finished, it’s now time to convert your store into a static ecommerce website. We’ll do it with the help of Simply Static.
Step 3: Convert the site to static with Simply Static
Simply Static is a WordPress plugin that easily converts your newly created ecommerce store to a static website in just one click.
It converts all your pages, forms, and comments, including the search filter functionalities of your ecommerce site.

This conversion allows store owners to enjoy maximum performance, the best site security possible, and reduced maintenance at an affordable cost. You won’t have to invest heavily in additional plugins for increased site performance and security or upgrade web hosting for your online store.
Instead, your static ecommerce website is deployed independently of WordPress hosting through various platforms. Platforms like your web servers or static hosting providers like CloudflareA company that provides services like security and website speed improvement. It acts as a protective layer between the …, GitHubA web-based platform for version control and collaboration, allowing multiple people to work on projects at once., Kinsta, CDNStands for Content Delivery Network. It’s a system of distributed servers that deliver web content quickly to users base…, or Netlify.
Let’s see how you can achieve this.
Install Simply Static
To install Simply Static:
- From your WordPress dashboard, go to Plugins > Add New and click the Upload button on your WordPress dashboard.
- Upload the extension you downloaded and install the plugin.
- When the installation is complete, click Activate and paste the license key from your email to activate the plugin.
Try static WordPress hosting free for 7 days
No credit card. No maintenance. No headaches.
Upon activation, you’ll need to visit the Simply Static > Settings page to customize the plugin.
Customize Simply Static settings
We’ll do this on the Simply Static > Setting page. On this page, you can choose the URL path you want to use in your static files under the General tab. If you know the URL or the domain name where you will host your files, provide that URL under the Absolute URLsComplete web addresses that show the full path to a specific page or file on the internet. option.
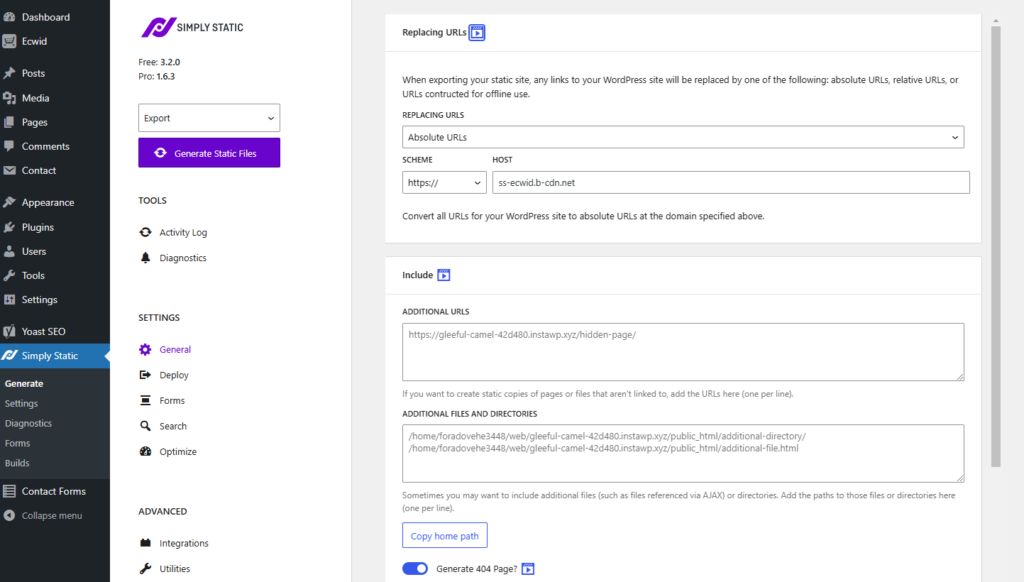
If you’re not sure of the exact URL, opt for Relative URLs. These are relative paths instead of full web addresses.
Next, scroll down to the Include and Exclude tabs. Here, you can specify additional pages to include or exclude from the static exportThe process of saving the files and data from your WordPress site to create a static site.. You can also use regex expressions to exclude URLs that match a specific pattern.
When you’re done, click the Save Changes button to store your settings.
Modify Ecwid plugin settings for Static compatibility
Before you can convert your ecommerce store into its static version, you’ll have to modify the following settings in Ecwid to ensure it’s ready for static conversion.
These include:
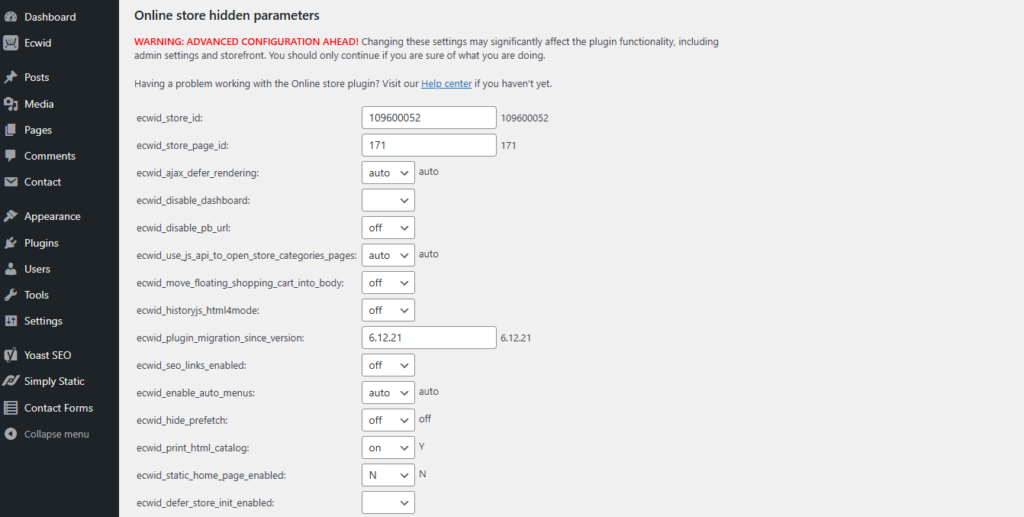
- Access the hidden Ecwid settings page: In your WordPress dashboard, add /admin.php?page=ec-params after “wp-admin” in the URL to access additional settings.
- Disable SEO links: In the ecwid_seo_links_enabled dropdown, select Off to avoid issues with direct product URLs.
- Disable static home page setting: In the ecwid_static_home_page_enabled dropdown, select N to ensure the static pages load correctly.
That’s it! Now, your Ecwid store is ready for a static WordPress conversion.
Generate static files
Before you can generate your static site, select the deploymentThe act of pushing the static files generated by Simply Static to a live environment where users can access them. method you want to use and connect it to Simply Static.
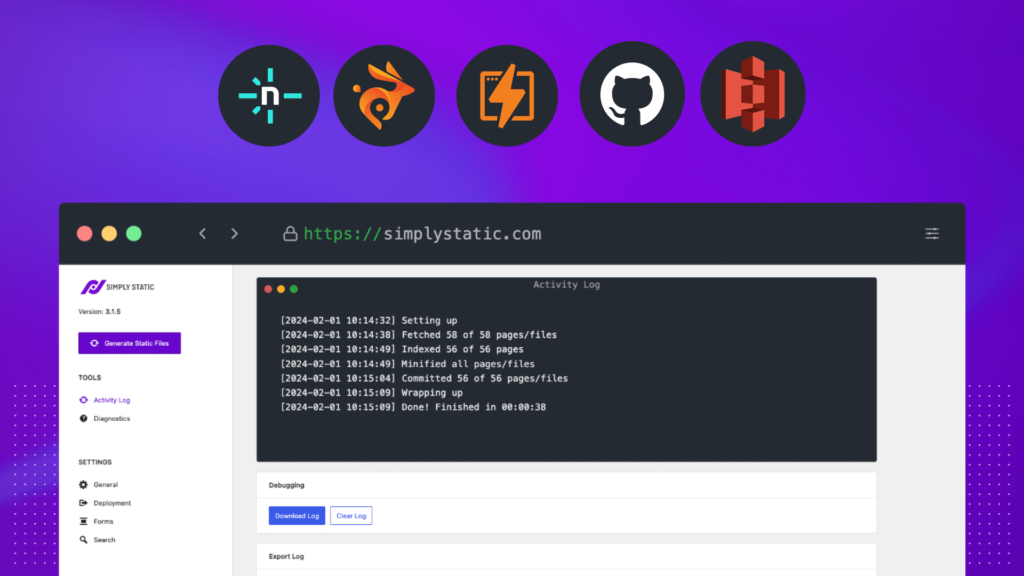
This plugin provides the following deployment methods:
- Amazon AWSAmazon Web Services (AWS) is a cloud computing platform that offers various services, including storage solutions like S…
- Cloudflare Pages
- BunnyCDNBunnyCDN is a service that helps your website load faster by storing copies of your site’s files in multiple locations.
- GitHub pages
- Kinsta
- Netlify
- And more
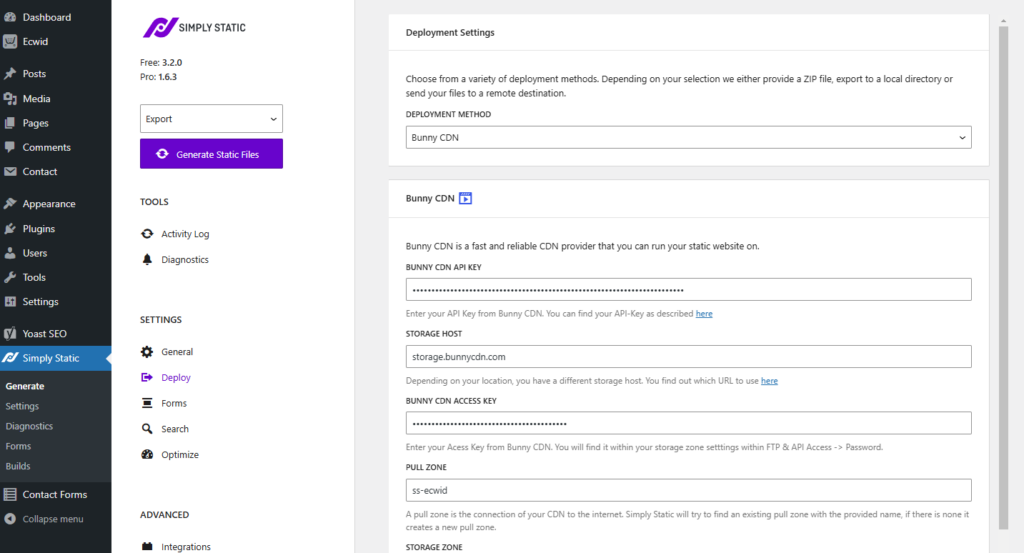
Part of connecting these deployment methods to Simply Static will require you to provide your custom domain, access (API) key, etc., and then Save settings. It depends on the hosting method you choose.
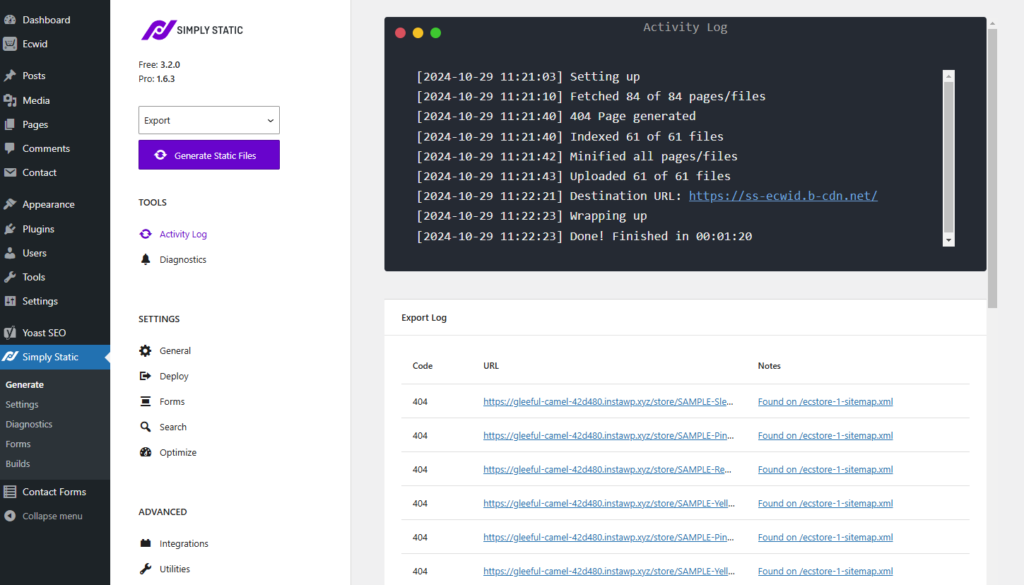
After that, click the big Generate Static Files to convert your WordPress site into a static ecommerce website.
Create your static ecommerce website today
Creating a static ecommerce website gives you the speed, security, and reduced maintenance required to run a successful online store efficiently.
But you could lose critical dynamic ecommerce functionalities like inventory updates, dynamic cart & checkout functions, user account features, etc., without the right tools in your arsenal.
Ecommerce solutions like the Ecwid plugin let you workaround this by adding a fully functional online store to your static WordPress site. So you can have the best of both worlds—fast performance with all essential online shopping features. But you have to connect it to your WordPress site first.
Once your store is ready, use Simply Static to convert your site to a static version seamlessly. It combines speed and security with the full power of ecommerce.
Try static WordPress hosting free for 7 days
No credit card. No maintenance. No headaches.
Table of Contents
