Table of Contents
If you’re considering converting your WordPress website to static HTMLHyperText Markup Language. It’s the standard language for creating web pages., you’re probably looking for a straightforward process. If so, this guide has your back!
👋 We’ll show you a three-step process for converting your WordPress site to static HTML that anyone can follow, even if they have little technical experience.
- First, we’ll show you how to prepare your existing WordPress website for conversion to a static HTML website.
- Next, we’ll cover how to convert this content using a static site generator tool like Simply Static.
- Finally, we’ll show you how to update your static website from within WordPress.
Following these three steps, you can successfully convert your WordPress site to HTML and start using your new, static website. Whether you’re looking to speed up your site, improve security, or want to try something new, converting your WordPress site to HTML can be a great way to achieve your goals.
Keeping that in mind, let’s start with the method we’ll use in this guide.
The method used in this guide
As a WordPress website owner, you want your website to be as fast and secure as possible. One way to ensure this is by converting it to a static HTML site. WordPress websites are dynamic by default.
This means your site’s pages are generated and fetched from a database when a client clicks to view them in real time. This slows your website down because round trips must be made to the database to display your pages.
Server-side code is processed, and a database is involved when this happens. This presents an additional avenue for cyberattacks via techniques like SQL injection. You can avoid all of the above by converting your WordPress website to a static site.
On the other hand, a static site is prebuilt, and its files are hosted on a server. They don’t need to process the static pages and draw their content from a database. This means they provide content instantly when a user clicks to view it.
You can’t convert a WordPress website to a static HTML site in the default WordPress setup. To do this, you’ll need the Simply Static pluginA piece of software that adds specific features to WordPress..
Try static WordPress hosting free for 7 days
No credit card. No maintenance. No headaches.
Convert your WordPress website to a static HTML site using Simply Static
Simply Static allows you to convert your existing WordPress website into a static site with just the click of a button. With Simply Static, you can generate a series of HTML files or HTML pages for your website and copy them into a folder where your site will serve these files.
Converting your WordPress website to a static HTML site using Simply Static has the following benefits.
Increased site speed
Since Simply Static eliminates roundtrips made by the server to a database, the time taken to load your site’s pages reduces. Your static site will deliver your site’s content to users instantly, thereby increasing your site’s speed.
📈 A faster website can help you to retain site visitors. 47% of users expect a webpage to load in one to two seconds. Anything above 3 seconds and most of them will leave your site.
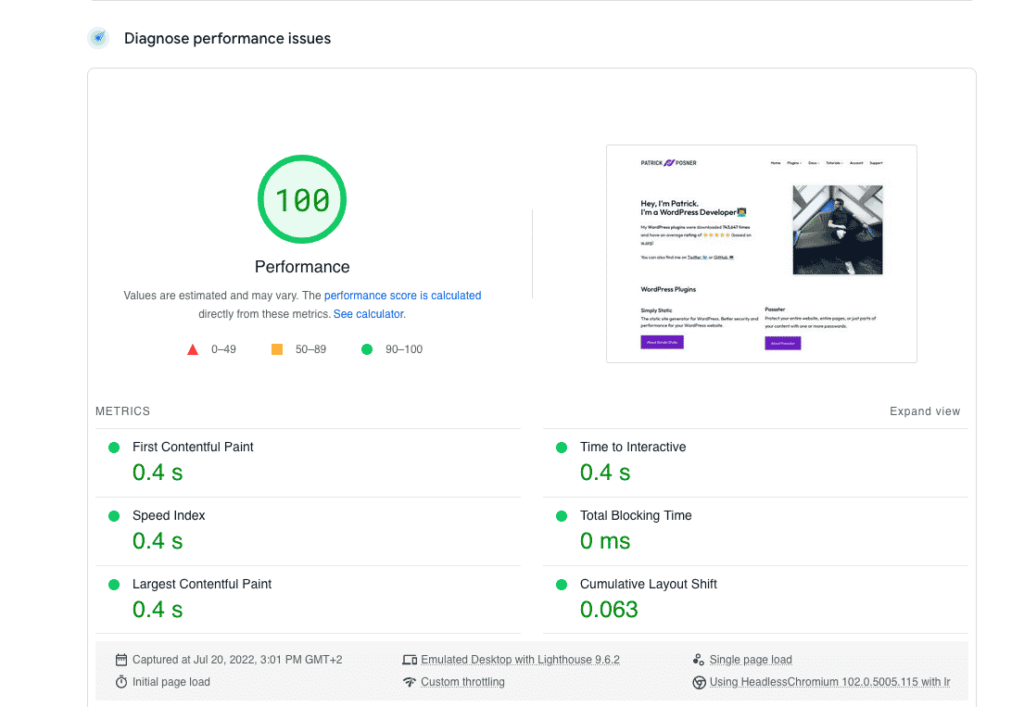
Website speed also has a massive impact on SEO (search engine optimization). Google has indicated that site speed is one of the factors their algorithms consider when ranking pages. So it goes without saying that improving your site’s speed in this way has some huge benefits.
Improved security
By removing your site’s connection to a database, you limit the avenues that can be exploited for cyberattacks.
📈 Database breaches are one of the most common cyberattacks, and in the US, over 200 million users were affected.
Reduced WordPress hosting costs
Because Simply Static will deploy your website to a directoryA folder in a computer’s file system used for storing files and other directories. of a static hosting service provider, usually a CDNStands for Content Delivery Network. It’s a system of distributed servers that deliver web content quickly to users base…, the strain on your server resources is greatly reduced. This means that you will spend less money on reliable web hosting.
Improved scalability
Your static WordPress site will be able to handle more users without a significant change in performance.
Simply static works exceptionally well with WordPress
With Simply Static, you can still retain the flexibility of using WordPress as an open-source content management system (CMS). This means you can still update your website without writing any HTML code. This includes adding and editing pages and posts.
The best part? You can choose to convert only part of your WordPress website to static while leaving the rest dynamic with Simply Static. This way, you can reap the benefits of a static site while handling dynamic content on your website. So, your site can still have authentication pages, real-time data, or any other dynamic content.
At the same time, you can also install new or revised versions of WordPress, install additional plugins, and change WordPress themes for your website.
What makes simply static special is that:
- You’ll be able to use things like contact forms, comments on blog posts, and search – things that you can do on a typical HTML site can’t.
- Your site’s search capabilities will be improved as Simply Static adds fuzzy searching and autosuggestions.
- Automate page deploymentThe act of pushing the static files generated by Simply Static to a live environment where users can access them. via Simply Static’s integrationThe act of combining different systems, software, or functionalities to work together as a unified whole. with GitHubA web-based platform for version control and collaboration, allowing multiple people to work on projects at once..
That being said, let’s see how you can convert WordPress to a static HTML site using the Simply Static WordPress plugin.
How to convert WordPress to HTML
This section will walk you through a three-step process to convert your WordPress into a static HTML site step-by-step.
Step 1: Prep your WordPress website
To ensure that you convert your WordPress website to a static site without any issues, there are a few preparations that you must make.
Confirm if your website has an SSLSecure Sockets Layer. A technology that encrypts the data transferred between a user and a website. certificate
For Simply Static to work properly, it requires your website to have an SSL certificate. An SSL (Secure Sockets Layer) certificate establishes a secure connection between the browser and the server. To ensure that sensitive information can be securely transmitted over the internet.
To find out if your WordPress website has an SSL certificate:
- Open your WordPress site on any web browser.
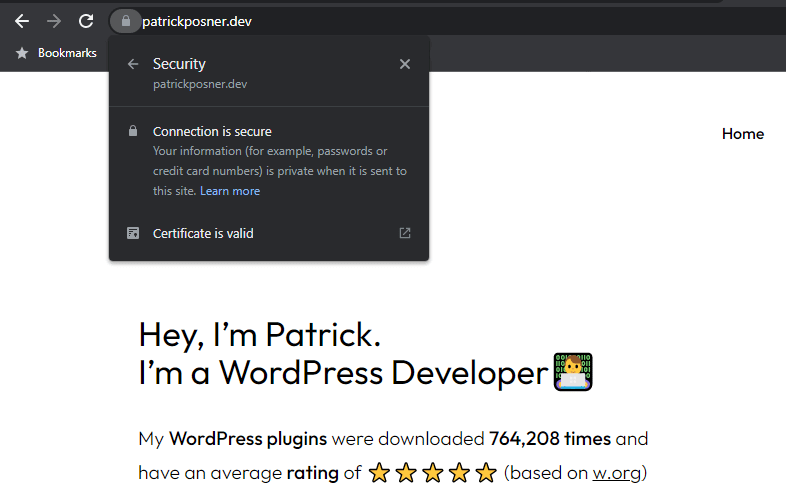
- Look at the address bar at the top of the browser window. If the address begins with https://, your website is SSL certified.
- You can also click the lock icon in the address bar to check if your site has an SSL certificate. This will display information about your SSL certificate, including the issuing authority and the expiry date.
💡 Top additional tip: Make sure all the plugins and version of your website (WordPress) are up to date. Doing so will prevent any hiccups down the line.
Check the forms you use on your website
Since static sites cannot process server-side code, you can’t use contact forms. However, Simply Static allows you to use forms to collect, validate, and store user data on your website.
Simply Static works well with these form plugins: Contact Form 7 and Gravity Forms. If you want to use forms on your static WordPress, now is to make a switch to these plugins.
To find out if you use forms on your WordPress website, check for a Contact or Forms tab on the left side menu on your WordPress Dashboard. If you have certain plugins like Jetpack installed, you’re probably using contact forms.
If you do, install Gravity Forms or Contact Form 7 before converting your WordPress website to a static site.
Otherwise, you can use other static site form plugins to handle your form submissions.
Check the commenting system you use
The standard WordPress comments system will not work with a static HTML site because it relies on the server-side programming language, PHPA widely-used programming language especially suited for web development..
However, with Simply Static, you can still accept comments on a static WordPress site and even redirect them to a thank you page after they leave a comment.
Similarly, you can use one of these recommended tools to get a commenting system that best fits your needs.

Check the search function you use on your site
The standard WordPress search function will also not work with a static HTML site because it depends on a database. As a result, you’ll also have to check if your site implements searching for its contents.
Fortunately, Simply Static uses Fuse.jsA lightweight JavaScript library for searching, which allows for more flexible and forgiving searches. to ensure your static site can still handle search with auto-suggest. But if you want to help users find what they’re looking for in your static website more easily, here are a few static site search tools you can use.
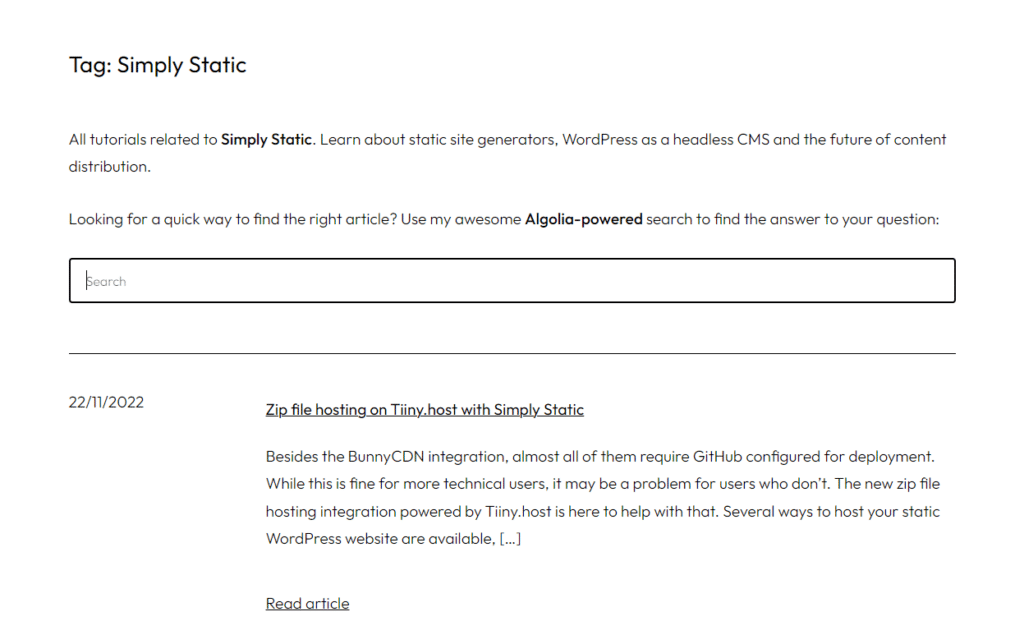
After the preparations are complete, you can now convert your WordPress website to a static HTML site.
Step 2: Convert WordPress to HTML
First, you’ll need to install the Pro version of Simply Static in WordPress. To do this, purchase Simply Static from the official website: simplystatic.com/simply-static
Try static WordPress hosting free for 7 days
No credit card. No maintenance. No headaches.
Download the extension, then follow these steps to install it on your WordPress website.
- Go to Plugins > Add New and click the Upload button on your WordPress dashboard.
- Upload the extension you downloaded, then click Install Now.
- Search for Simply Static and click Install Now.
- When the installation is complete, click Activate and paste the license key from your email.
- Click Agree and Activate Plugin.
Once Simply Static is installed, you’ll have to configure certain static plugin settings as our first step before we can proceed to generate any static content.
Step 1: Configure your static website settings
- Go to Simply Static > Settings on the WordPress dashboard to access the Settings page.
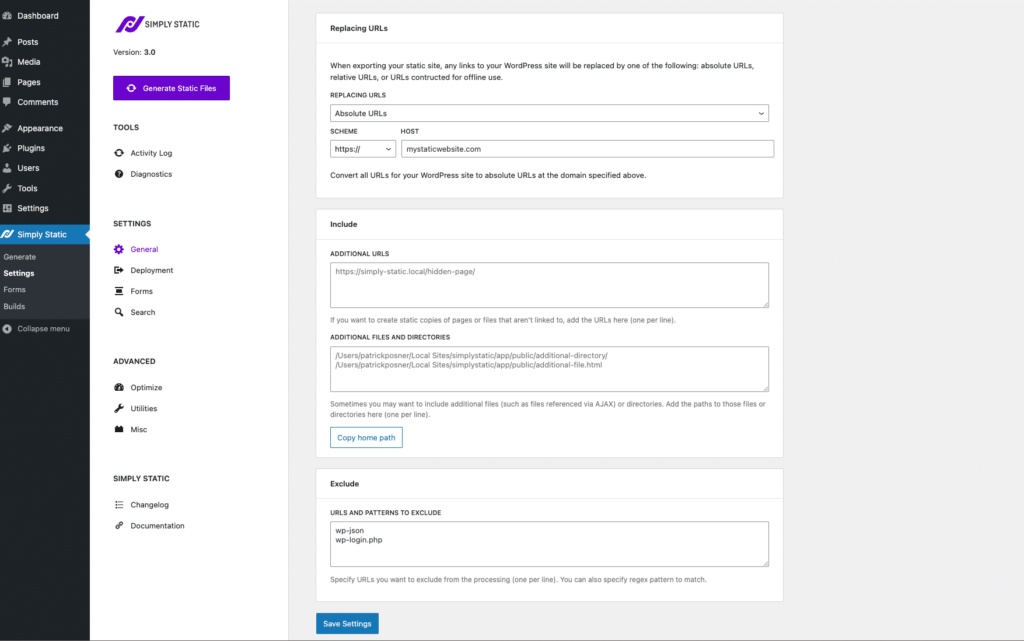
- On the General tab, you’ll be able to set up the URL for your static site. These settings will depend on the type of site you’re working with, so be sure to check out the Simply Static documentation for more information.
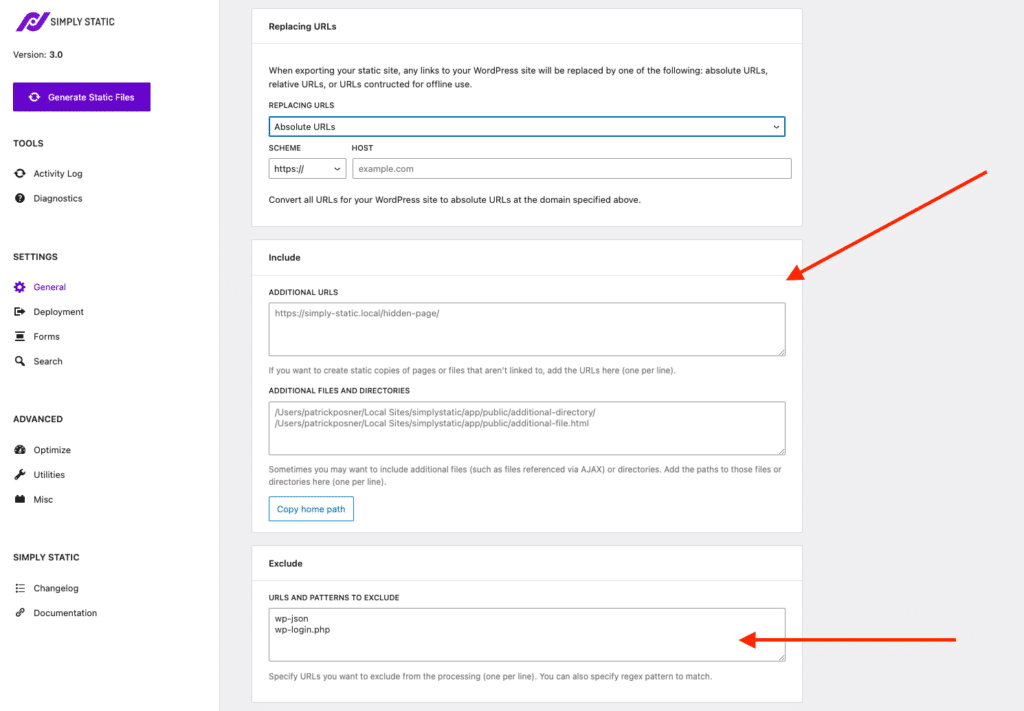
- In the Include/Exclude sections, you can include pages or files that aren’t linked to your general site (e.g., hidden pages). Likewise, you can use this tab to exclude specific sites from the static generator.
- The Deployment tab is crucial for setting up a secure method for deploying your site’s files. We recommend using BunnyCDNBunnyCDN is a service that helps your website load faster by storing copies of your site’s files in multiple locations., which you can get set up for free using our CDN tutorial.
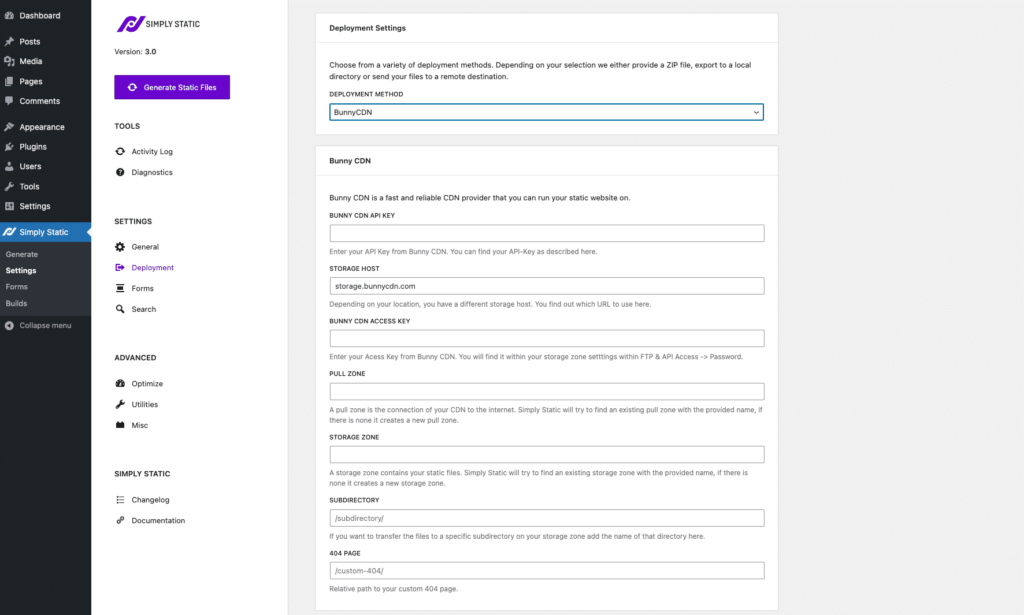
- You can customize how your forms, search, and comments should work on your site in the Form and Search tabs, respectively. They are particularly important if you want to collect user data or interact with them.
Now that everything is set up and ready to go, it’s time to create your static WordPress website.
Step 2: Generate your static website
- Navigate to the Simply Static > Generate page in your WordPress dashboard.
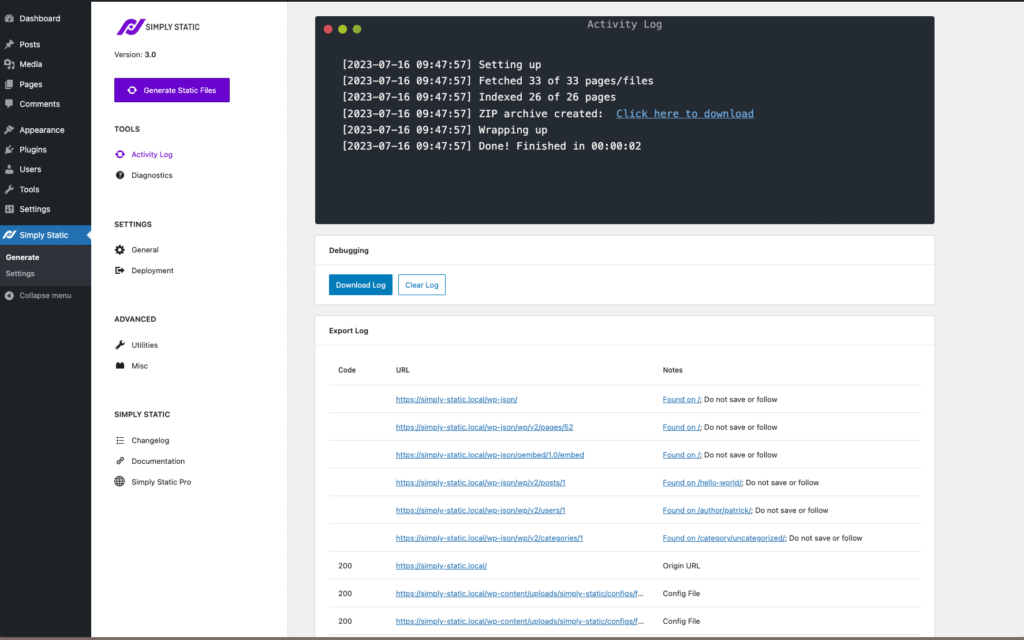
- This will take you to a page with a Generate Static Files button and an Activity LogA record of all the actions and changes made within the Simply Static plugin. It helps you track what has been done. and ExportThe process of saving the files and data from your WordPress site to create a static site. Log section below.
- Go ahead and click the Generate Static Files button, and Simply Static will get to work.
- This will convert all your site’s pages and content (including PHP, HTML, CSSCascading Style Sheet. It’s a language used for describing the look and formatting of a document written in HTML., JavascriptA programming language used in web development to create interactive elements on a webpage., posts, and more) into static HTML files and pages.
- You can track your progress in the Activity log section and see how many static copies of codes and URL links have been successfully exported in the Export log box.
- Once Simply Static has finished, you can click the View static URL in your admin bar to check your static WordPress website’s frontend.
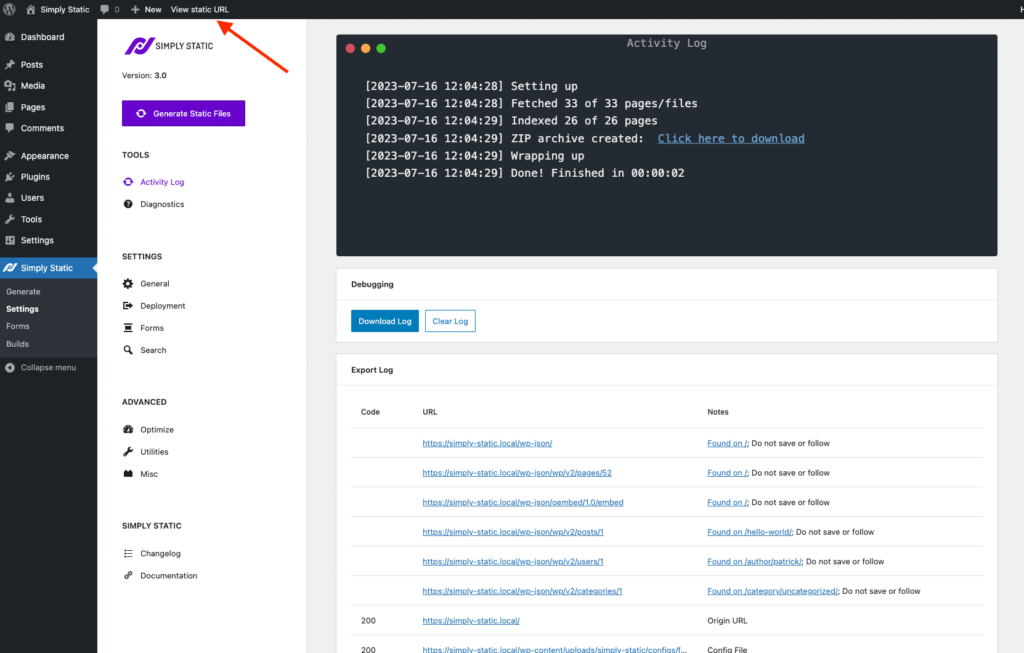
That’s it. You now have a fully functional static HTML website.
Step 3: Update your static HTML WordPress website
So now you’ve made your website static, what now? What if you want to make updates? Well, with Simply Static, this is pretty straightforward because all you need to do is make some updates in WordPress and export/publish them.
Simply Static allows you to update your Static WordPress website in four ways.
Method 1: Using Single Exports
You can use this method to quickly update single pages, posts, or any other custom post types on your static HTML site.
To get started:
- Go to Pages > Add New from your WordPress dashboard. This method works for posts as well.
- Start editing your page, just like any other normal page/post. Then click Update at the top of your page.
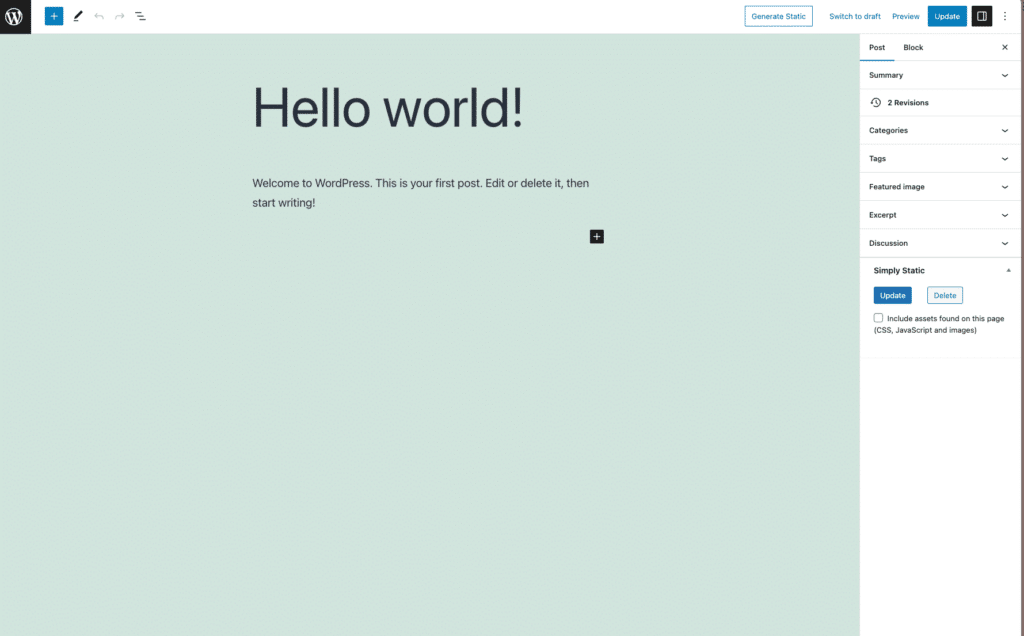
- On your right-hand side, you will see a Simply Static section.
- This should contain a couple of actions. The most obvious one is Generate Static.
- Click the Generate Static button. This should start a static export of your current page.

You can also use single exports to update assigned category and tag pages, the blog page, homepage, and extract and export all images from that page/post.
Method 2: Automate static export once you publish a page/post
Instead of clicking the Generate Static button within a page or post, you can use this code snippet to export your page/post automatically once you publish it.
Add this code snippet to your functions.php, or use a Code Snippet plugin to add it to your website. When Simply Static sees it, it will automatically trigger a single export if the page or post is published.
Method 3: Using BuildsIn the context of Simply Static, builds are the process of creating a static version of your WordPress website.
Builds is a built-in function of Simply Static that allows you to assign a list of URLs to multiple pages and files and then ‘static’ export them all at once with just one click.
- From your WordPress dashboard, go to Simply Static > Builds. This should open the Builds page.
- To add a new build, first, give it a name. The name will appear on your site. So make sure it’s clear and simple.
- Next, in the URLs to export section, you can add URLs you want to export here, one per line. Simply Static will crawl each of these and run a static export only for these URLs.
- Add your files and directories in the Additional files and Directories section, including the path to those files and directories.
- When you’re done, click the Add New Build button to create a new build.
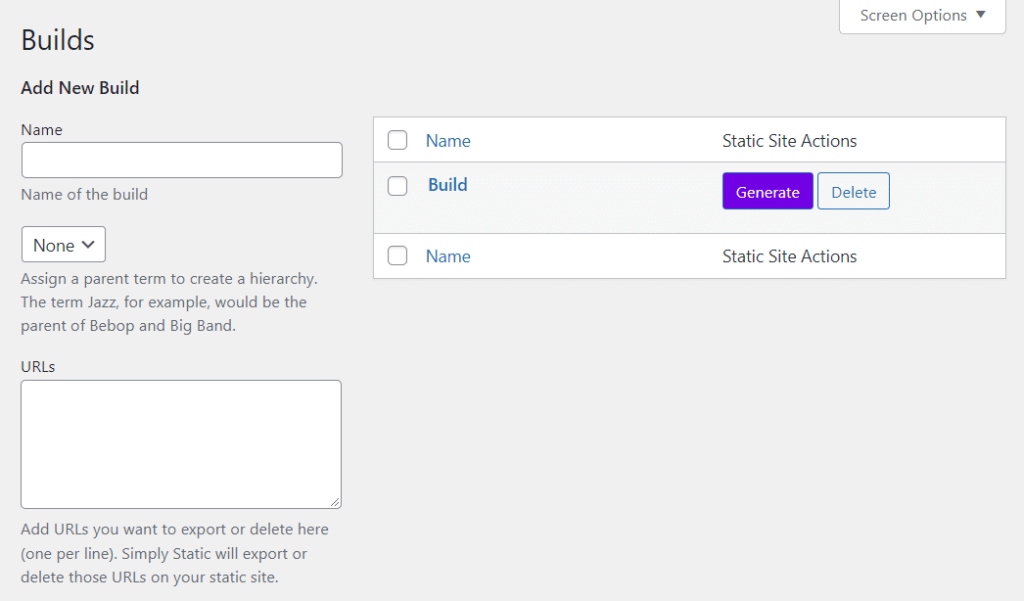
You can also assign Builds to posts, pages, or custom post types that aren’t recognized by single exports.
Method 4: Schedule static exports for updating your website
You can use this method to ensure that your static site is updated on a fixed schedule if you have a large content team that publishes many articles or posts regularly, for instance, every week.
You can use the following code snippet to schedule a static export for full, single, and build exports.
Convert WordPress to HTML today
Converting your WordPress to static HTML has several benefits, including faster page load times, increased security, and easy maintenance.
With Simply Static, you can easily convert your WordPress site into a static site, giving you all the benefits of a static site while still maintaining the flexibility and functionality of a dynamic platform.
Apart from the advantages of a static site, Simply Static also allows you to use forms, comments, search, and even multilingual, things a normal static HTML site can’t do.

