Table of Contents
Just a quick heads-up!
This article is more than 24 months old and might contain outdated information.
If you want to learn the latest about Simply Static, visit our documentation or watch our video course.
If you’re running a WordPress static site, you might need a way to automate different tasks. For instance, if you work with lots of clients or sell products, you might need a way to add contacts to a CRM like Pipedrive. Similarly, you might need to enter data in a Google Sheet or send a message to Slack.
Instead of writing code, you can use Zapier with your static website. Zapier lets you integrate the different web applications you use to automate tasks. This means that you can integrate your WordPress static site with just about any Zapier-supported application.
In this tutorial, we’ll take a closer look at what Zapier is and how you can use it with Simply Static Pro to run automations.
What is Zapier?
Zapier is essentially an automation tool that lets you create all sorts of workflows that involve the web apps and services you use. It’s based on a simple trigger and action system that you can use to create commands similar to IFTTT’s if this happens then do that.
The key benefit of using Zapier is that you don’t have to build integrations yourself. You can use Zapier’s zaps to create commands and automate different tasks. Here are some examples:
- Share new Twitter mentions in Slack.
- Create Trello cards from new rows on Google Sheets.
- Add new Zoom meetings to your Google Calendar.
Zapier supports over 3,000 apps including Google Sheets, Slack, WordPress, Pipedrive, and Mailchimp with new options added regularly.
Why you might need to use Zapier for your static site
You probably already know that static websites are displayed in the end user’s web browser exactly as they’re stored on the server. A static site is simply a series of HTMLHyperText Markup Language. It’s the standard language for creating web pages. files served by an HTTP server where each HTML file represents an individual page of the static site.
The easiest way to build a WordPress static site is by using a pluginA piece of software that adds specific features to WordPress. like Simply Static. It lets you create a static site directly from the WordPress admin. Once that’s done, you can deploy it to a directoryA folder in a computer’s file system used for storing files and other directories. on your hosting server.
Try static WordPress hosting free for 7 days
No credit card. No maintenance. No headaches.
Since static sites don’t have dynamic back-ends the way WordPress does, you need a tool like Zapier to trigger automations. Let’s look at some examples of automations you might want to run:
- Add information to a Google Sheet when a user submits feedback.
- Add contact to Pipedrive when a user fills out a form on your static site.
- Send a message to Slack whenever a prospective client requests a quote.
These are just some of the different things you can do with a Simply Static Pro and Zapier integrationThe act of combining different systems, software, or functionalities to work together as a unified whole.. Next, we’ll show you how to use Zapier with Simply Static Pro to connect to different web apps.
How to use Zapier with Simply Static Pro
For this tutorial, we’re using the Simply Static Pro plugin to generate a static site. The static site is hosted on NetlifyA platform for automating web projects that provides hosting and serverless backend services for web applications and st….
You can check out our roundup of 7 Easy Services for Static Hosting for more hosting platforms.
Step #1: Create a new zap
If you haven’t done so already, create an account on Zapier. You can get started for free.
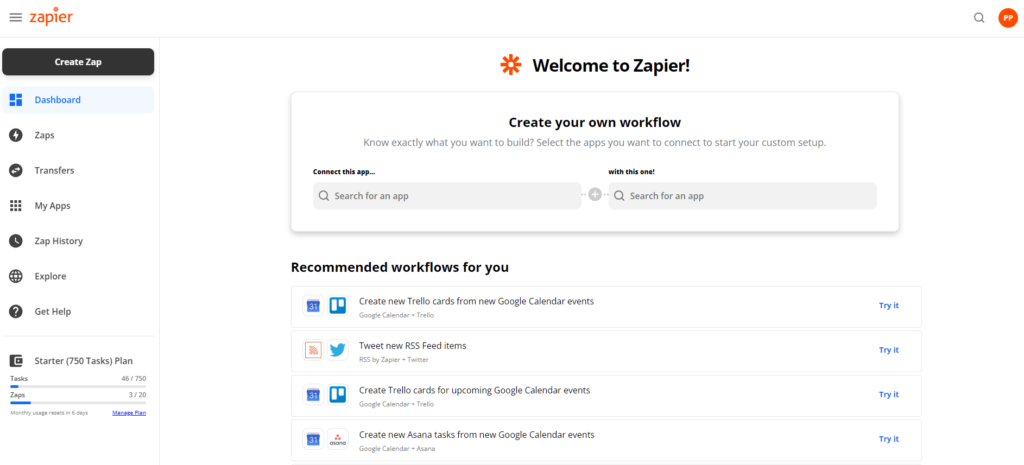
Once that’s done, click the Create Zap button from the dashboard. Give your zap a name.
Step #2: Set the trigger
Next, set the trigger to Webhooks by Zapier. This will let you start the zap when another app (in this case, the static site) sends a webhookA method of altering the behavior of a web page with custom callbacks. These are triggered by specific events, like push….
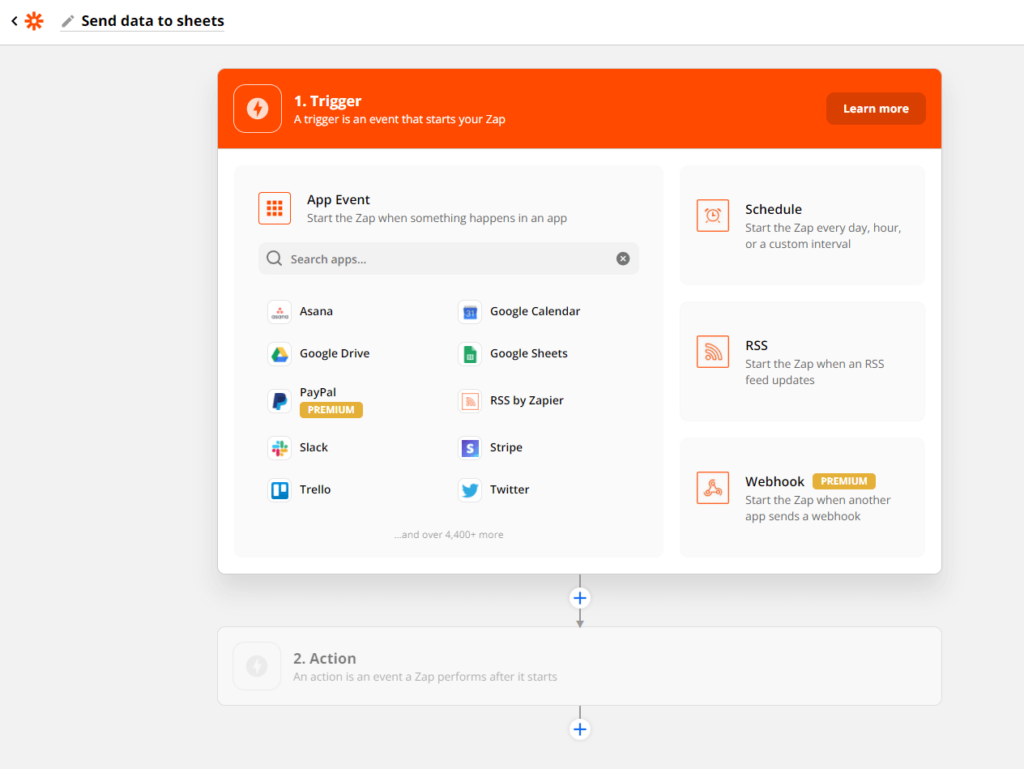
Set the Trigger Event using the dropdown. Different apps have different trigger events to pick from. Let’s say you want to add the data a user submits on your website to a Google Sheet. Following our example, we’ll choose the Catch Hook trigger event.
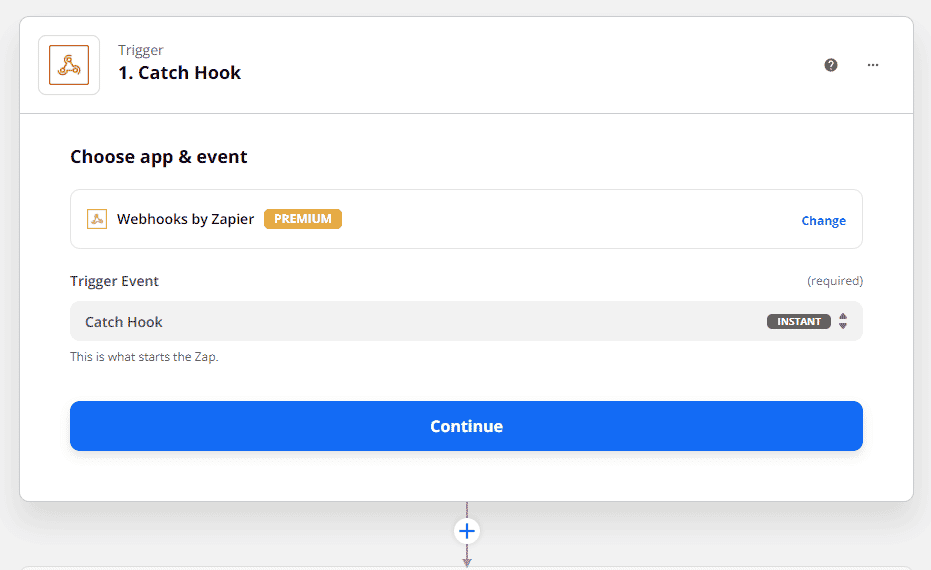
Click the Continue button.
You’ll be prompted to set up the trigger. For this, you’ll see a Custom Webhook URL.
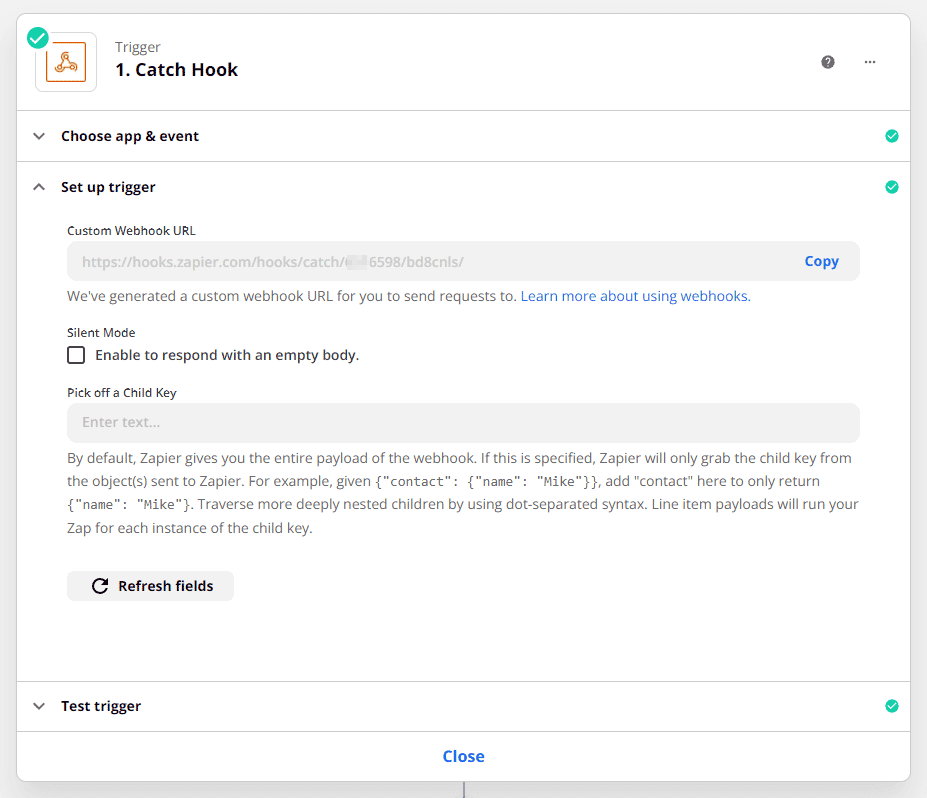
Copy it to your clipboard. This is the Zapier endpoint that you need to enter in Simply Static. Log in to your WordPress static site and head over to Simply Static → Forms from the admin panel and select the form you want to pull data from.
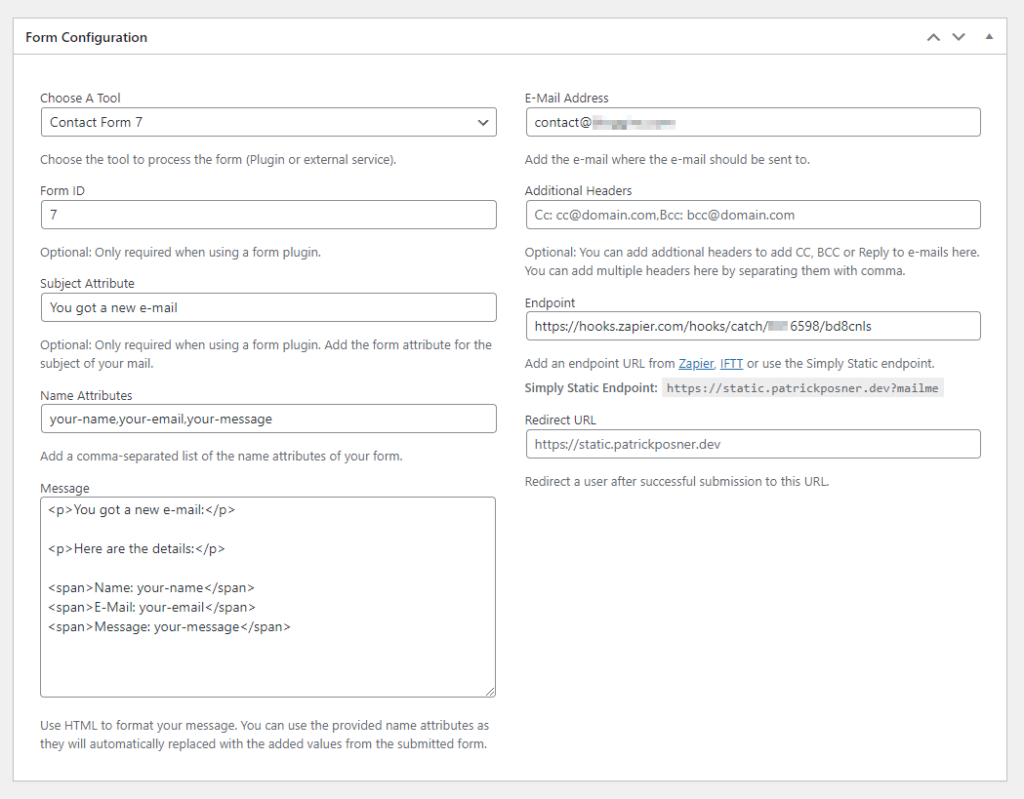
Paste the Zapier endpoint in the Endpoint field. Click the Update button to continue.
Now, go back to Zapier and test the trigger. It will look something like this:
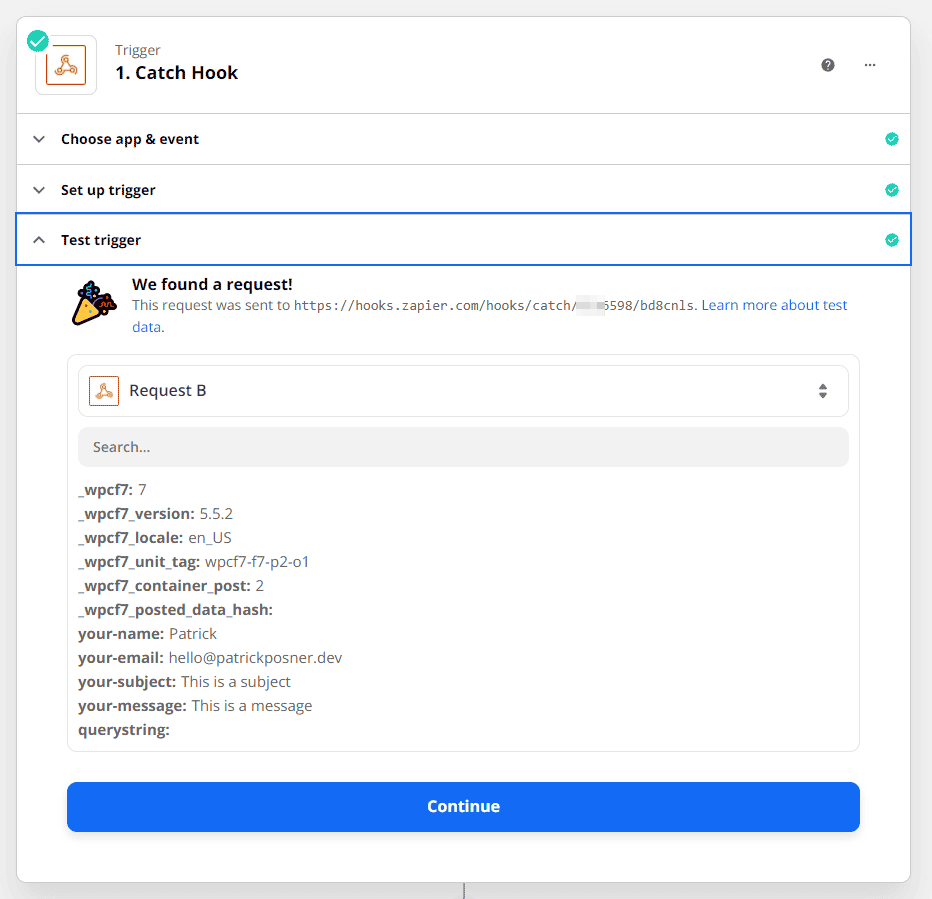
Click the Continue button.
Step #3: Set the action
The next step is to set the action. Since we want to add the data to Google Sheets, we’ll search for the Google Sheets app.
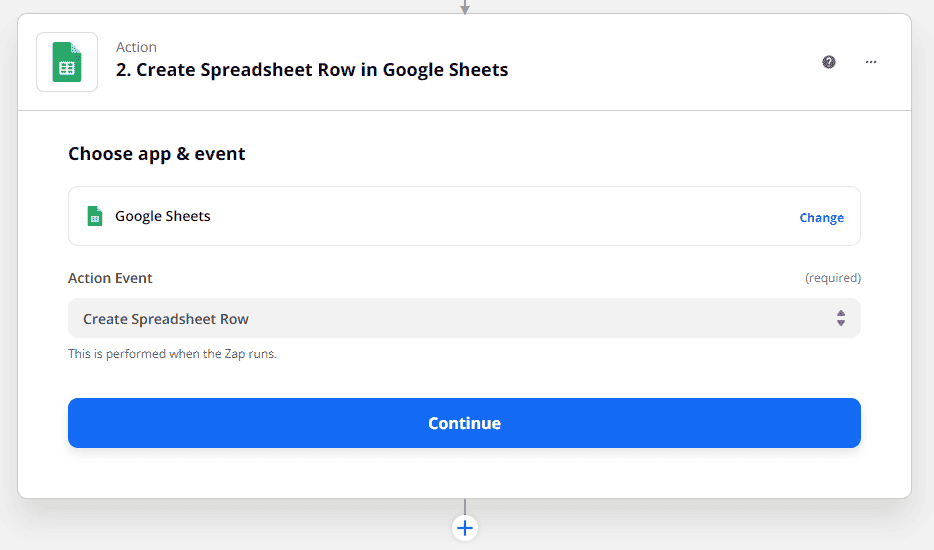
We’ll also set the Action Event to Create Spreadsheet Row using the dropdown menu. Once that’s done, you’ll be prompted to select a Google Sheets account that you want to create the spreadsheet in.
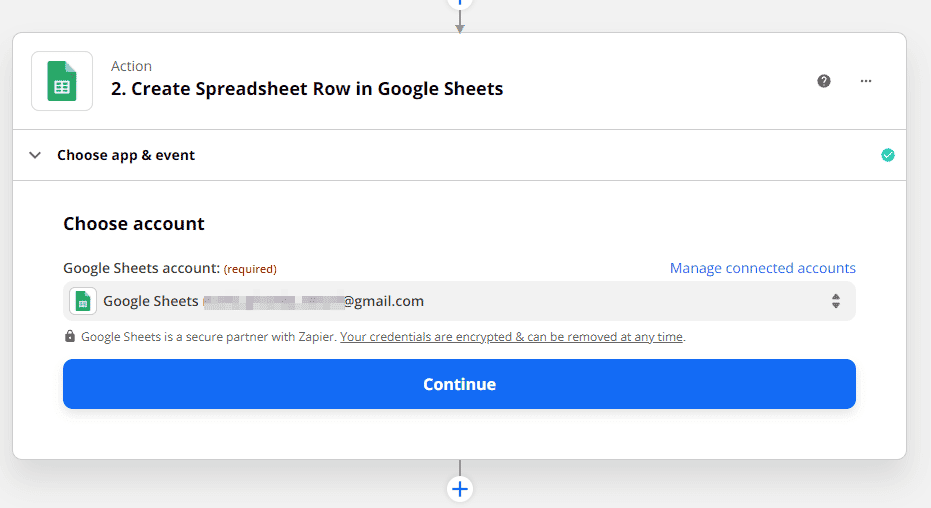
Click the Continue button.
Next, you’ll be prompted to set up the action. This involves choosing the Google Drive where your spreadsheet resides, choosing the spreadsheet, and the worksheet where you want to enter the data.
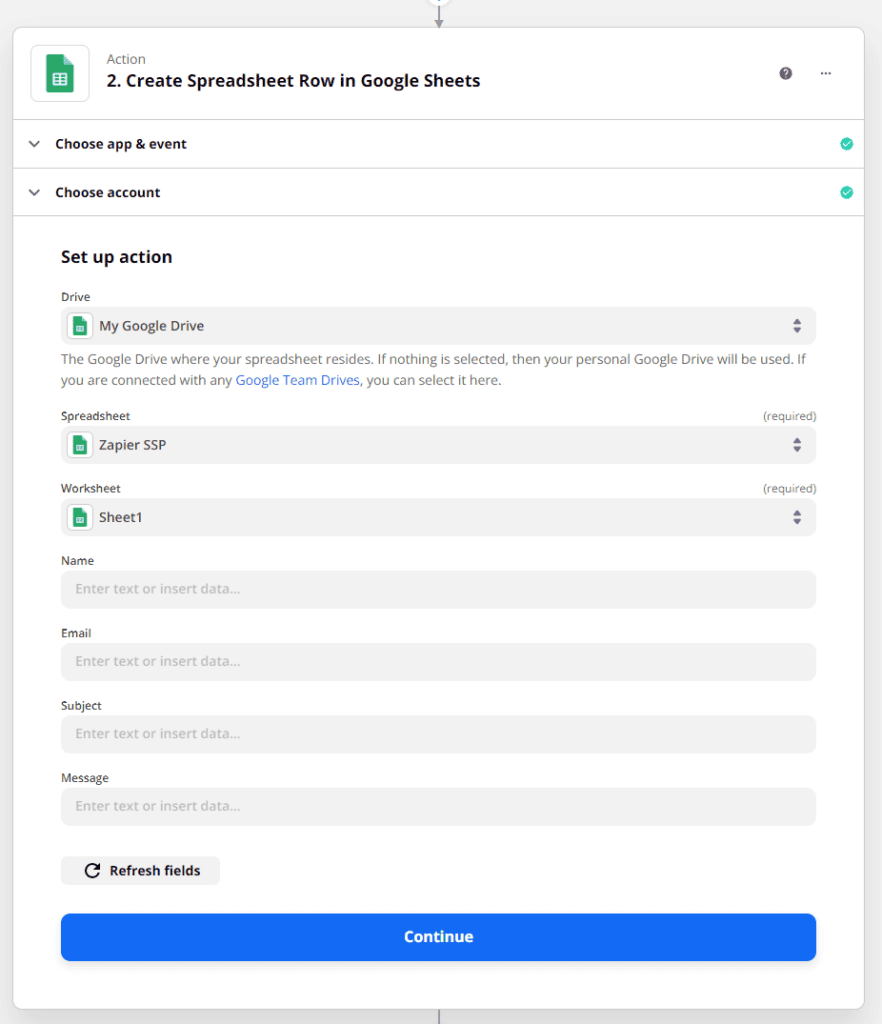
Finally, you need to choose the fields from your form to enter into the spreadsheet. Zapier will automatically show you the fields it’s pulled from your form. All you have to do is select them. You can also set custom text if you’d like.
It will look something like this:
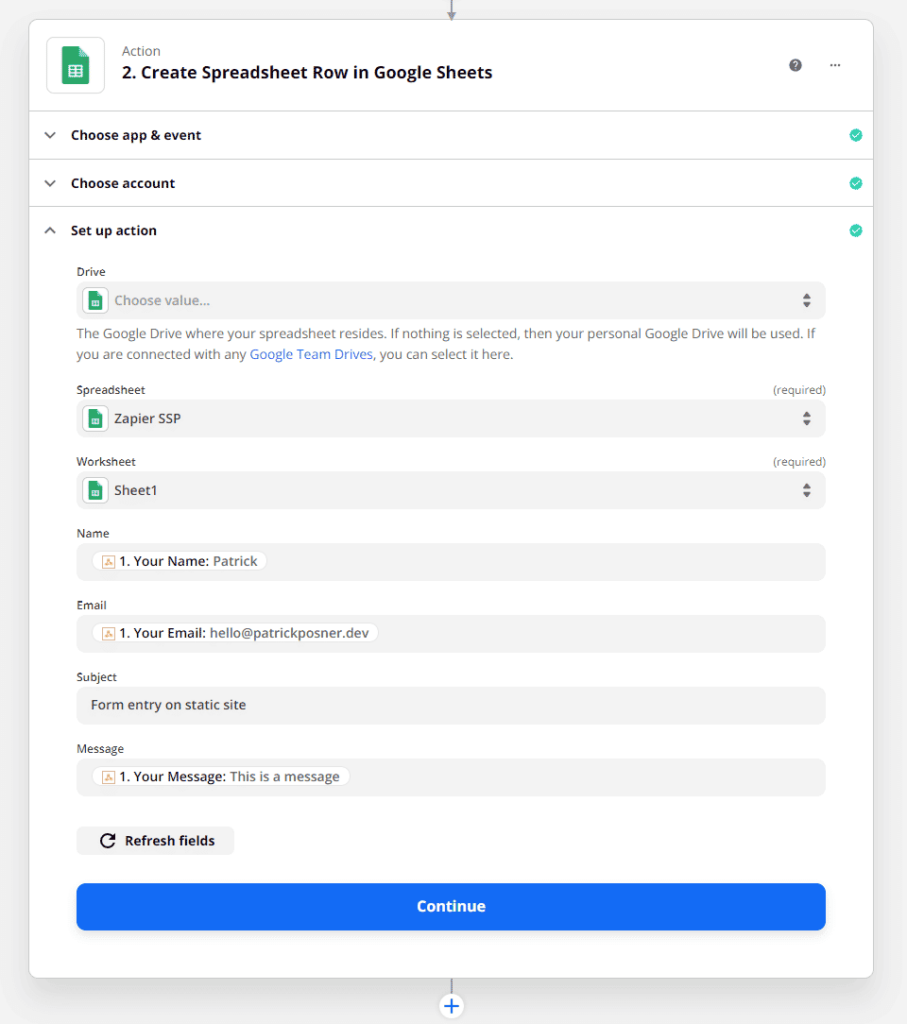
Click the Continue button.
Step #4: Test the zap
Zapier will automatically run a test to see if the zap works. The success message will look something like this:
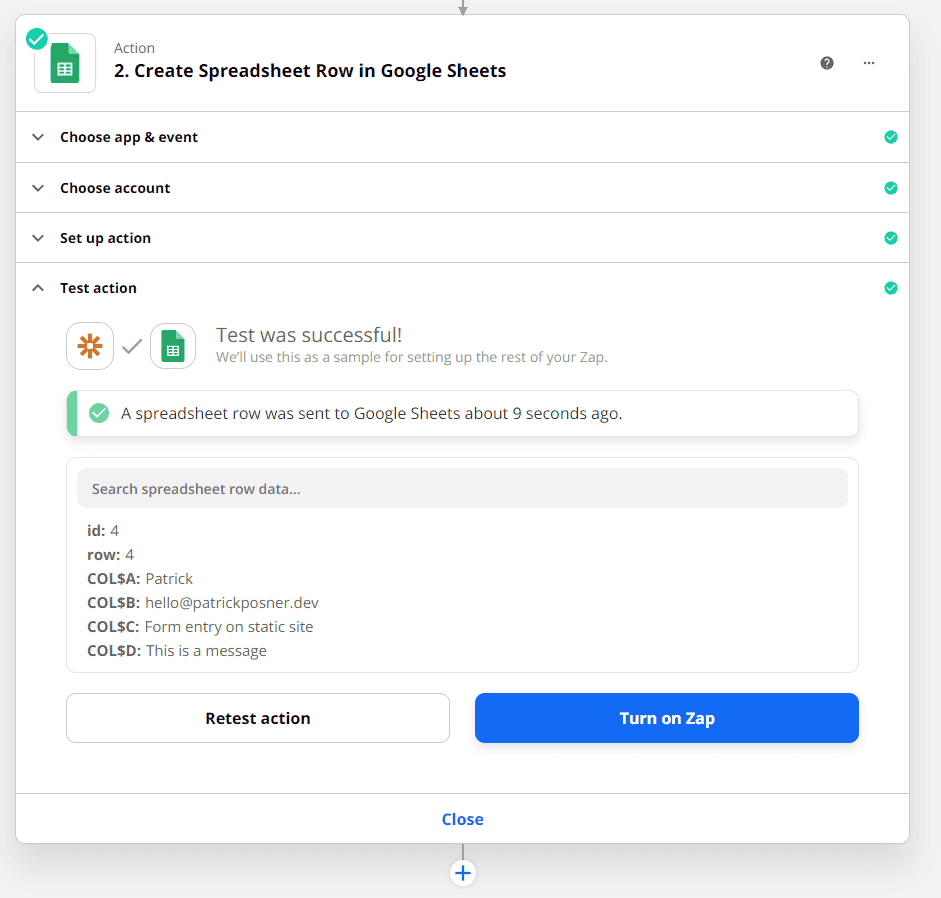
And data entered in your spreadsheet will look something like this:
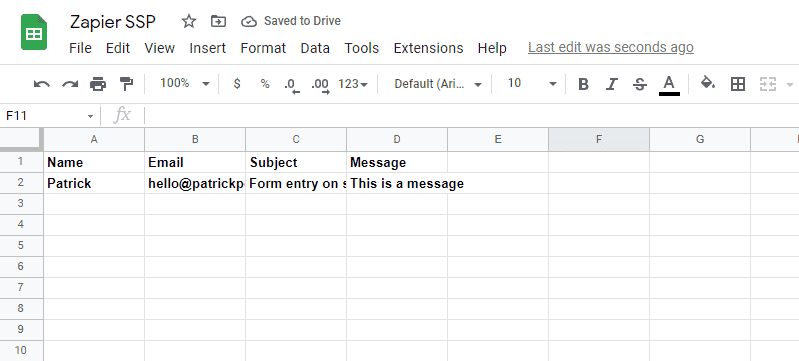
Click the Turn on Zap button to proceed.
Bonus: Use Zapier with Simply Static Pro to add a contact to Pipedrive
If you want to add a new contact in Pipedrive every time someone fills out a form on your WordPress static site, you can create a new zap.
Same as before, you’ll need to set the trigger and then set the action. We showed you how to set up the trigger in the previous section. First, follow Step #1 and Step #2 from the previous section to create a zap and set the trigger. Once that’s done, follow the steps outlined below to set the action.
In the Choose app & event section, search for and select Pipedrive. Make sure you’re logged into your Pipedrive account. Next, set the Action Event to Create Person. This will let us pull data from the form and create a new contact in Pipedrive.
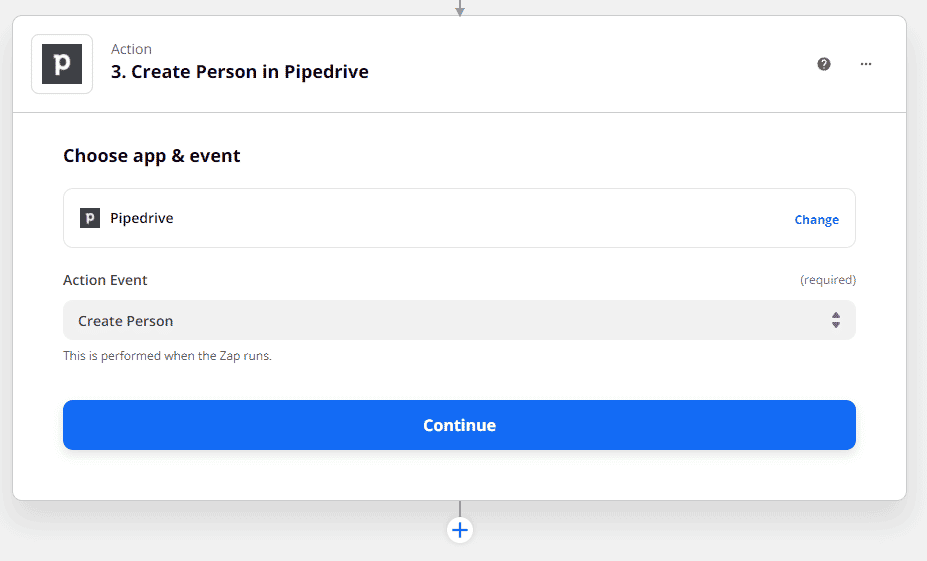
Click the Continue button.
The next step is to set up the action. Use the dropdowns to set the contact’s details. You can set the name and email address.
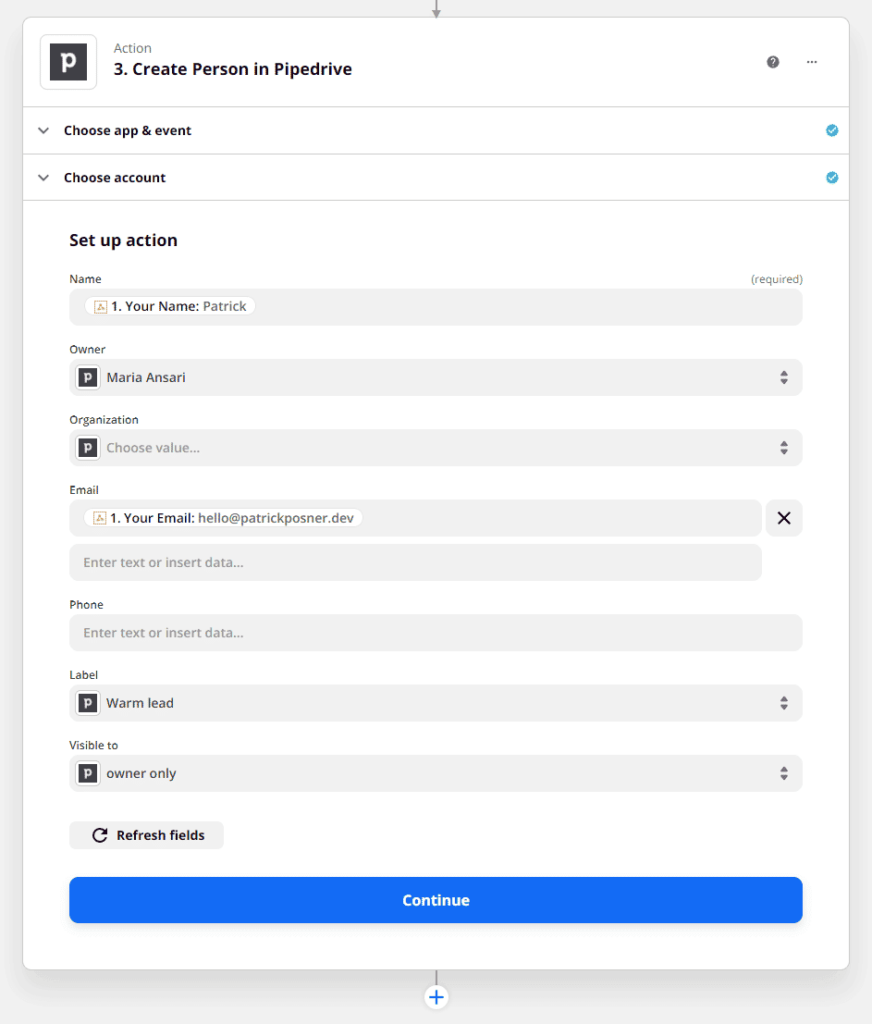
In addition to this, you can also add a label e.g. Warm Lead to segment leads in Pipedrive.
Once you’re done, click the Continue button.
Finally, test out the zap. If the test is successful, you’ll see a success message that looks something like this:
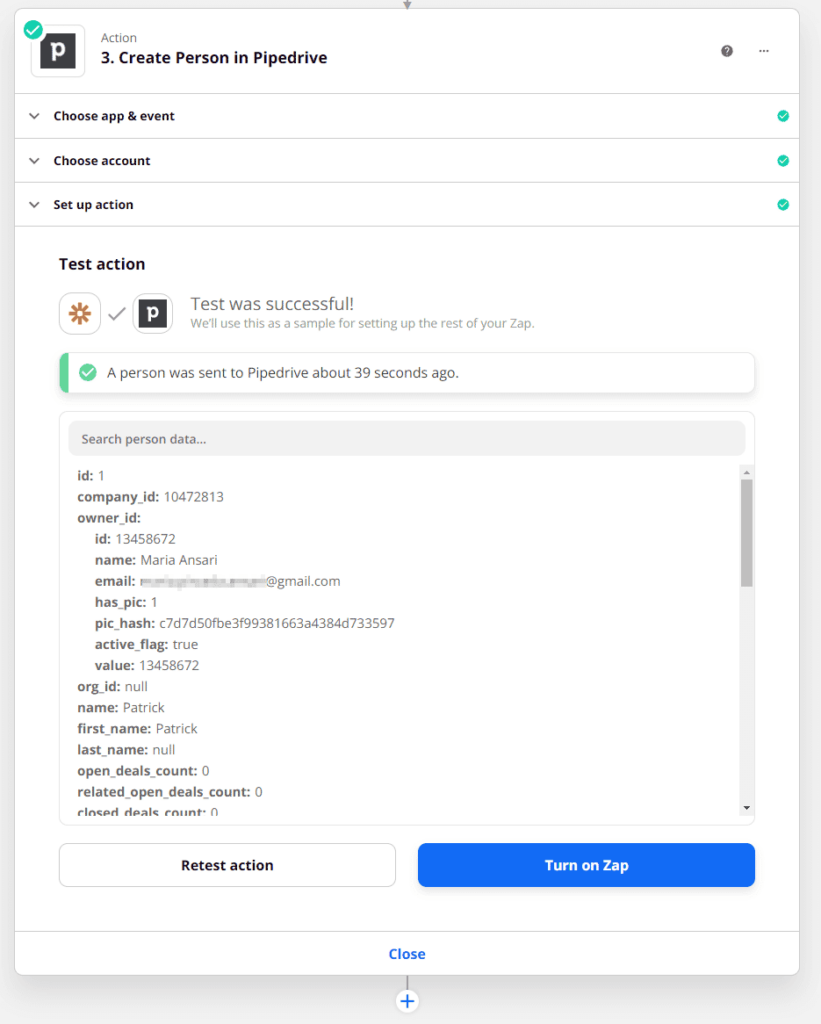
And the contact will be added to your Pipedrive account:
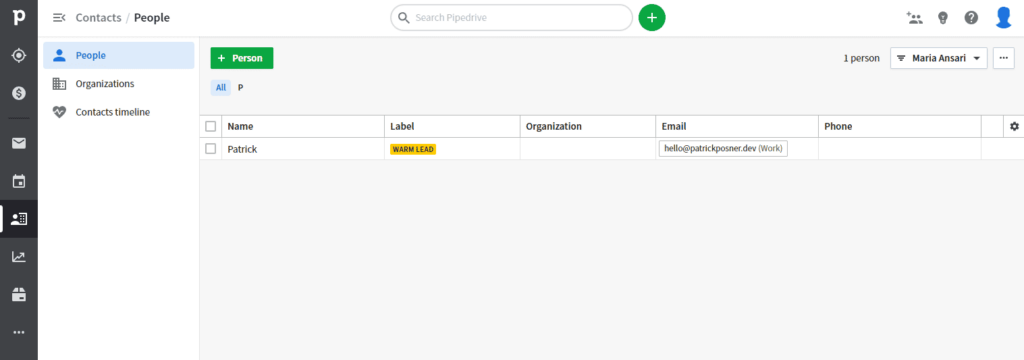
Click the Turn on Zap button to proceed.
Bonus: Use Zapier with Simply Static Pro to send a message to Slack
Let’s say you want to send a message to Slack when someone fills out a form on your WordPress static site. You can do that by creating a new zap in Zapier.
First, follow Step #1 and Step #2 from the tutorial section to create a zap and set the trigger. Once that’s done, follow the steps outlined below to set the action.
In the Choose app & event section, search for and select Slack. Make sure you’re logged into your Slack account. Zapier will prompt you to connect to it.
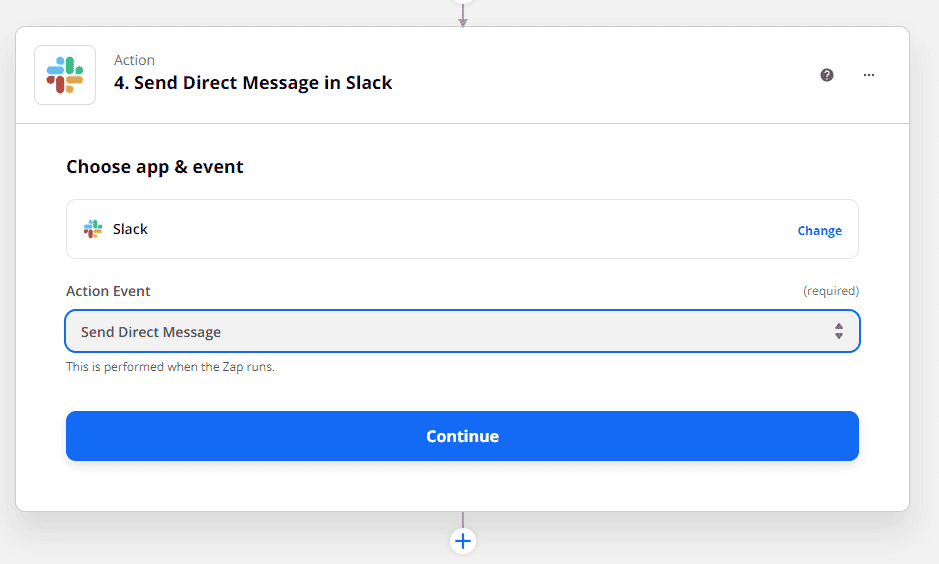
Next, set the Action Event to Send Direct Message. Alternatively, you can also send a channel message, send a private channel message, add a reminder, invite users to the channel, and much more.
Click the Continue button.
The next step is to set up the action. Use the dropdowns to set the message. It lets you send messages to a single person or multiple people at a time, set the message text, include links to the zap, and more.
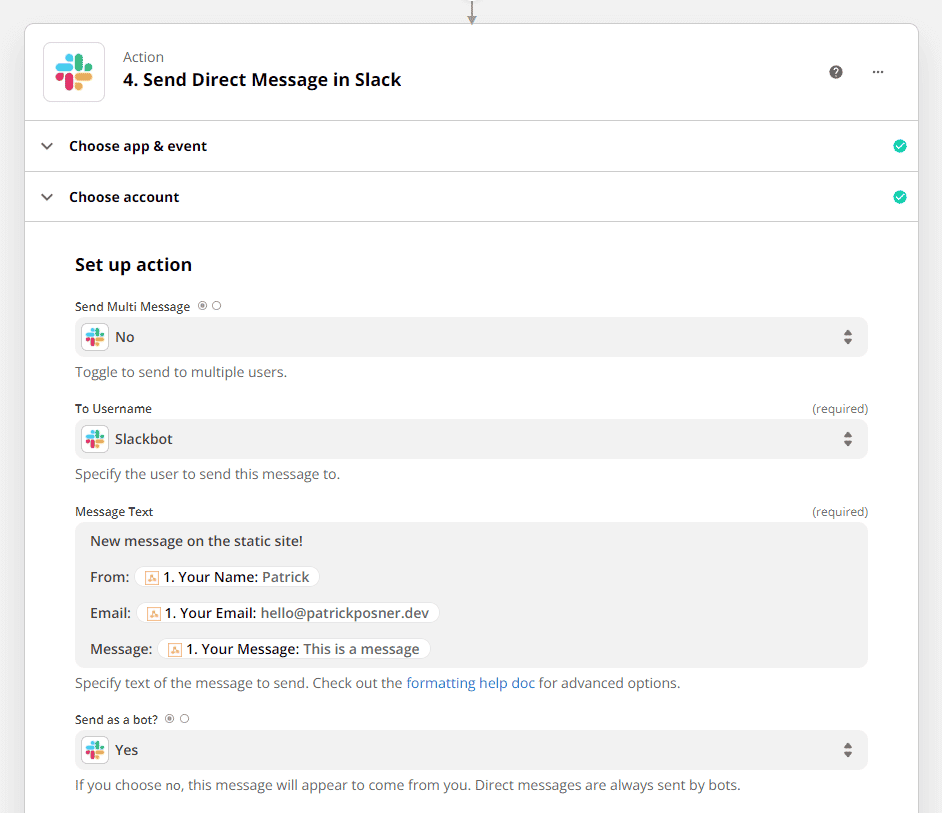
Once you’re done, click the Continue button.
Finally, test out the zap. If the test is successful, you’ll see a success message that looks something like this:
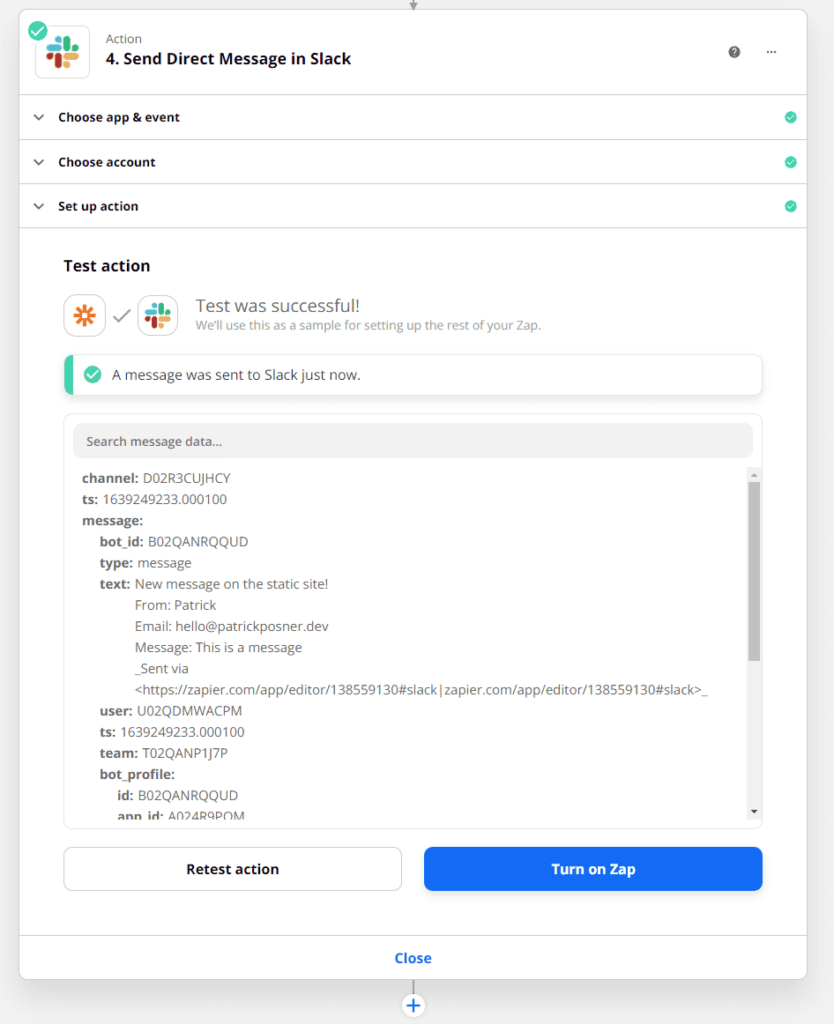
And the contact will be added to your Pipedrive account:

Click the Turn on Zap button to proceed.
Conclusion
Zapier lets you do so much more with your WordPress static site that would be pretty difficult to achieve otherwise. We showed you how you can:
- Add information to a Google Sheet.
- Create a new person in Pipedrive.
- Send a message to Slack.
There are tons of other zaps you can create depending on your specific use case scenario.
Also, be sure to check out our tutorial on how to use IFTTT with Simply Static Pro.
