While we planned our website’s relaunch, it was important to me as the founder to show, not just tell, people that static websites can be powerful, interactive, and modern-looking.
From day one of planning this project, I knew we would return to an entirely static WordPress website powered by our very own plugin, Simply Static. In this article, I will show you how our website runs, which features of Simply Static (and Simply Static Pro) we use, and how everything comes together.
WordPress Setup
WordPress Hosting
We are using SpinupWP combined with a pretty cheap Digital Ocean droplet. It’s that easy as all you need to run a Static WordPress website smoothly is a hosting provider with:
- decent power (>256MB RAM, some storage)
- NGINX instead of Apache (personal preference)
- working WP-Cron (or having a UNIX cron instead)
- barebone WordPress without the usual bandaids (serverside-caching, complex firewalls, or proxy setups..)
- daily managed backups
- easy to use SSL
The rest of the setup is covered by Simply Static anyway.
You can choose a fancy managed hosting provider, but Static WordPress differs from the average WordPress setup.
Over the years, we’ve seen countless examples of hosting providers trying to hide their use of cheap servers and cache everything they can to reduce customer costs.
Here is what the dashboard for our website in SpinupWP looks like:
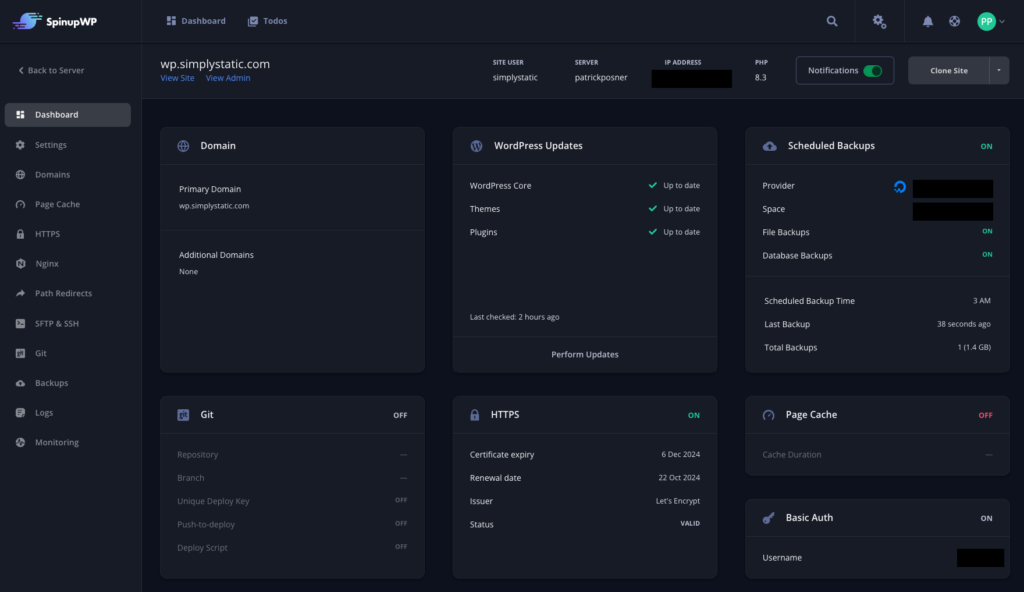
The only thing that might differ from your website is that we run our WordPress installation on a subdomain and use Basic Authentication to protect the entire site.
Basic Authentication and subdomain
As our documentation recommends, we use a standard setup for Static WordPress: We host the entire website on a subdomain and protect it with basic authentication.
Most hosting providers offer an easy-to-use UI to set up basic authentication for your website.
Still, we also cover that inside of Simply Static Pro – it’s just a simple toggle option in Simply Static -> Debug -> Basic Auth:
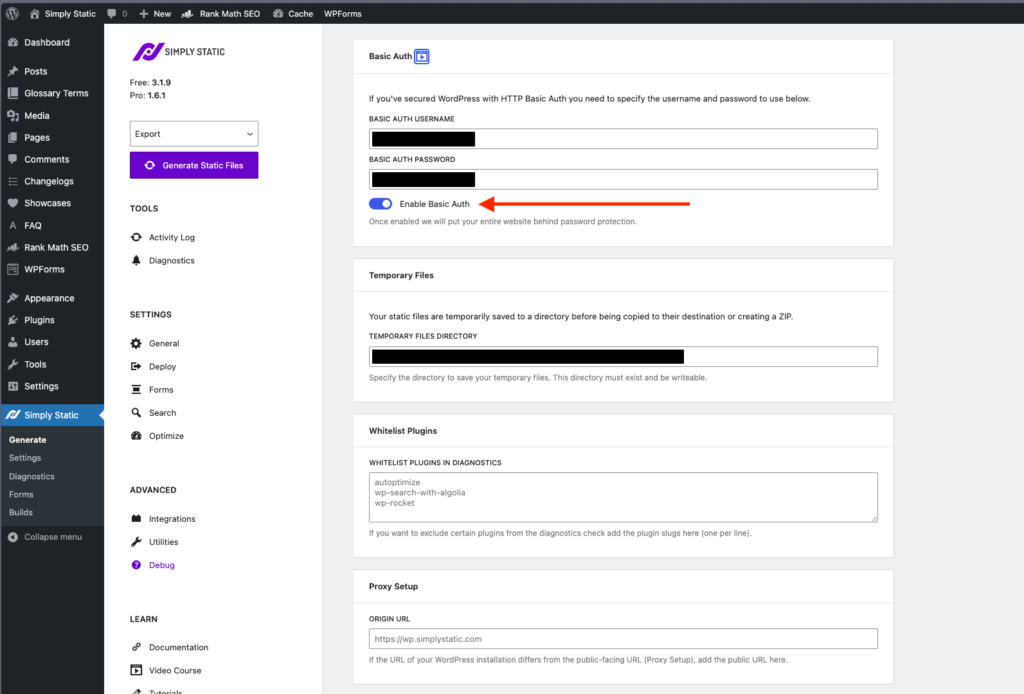
It’s important to note that even if you set up basic authentication directly on your hosting provider, you must add those credentials in the settings shown in the screenshot to allow Simply Static to bypass the protection when running a static export.
Why not LocalWP?
The answer is simple: managing our website is a team task.
Multiple people need access to the website to write and publish blog posts, update changelogs, write FAQ and glossary posts, etc.
Managing the website via LocalWP would require us to share the site export every time something changes—possible but not practical.
Theme
We use our very own OllieWP theme, an FSE theme.
The block editor works incredibly well with static WordPress – it’s less hassle, no performance hiccups, and the code is clean.
Plugins
We like to keep things clean, so we don’t use any block suite plugin – it’s core blocks combined with the following plugins:
- Block Visibility
- Code Syntax Block
- Glossary
- RankMath SEO
- The Icon Block
- WPForms
- Simply Static & Simply Static Pro
We have two custom plugins to add additional custom post types (FAQ, Showcase..) and integrate our checkout with the block editor.
Static Website Hosting
BunnyCDN
We are using BunnyCDN as our static site hosting provider.
It combines all the benefits of the other static site hosting solutions but with fair pricing and enough flexibility to extend our setup as needed:
- edge caching for low latency worldwide
- streaming capabilities to distribute our videos
- Easy-to-use dashboard
- DNS (we still use Cloudflare, but BunnyDNS is great)
Zones
Each project inside BunnyCDN consists of a pull zone and a storage zone.
The storage zone is where you upload your files, and the pull zone is what is available to your visitors and manages all the caching.
Storage Zones
We use two different storage zones, one for the website which uses the Edge (SSD) type – this one is more expensive but has lower latency and is a perfect fit for static sites and a Standard storage zone to deliver our videos:
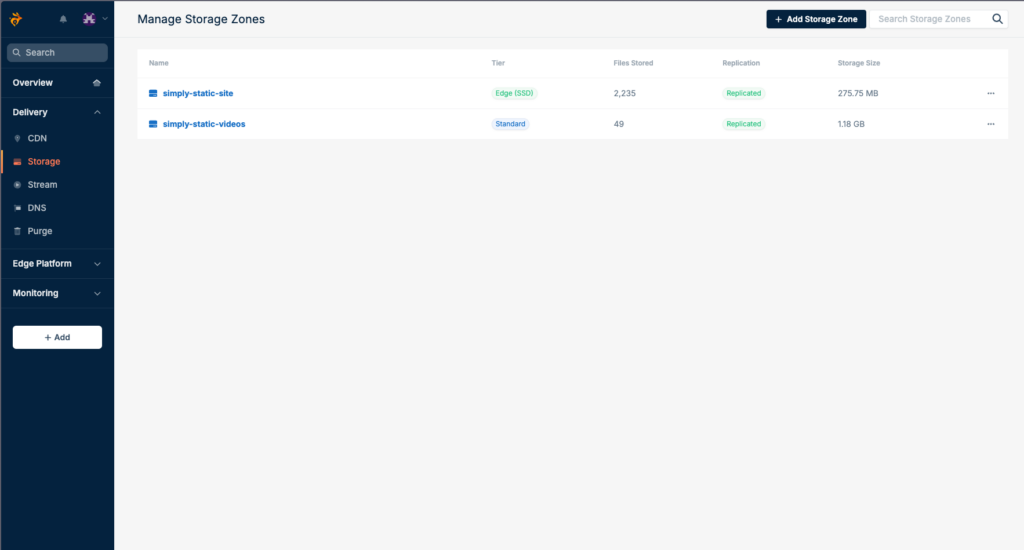
There isn’t much to explain regarding storage zones.
You set them up once, connect them via Simply Static, as shown in our documentation here, and you’re done.
Pull Zones
Like our storage zones, we also set up two pull zones: one for the website and one for the videos.
videos.simplystatic.com
We set up a subdomain to host our videos on a “Standard” pull zone via BunnyCDN.
This is because delivering videos is very different from hosting a static website.
Despite attaching the subdomain to the zone, we changed two settings inside the caching settings:
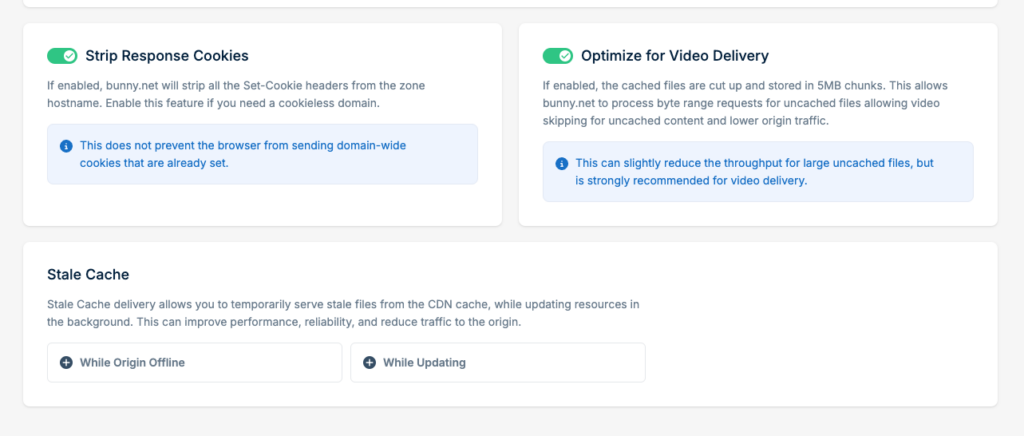
The first option ensures we run our videos from a cookieless domain, which is essential as we must comply with GPDR, and we hate cookie consent plugins (sorry!).
The second one is an intelligent way to deliver high-quality videos in seconds without distributing them through YouTube or Vimeo – it loads the videos in 5MB chunks, lowering the browser’s pressure on the first load.
simplystatic.com
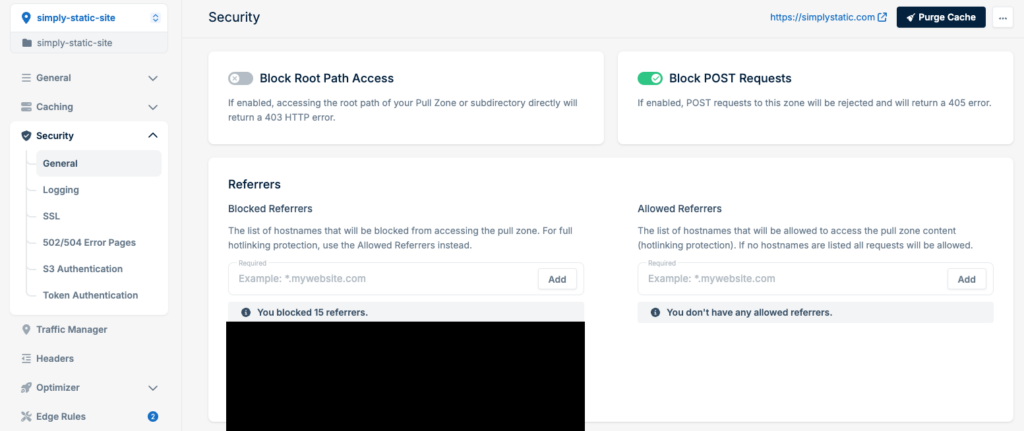
This pull zone isn’t optimized for video delivery. Instead, it’s set up to be heavily cached and includes additional security-related settings, such as a minimum TLS version, a firewall to restrict POST requests, MIME type checks, etc.
We heavily use the “Blocked Referrers” option inside the pull zone settings. It allows us to block access to our website from GPL resellers’ websites and other shady projects—we don’t want folks from these websites to use all our knowledge for free!
Edge Rules
Another powerful feature included in BunnyCDN is the ability to Edge Rules.
They are a hidden super-power for static sites, allowing you to do all kinds of advanced setups like:
- proxy requests (embedding other apps on the same domain)
- redirect on edge level
- improve your caching setup
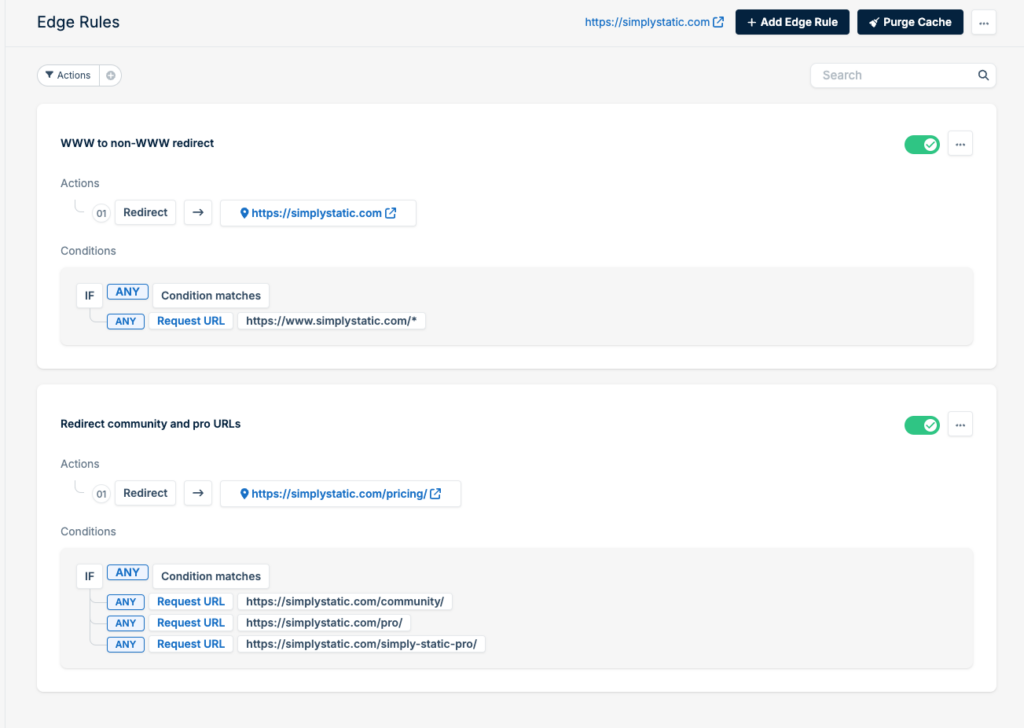
We kept it simple for now and only included two edge rules: one to redirect the WWW-version of our domain to the non-WWW version and one to redirect some old landing pages to the new pricing page:
Contact Form
Having a contact form on your website is a must.
That’s why we spend so much time making WordPress form plugins work with your static website.
WPForms
We are using WPForms as our form plugin and set up a form for our support page.
It’s easy to use, includes decent default styles, and includes all the field types we need for our use case:
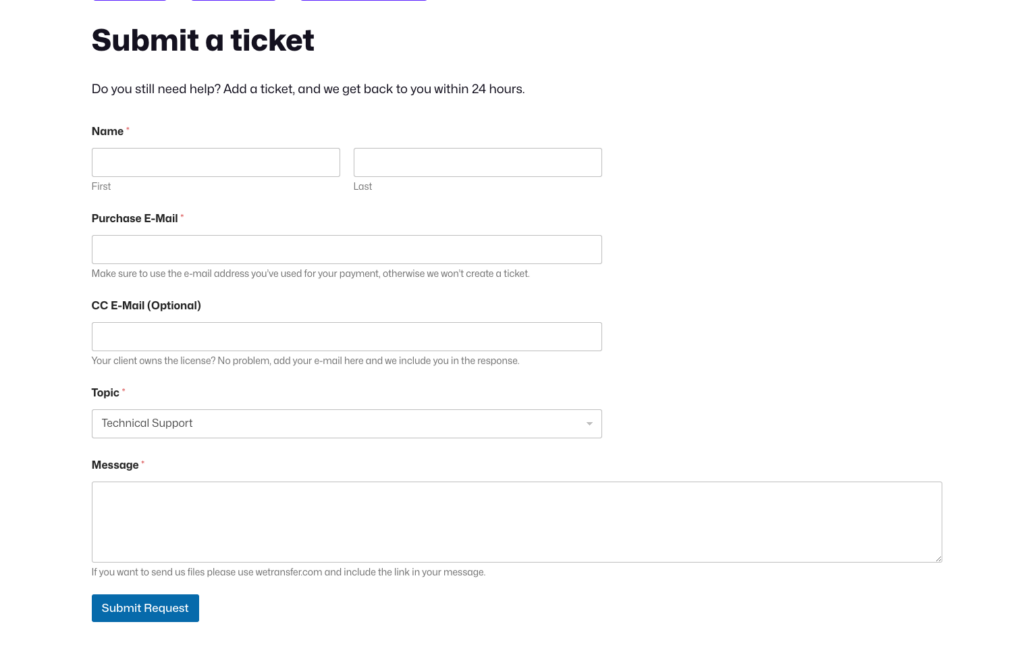
This is just a simple form created with WP Forms. No add-ons, no custom code.
Then, we set up a form connection in Simply Static to connect it to a webhook:
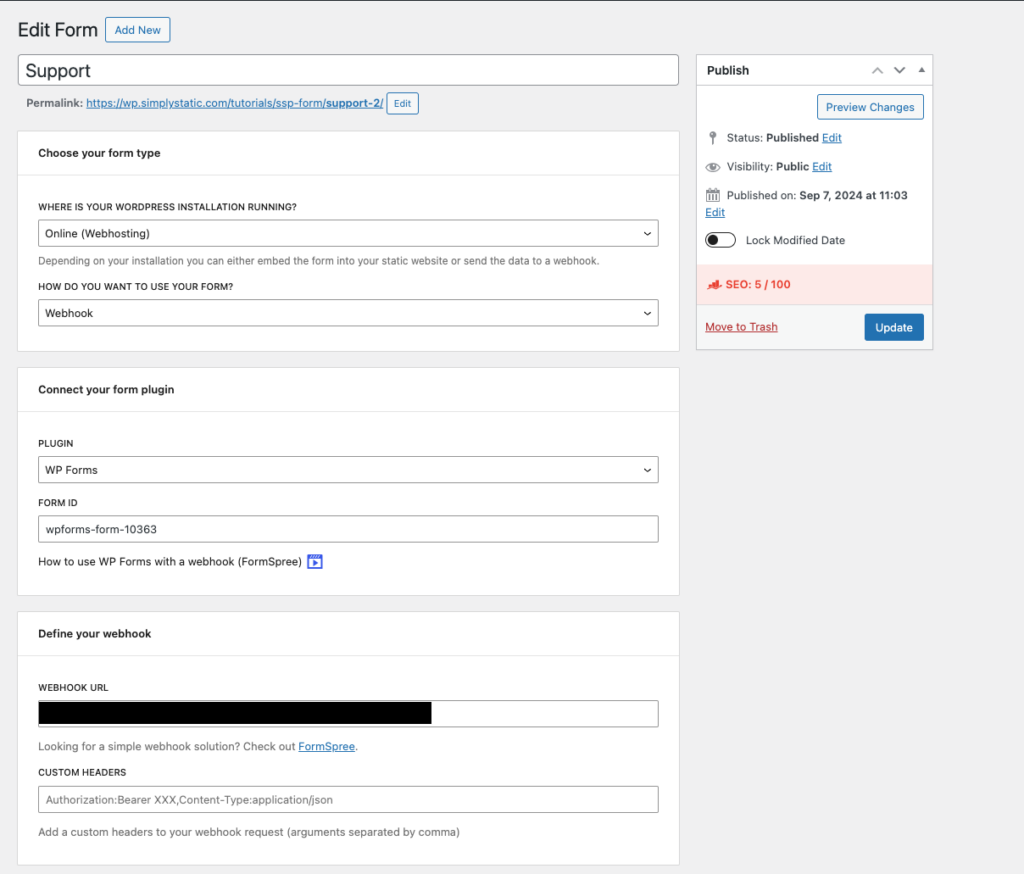
Because we use Helpscout for our support, we need to forward the submissions to an external webhook powered by Zapier.
You can also store the form submissions inside WordPress (use the Embedded type instead of the Webhook inside the form configuration, as explained in the docs here.
Zapier
Zapier is a task-automation service for automating all kinds of actions. It’s not the cheapest service, but it has the most integrations. We are using it to catch requests from our website and submit them to our HelpScout help desk software.
This includes tagging the posts, assigning the customer, and ensuring we can provide exceptional support without asking too many tedious questions.
We combine a “Catch Hook” trigger with the “Create Conversation” action inside our Zap:
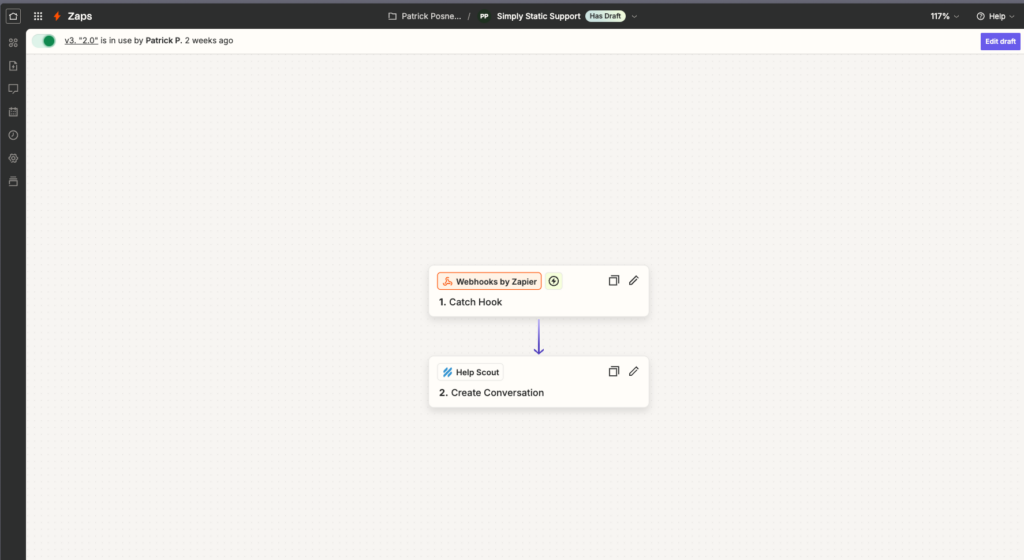
You will find a million courses and free videos on YouTube to work with Zapier and configure Zaps, so I don’t want to go into too much detail, but I wanted to show you some things you can do with it:
- add subscribers to your mailing list (Mailchimp, Brevo, ConvertKit, etc.)
- forward submissions to your CRM
- add contact to a Google Sheet
- automate workflows via AI (ChatGPT) to summarize e-mails or restructure the content
- automatically set up test environments for bug reports
The sky is the limit here, and we are barely scratching the surface of what Zapier can do for us.
Conclusion
As you have seen, static sites don’t need to be simple, but setting them up is easy with Simply Static.
You don’t need to be a coder to make Static WordPress work for you, and we provide exceptional customer support (including videos, detailed documentation, and e-mail support) to help you on a journey to build more secure, faster, and more economical websites with WordPress.
Table of Contents
