If you want to understand the static exportThe process of saving the files and data from your WordPress site to create a static site. options in Simply Static Studio and when to use them, this guide is here to help.
Simply Static Studio offers several static export types to enable you to update content on your static WordPress site after launching it. When updating your content, you might be unsure about which export to use and when to use it.
We’re here to help. We’ll introduce you to all the static export types that Simply Static and Simply Static Studio offer. We’ll explain what they are, when to use them, and how to set them up.
Here’s what we’ll be covering:
- What Simply Static and Simply Static Studio are and how they help.
- Different static export types and when to use each.
- DeploymentThe act of pushing the static files generated by Simply Static to a live environment where users can access them. options and their benefits.
- Step-by-step guides to set up each export option.
Let’s introduce you to our tools first.

What are Simply Static and Simply Static Studio?
Simply Static is a tool that can help you convert a WordPress site into static HTMLHyperText Markup Language. It’s the standard language for creating web pages. pages and assets. It makes it very easy to create a fast, highly secure, and low-maintenance version of your WordPress site. This helps improve both user experience and your site’s SEO.
Simply Static Studio includes everything Simply Static offers and a place to house and manage all your static WordPress websites.
Let’s put this into perspective to see how these two work simultaneously.
Simply Static Studio
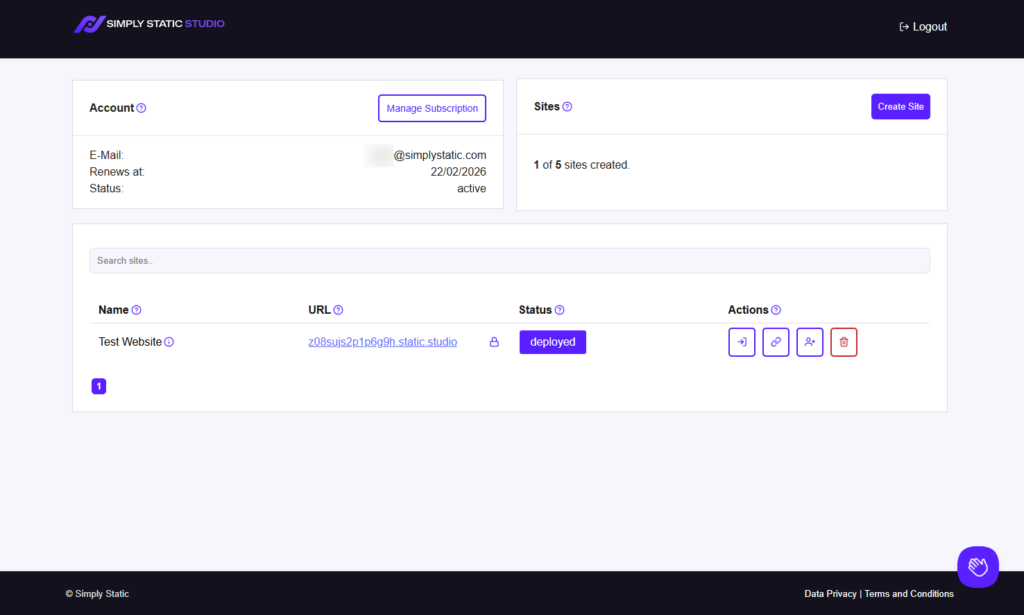
Simply Static Studio is a fully managed platform where you can create, manage, and deploy multiple static websites in a user-friendly dashboard.
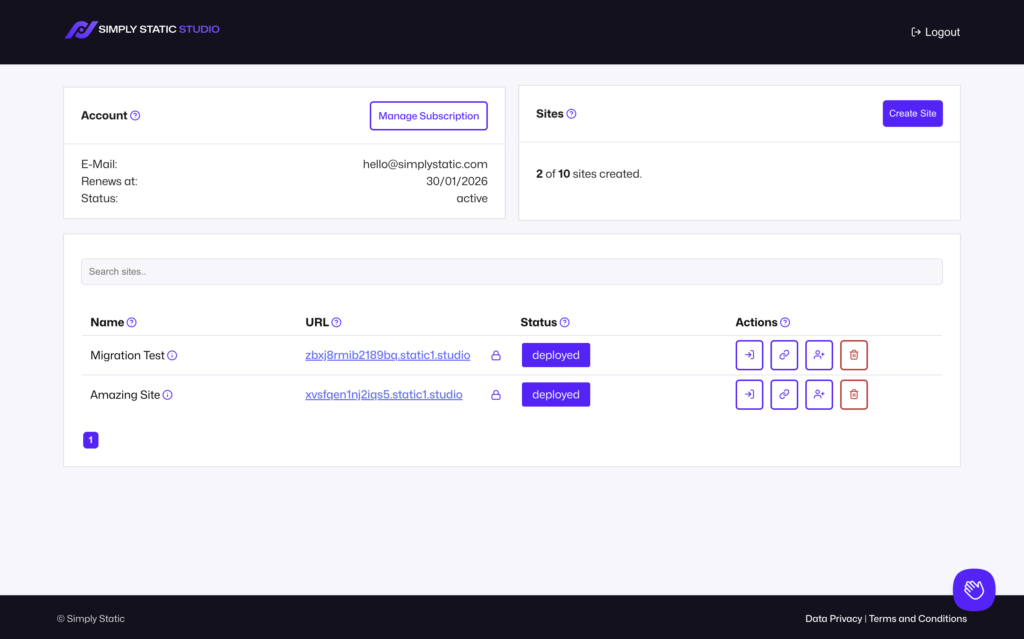
It is also an all-in-one solution that combines static WordPress hosting, security, performance optimization, automation, and static site generation to make all this easy.
Because of all this, you won’t have to worry about:
- Getting a web host and setting up servers.
- Setting up and securing WordPress on your own.
- Monitoring and improving the site’s performance, site maintenance, and more.
All your static WordPress site needs are met under one roof. This is so you can focus on creating static sites and managing content.
Why should you choose Simply Static Studio?
There are several compelling benefits to using Simply Static Studio to manage static sites with WordPress. Here are a few strong reasons:
Faster setup
Simply Static Studio sets up static site hosting, installs secure WordPress, and activates all in-house and essential plugins on your behalf. It also handles complex configurations when you create a site.
These include:
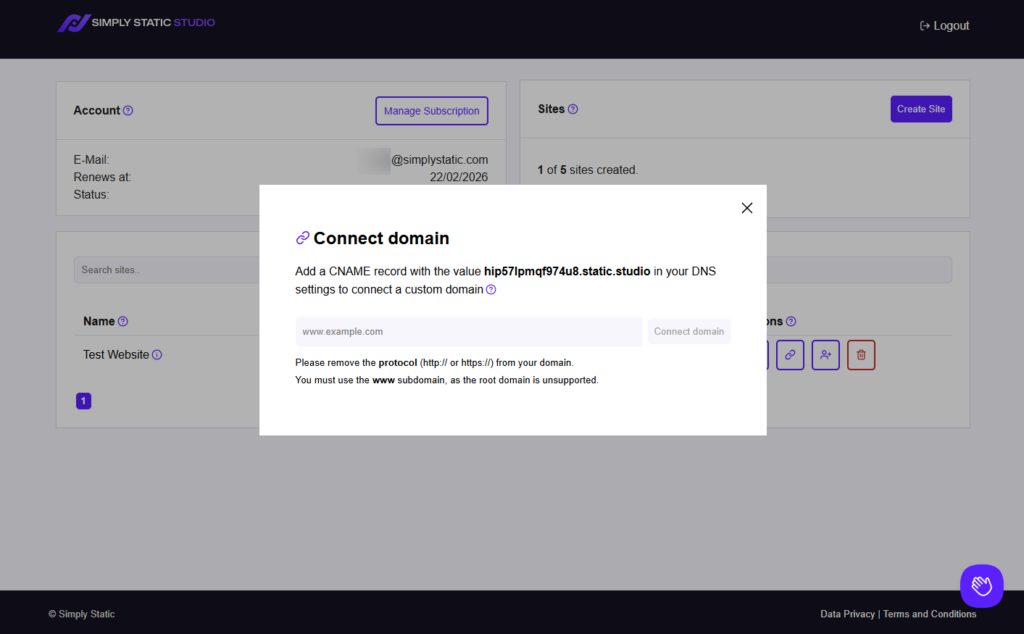
- Creating DNS records for WP and the CDNStands for Content Delivery Network. It’s a system of distributed servers that deliver web content quickly to users base….
- Setting up an NGINX web server and configuring it for you.
These are just a few server actions Simply Static Studio runs in the background to nail your first site experience. The goal is to ensure you have an easy time and get busy building fast, highly secure sites for yourself or your clients.
Easy-to-use dashboard
The dashboard is designed to be straightforward to use. When you land on the platform, you know exactly what step to take in order to create, deploy, and manage all your static WordPress projects in one place.
Rock-solid security
Every website you create on Simply Static Studio also runs separately from the WordPress database. You don’t need complex firewalls or bulky security plugins that run in the backend of your WordPress site.
Everything hackers usually target in the WordPress ecosystem just isn’t there. So the site is secure by design.
Access to your WordPress dashboard is also secured by basic authentication and a zero-trust firewall.
We use a passwordless approach to let you access your WordPress dashboard:
- The magic login link expires every 30 seconds.
- Links aren’t shareable as we authenticate against the user logged in.
- We don’t store your credentials anywhere.
Blazing-fast performance with our powerful CDN
Every static WordPress site you publish with Simply Static Studio is hosted on our high-performance global CDN. This means your website loads fast for visitors anywhere in the world. You won’t need to worry about expensive hosting plans, caching plugins, or performance optimization techniques like minificationThe process of removing unnecessary characters from code files to make them smaller and improve website speed., image optimization, etc. It’s speed, right out of the box.
Reduced maintenance
With Simply Static Studio, you won’t have to spend days updating plugins. Instead, you get to focus on your business. Backups are automated, so your site is always up to date. Billing, provisioning new sites, and SSLSecure Sockets Layer. A technology that encrypts the data transferred between a user and a website. certificates (including renewals) are also automated.
Let’s not forget about live customer support. If you need help, you can chat with a real person and get the support you need.

Simply Static
The WordPress pluginA piece of software that adds specific features to WordPress., Simply Static, is the flagship static site generator (SSG) in Simply Static Studio. Anytime you create or upload an existing WordPress website in Static Studio, the plugin is added and set up for you.
This plugin then autogenerates static HTML file copies of all your WordPress pages, templates, blog posts, etc. It also converts key dynamic features such as comments, forms, and search functionality so they can work in a static environment.
Simply Static allows flexible hosting options
Simply Static provides multiple deployment options to host your static HTML files, CSSCascading Style Sheet. It’s a language used for describing the look and formatting of a document written in HTML., JavaScriptA programming language used in web development to create interactive elements on a webpage., and other assets elsewhere.
You can download your static site files as a ZIP file. Deploy to a local directoryA folder on your computer’s hard drive where files are stored. In the context of Simply Static, this could be the place …, GitHub PagesA hosting service from GitHub for publishing static websites directly from a GitHub repository., Vercel, Kinsta, NetlifyA platform for automating web projects that provides hosting and serverless backend services for web applications and st…, CloudflareA company that provides services like security and website speed improvement. It acts as a protective layer between the … Pages, etc.
It provides customizable static export options
Additionally, Simply Static provides the following static export types:
- Full
- Incremental update
- Single
- Build
These static export options are our primary interest in this tutorial. They let you optimize content in WordPress and deploy it to your live site.
Because each export type serves a specific purpose, it begs the question: when is the right time to use one?
When you might want to use different static export types when managing your static website
A static WordPress site runs independently of the original WordPress database and its dependencies. This implies that any changes you make directly within your WordPress dashboard won’t immediately reflect in your live static site unless you export them.
That’s where our four static HTML export options come in handy to bridge this gap.
Reasons to use different export types
Here are some of the best use cases or scenarios to use different static export types in Simply Static:
- When you want to do a full site update. In this scenario, you can use a full static export to deploy those significant changes or updates to your live site.
- When only parts of your site change frequently. Switching to incremental exports will enable you to update specific parts of your static site.
- If you need to make quick updates to individual pages. A single-page export is the best way to update changes within a current page.
- If you want more control over which pages or file paths get exported. In this case, you use build exports. It’s a slightly advanced setup and requires a bit of work.
Using these export options can save you time and ensure your updates are applied efficiently. You don’t have to run a full static export repeatedly whenever you update WordPress content.
We’ll get more into the details of these static export options as we go through how to set up each one in the next sections.
How to use the different static export options with Simply Static Studio
Exporting a static site with Simply Static Studio is designed to be as simple as possible, even for total beginners.
The best place to start is by creating a site with Studio.
Setting up your website with Simply Static Studio:
The whole process begins by signing up for an account in Simply Static Studio.
We’ll need a valid email address and a password from you. After this, you’ll receive a confirmation link from us via email to verify and activate your account.
Step 1: Create your first website
Activating your account will open your Simply Static Studio dashboard. You can follow these simple steps to create your first static website:
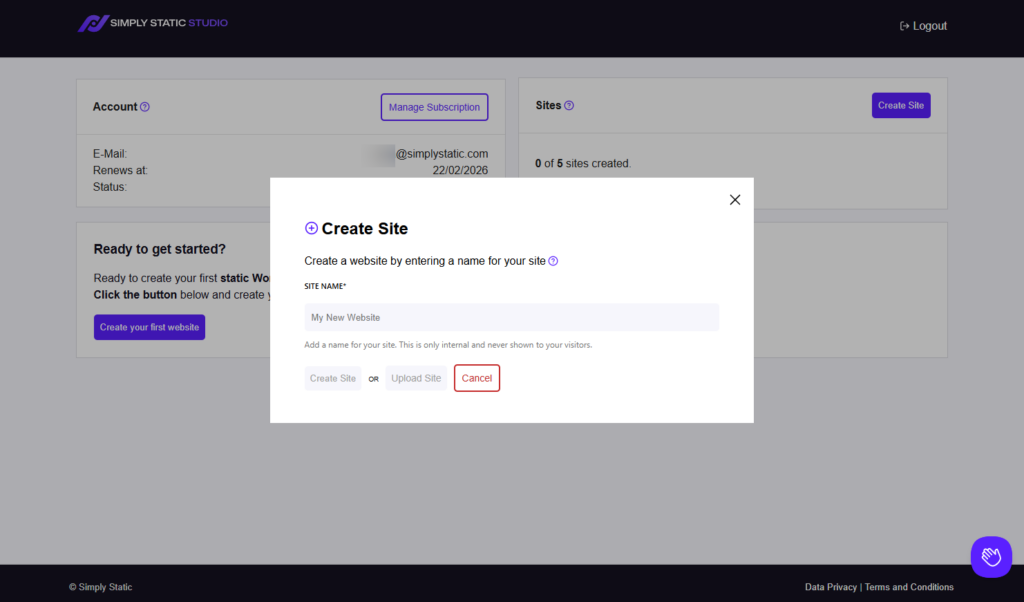
- Click the Create your first website button in the middle of the screen.
- Give it any name you want in the window that pops up. You’ll also have two button options:
- Create Site. Click this button to build a static site from scratch.
- Upload Backup. Go for this option to migrate an existing WordPress site instead of starting from scratch.
- If you click the Create Site button, a table appears with a Status column showing the progress of your site’s deployment. It can be pending, migrating, creating, failed, or deployed.
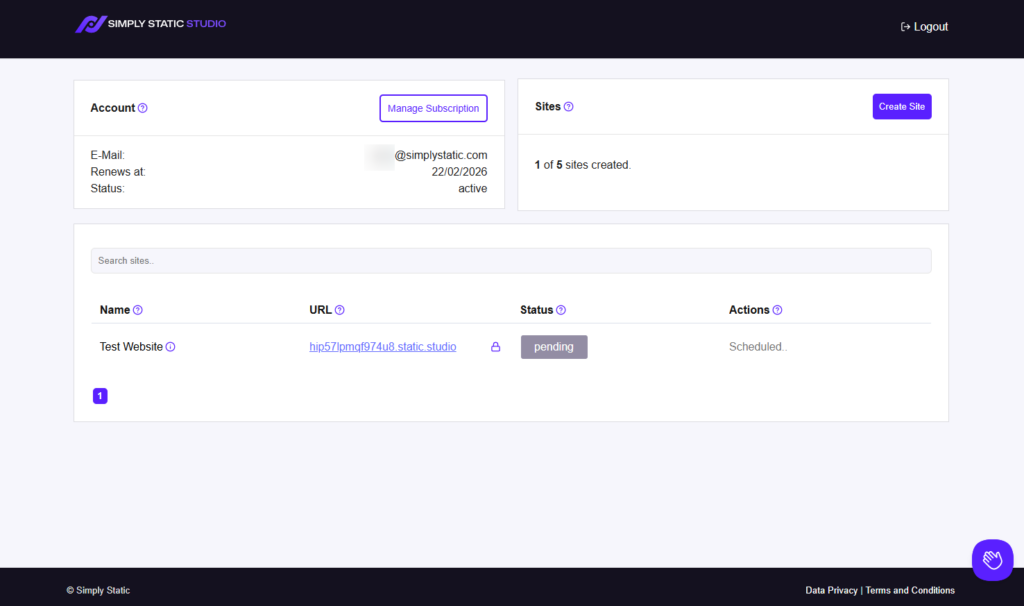
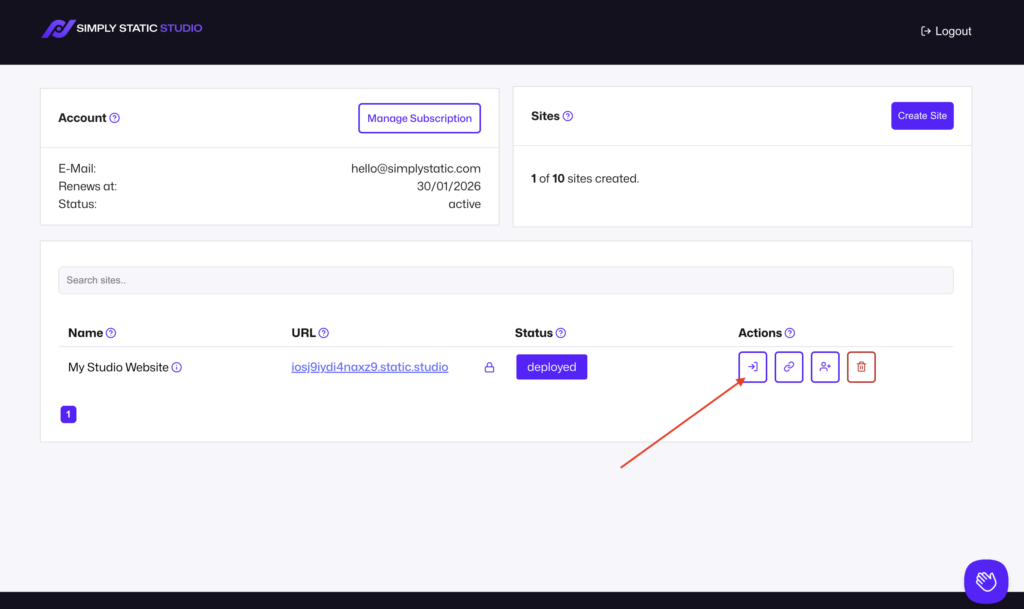
Once the Status shows deployed, your site is ready to use. You’ll see four available actions you can take in this order:
- A magic login link to access your WordPress dashboard.
- Connecting to a custom domain so you can go live.
- Adding and managing team members to help you manage your static site.
- Deleting a project if it’s no longer needed.
For this tutorial, we’ll log in to WordPress.

Check our guide on creating your first static WordPress website to get the full picture of the setup process.
Step 2: Log in to your WordPress dashboard
Click the magic login link to open WordPress in a new tab. This will be the first icon in the Actions column. It’s a passwordless login protected with basic authentication and a zero-trust firewall. So you don’t have to provide a password.
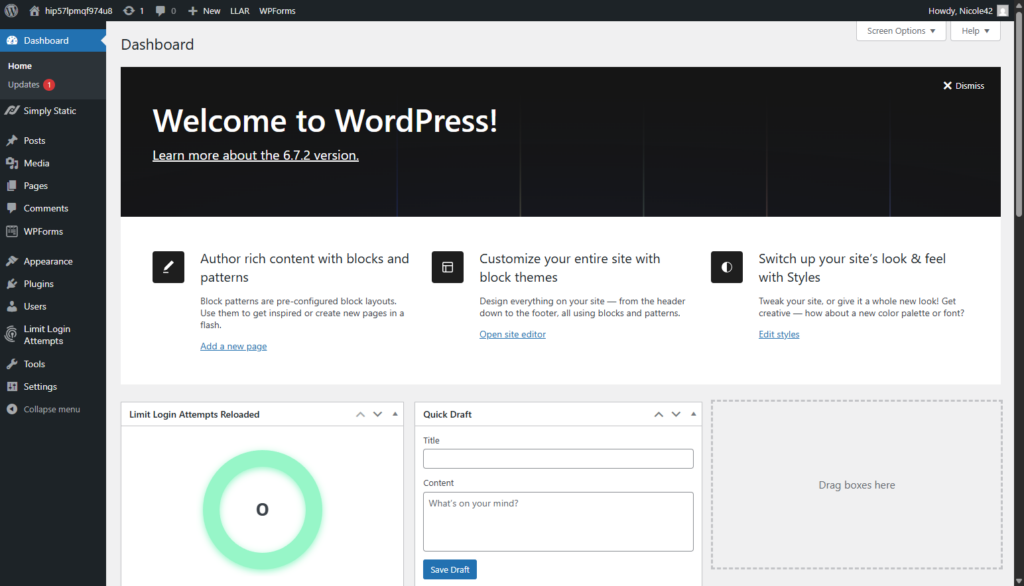
Opening WordPress allows you to use the content management system to add content to your site. Simply Static Studio installs the OllieWP WordPress theme library to design your site’s look and feel.
For this tutorial, we won’t get into design and content management in WordPress. Instead, find Simply Static on your WordPress dashboard.
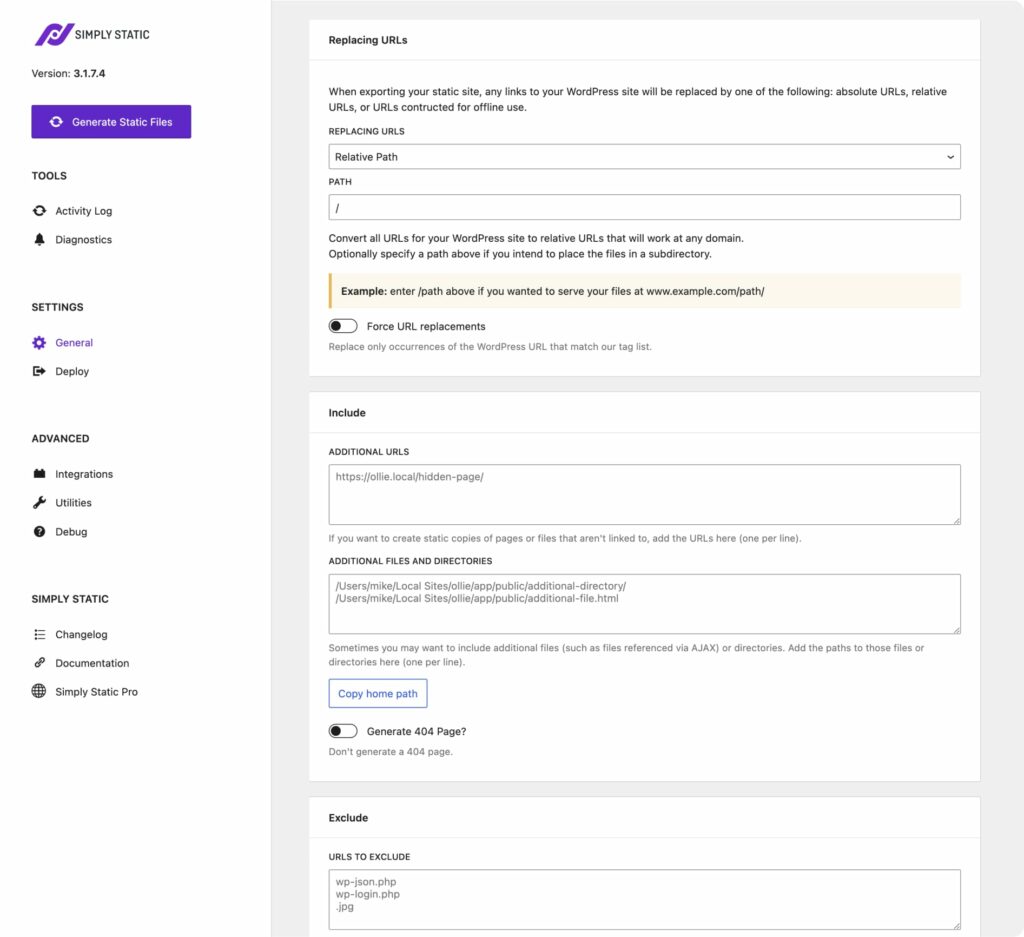
Here’s where we’ll make the following two key configurationThe setup process where you specify the settings and options for how a software or system will operate. options:
- Deployment settings. Go to Simply Static > Deploy under Settings to customize where and how the static files are hosted.
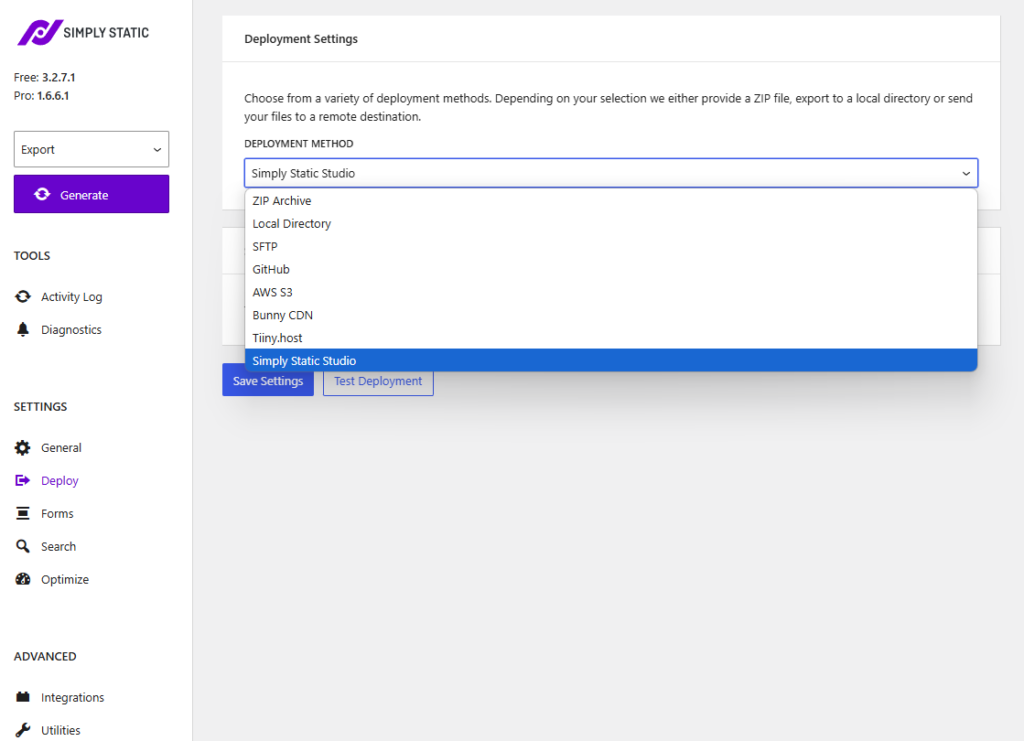
Usually, it’s a good move to select and set up the deployment options before a static export.
What are your deployment options?
Deployment options refer to the different ways you can transfer your static files to a server or any other hosting platform before a static export.
Here are some of the standard deployment options that Simply Static offers:
Common deployment options in Simply Static include:
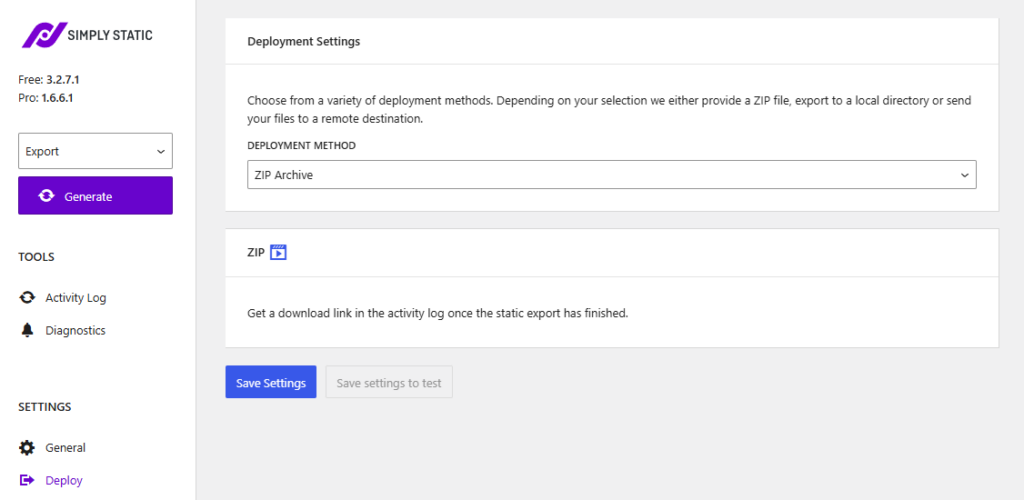
ZIP file (the easiest)
Selecting this option allows Simply Static to create a downloadable file during an export. You can download the entire static site as a ZIP file and then upload it to your hosting provider. This method is simple and doesn’t require a complex setup.
Best for: It is ideal for users or developers who prefer manual control.
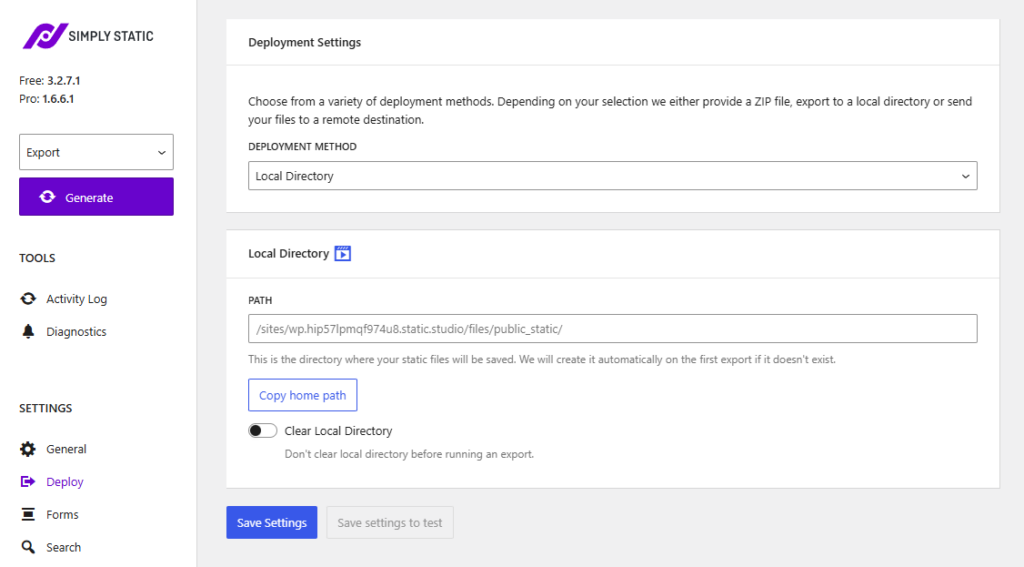
Local Directory
This option saves your WordPress static files directly to a local folder on your computer. You can make changes, test locally, and then deploy the static files when ready.
Best for: This option is best when you want to test your static site locally before publishing it online.
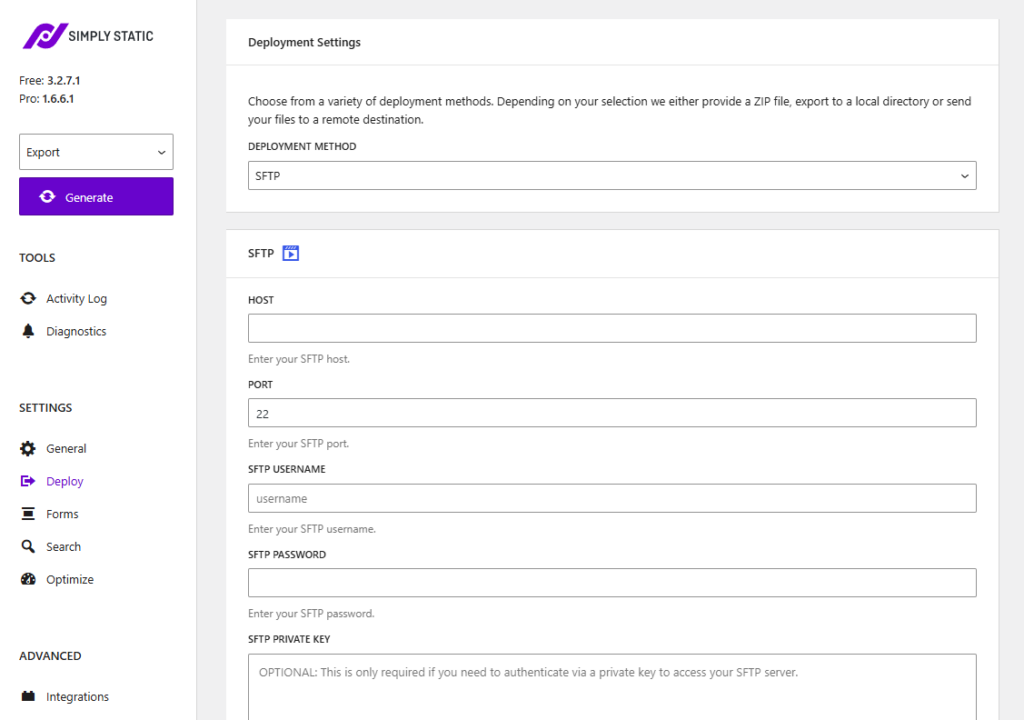
Remote SFTP server
This option is useful when you want to export static files to your own server because you’re running WordPress with Local WP. Or, if you want to host these files on another server for more security.
The settings are simple. Generally, you need a:
- Host.
- Port.
- Username.
- Password.
- Subdirectory where Simply Static will export your files to.
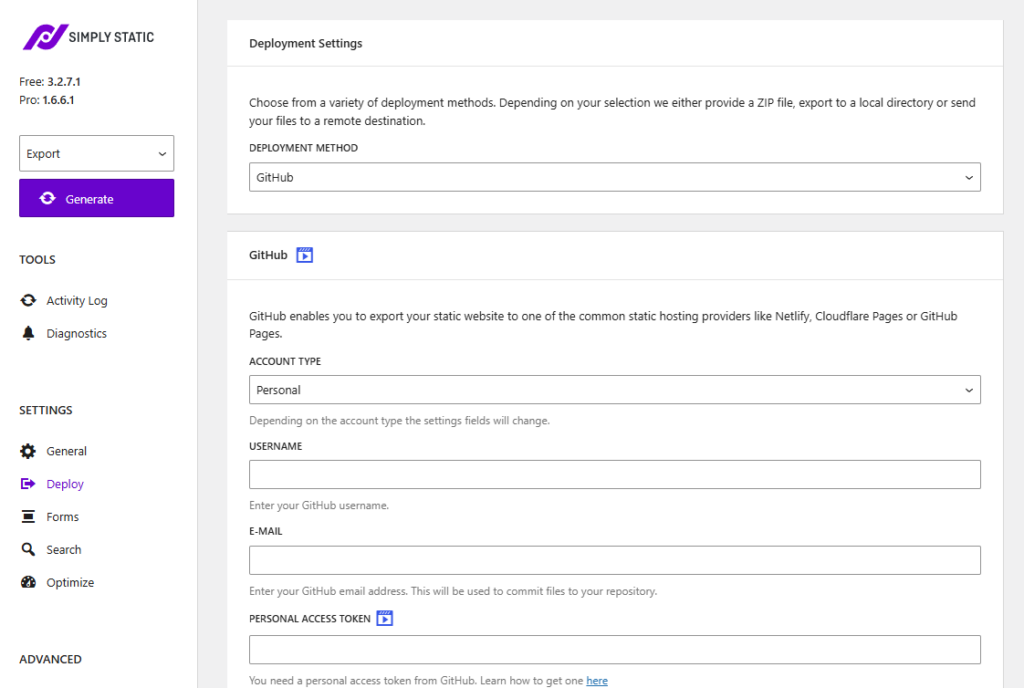
Set up GitHub integration
With this option, Simply Static can push the static files to a GitHubA web-based platform for version control and collaboration, allowing multiple people to work on projects at once. repositoryIn version control systems like GitHub, a repository is the most basic element, a folder where all the files for a parti…. You can then deploy the files from GitHub to various platforms like Kinsta, Netlify, Cloudflare Pages, Digital Ocean, Vercel, GitHub Pages, or similar platforms.
Best for: It’s best when you want to manage or version controlA system that records changes made to files and directories so that you can recall specific versions later. your static site.
You can also automate the deployment process every time you push updates from WordPress to your repository with this method.
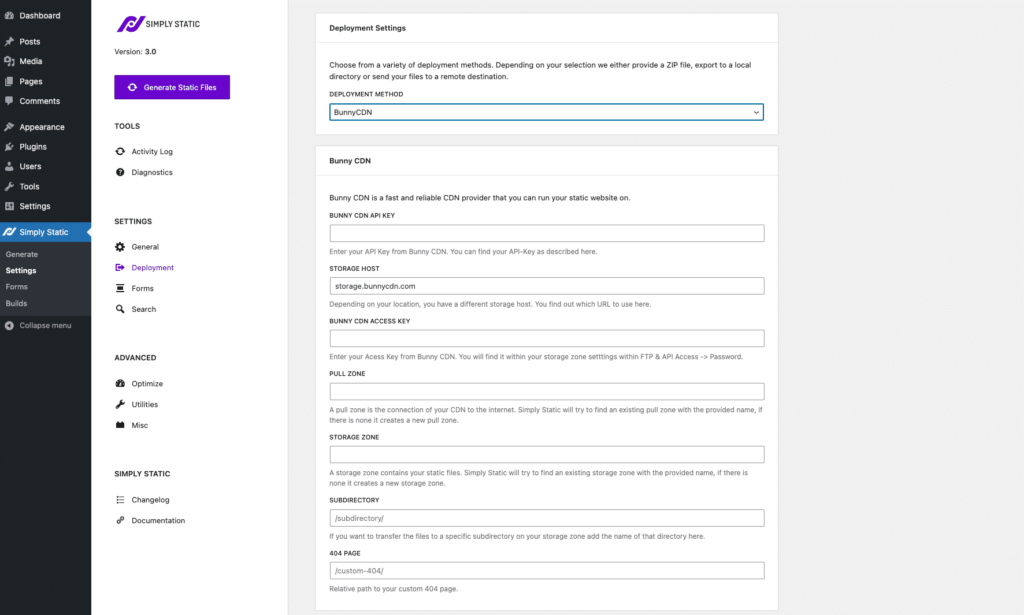
Content Delivery Networks (CDNs)
Simply Static allows you to deploy to the following CDNs:
- Bunny CDN. This is quite a popular choice for a CDN because it offers fair pricing and excellent performance. It also guarantees 99.99% availability around the world.
- Simply Static Studio. Simply Static Studio is one of the best options because all the setup is automated for you if you’re using Simply Static Studio. This managed platform provides full static site hosting on a high-performance CDN without additional setup.
Best for: CDNs are great if you want to serve your static files on a server closest to a user’s geographical location.
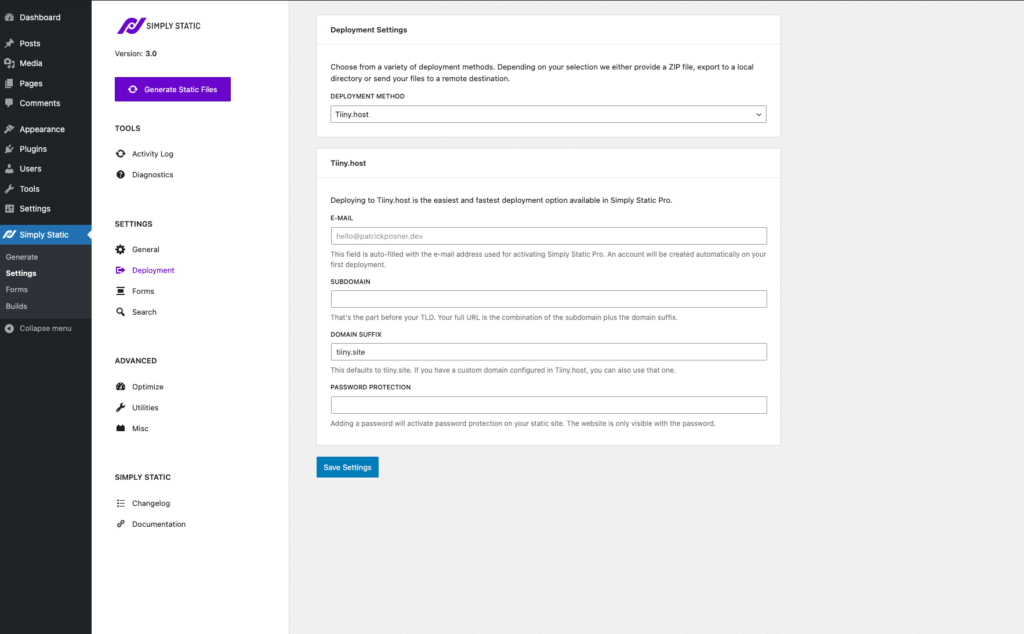
Other deployment options in Simply Static include:
- Tiiny.host.
- AWS S3 cloud services.
After selecting a host, you can export your site using four types of static export options in Simply Static. We’ll start with the default static export.
How to export your whole website
The default static export option in Simply Static is also called ‘full export’ or just ‘export’.
This option allows you to export your whole website as static files. You can use it with any of the deployment methods we discussed above.

Why use full static exports
Of course, when you log in to barebones WordPress from Simply Static Studio, you’ll want to manage your website content.
For example, you can select one of the OllieWP themes that fits your business style and brand and then modify it. You can add and edit pages, content, posts, etc, to your brand new site.
If you uploaded an existing WordPress site in Simply Static Studio, you may use WordPress to make major changes or update your entire site.
In both scenarios, you’ll need to run a full static export when you’re finished with all the changes you’ve made. It ensures that all content and pages in your static WordPress site are refreshed.
Here’s how this is done.
How to perform a full static export
Take these steps:
- Go to Simply Static > Generate in your WordPress dashboard.
- Once you’re there, you’ll notice a select menu above the Generate Static Files button, where you can choose your static export type. These options include:
- Export
- Update
- Build
- Export is the default full static export type. So leave it as it is.
- Before you run an export, you’ll want to switch to Deploy under Settings. Then, select your preferred deployment method and customize it.
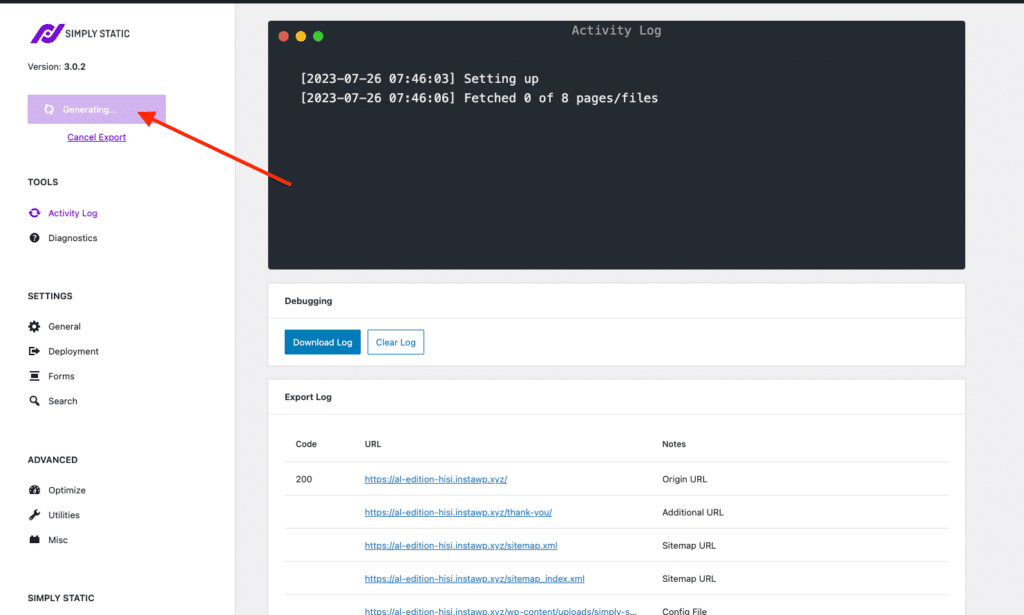
- Switch back to the Activity logA record of all the actions and changes made within the Simply Static plugin. It helps you track what has been done. and click the Generate Static Files button to run a full static export.
- Simply Static will run a full static export. So, wait for the export to complete.
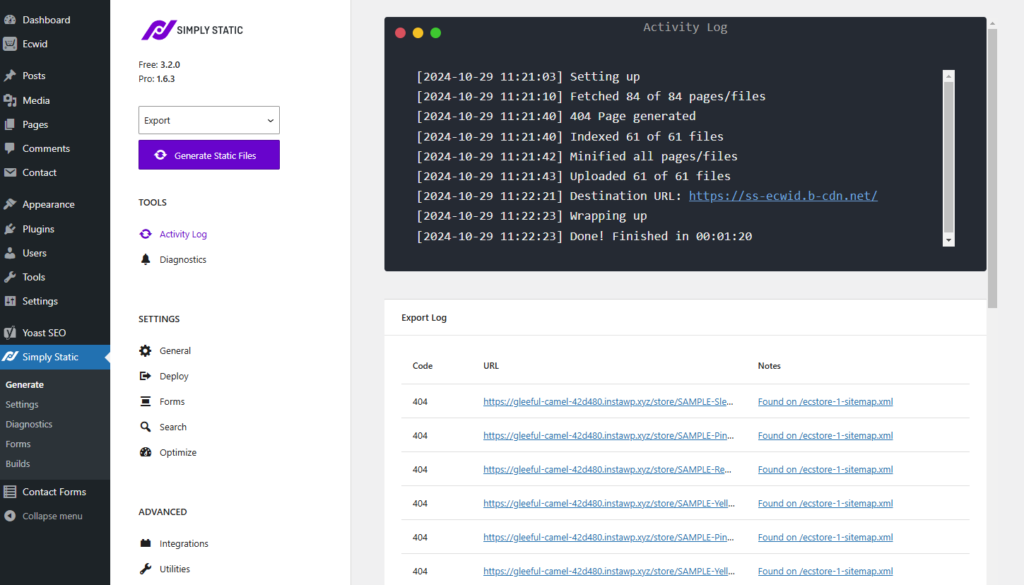
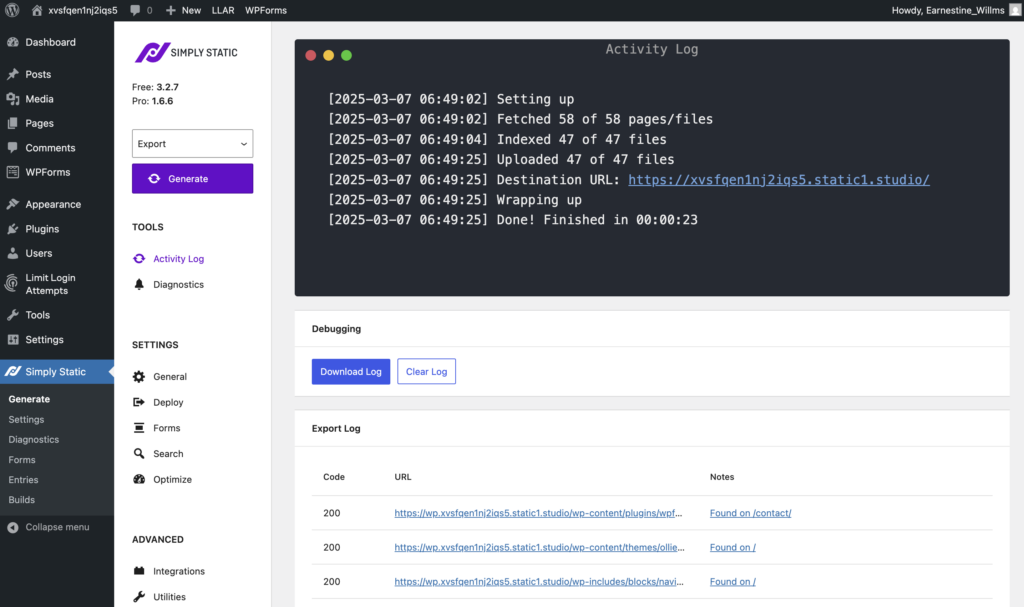
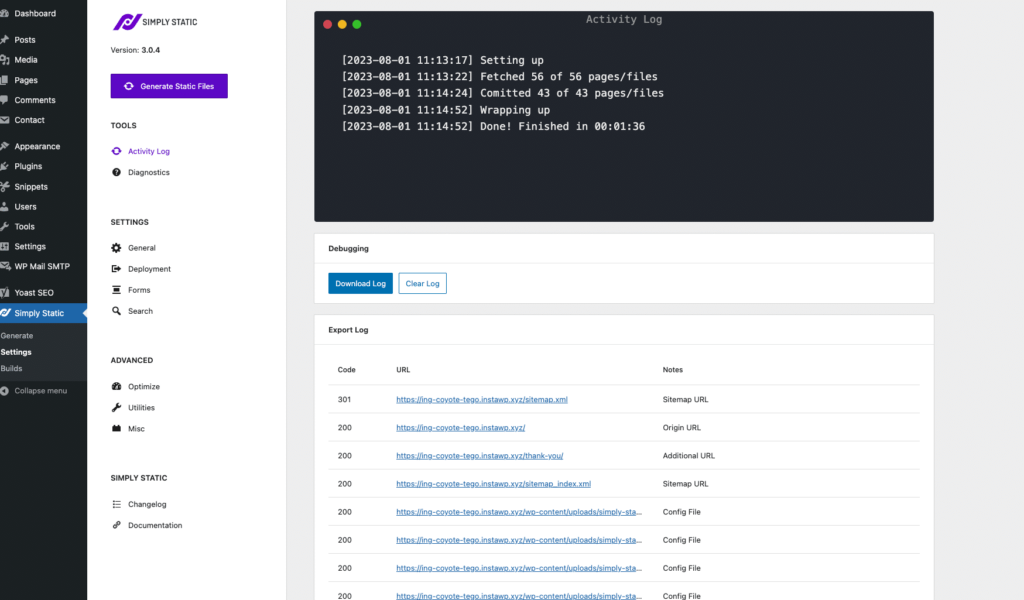
That’s it. In the Activity log, you’ll see the steps and the timestamps of the current progress of the export. These steps change depending on your setup or deployment method.
The Export log shows all the pages and files converted during the static export alongside their HTTP status code. Generally, you’ll have a single page showing info about page status, redirects, error pages, etc.
The other three static export types in Simply Static work once you’ve performed a full export.
How to use incremental exports
Incremental exports allow you to update only the parts of your static site where you’ve made changes.
Note: You can only use this static export option once you’ve done the initial full static export we just walked you through.
Why use incremental exports
The main reason for using the incremental export type is to save time and server resources by only exporting updated files.
Instead of overhauling the entire site, Simply Static tracks the changes you make in WordPress and updates only those files on your static site.
This makes updates faster, lighter, and easier to manage, especially if you made a few updates across different parts of your site. The plugin finds and exports only what has changed, automatically.
How to perform an incremental export
Let’s say you’ve added some content to three WordPress pages and saved the updates.
To update this content to your static site, take the following steps:
- From your WordPress dashboard, go to Simply Static > Generate.
- Select Update in the select menu above the Generate button. This will be your incremental export option.
- Hit the Generate Static Files button and let it push those changes to your frontend static site.
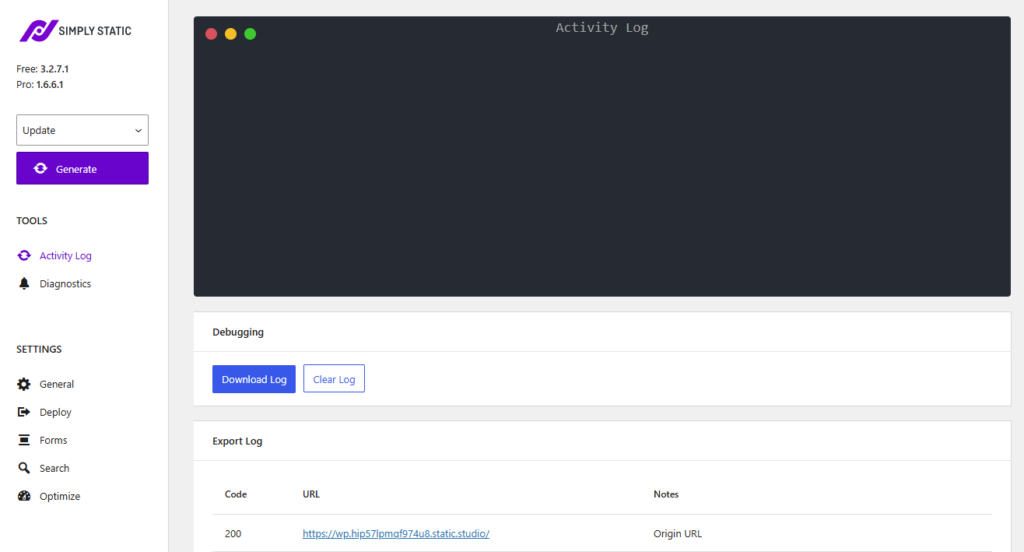
Here’s what happens behind the scenes. When you run an incremental export, Simply Static tracks your whole site to find what’s new or different. This implies that we still need to fetch all your WordPress pages and files from your website to compare them, but we only perform follow-up tasks for the changed results.
Note: Incremental exports do not work for ZIP-based and Tiiny.host exports. That’s because we create an entirely new ZIP file each time you run an export. There won’t be any files to compare against.
Other deployment methods accept incremental updates.
How to use single exports
Unlike incremental exports, single exports allow you to update the page or post you’re currently working on. It lets you export updates without leaving a page.
Why use single exports
For example, let’s say you made a few quick edits to your blog post. Maybe you fixed a typo, swapped out an image, or updated a paragraph.
In this case, using a single export is the fastest way to push those changes live on the current page you’re working on. It will create a static export for that specific page and add it to your live site. This saves you the time of going back to Simply Static to run a full export.
Aside from quick fixes, you can also use it to test how a single page looks immediately after changes.
How to perform a single export
Follow these steps to run a single-page export:
- Navigate to the page or post you want to update.
- Edit the page/post using the WordPress page editor. You will find a meta box in the right sidebar called Simply Static, which contains a couple of actions:
- Export static page button.
- Delete static page link.
- Click Export static page to start a static export of the current page.
- Then, wait for a confirmation message that the export is complete.
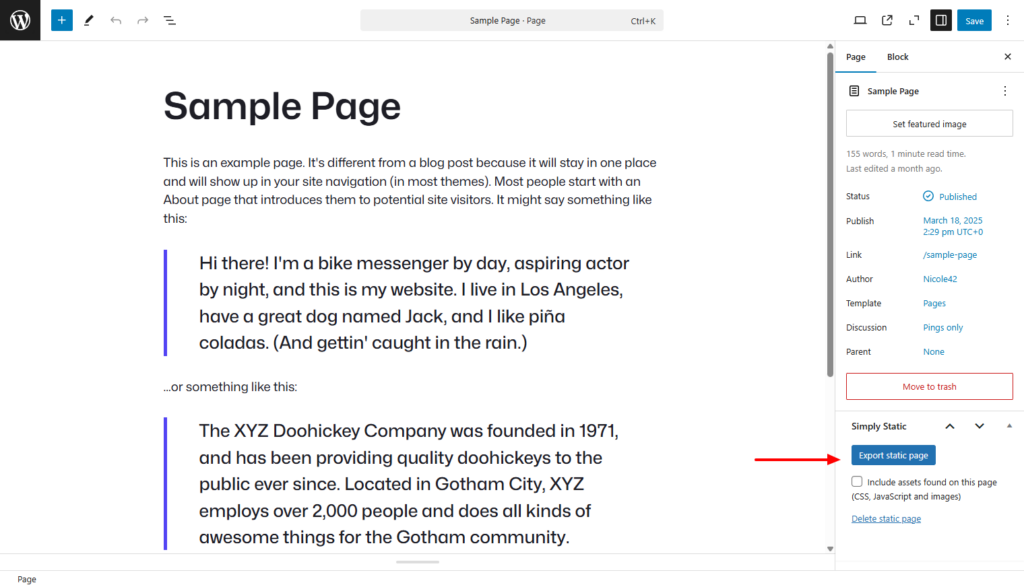
Single Exports don’t just update the single page/post you are exporting. It will also update the assigned category and tag pages, your homepage, extract and export all images from that page, and update the XML sitemap.
Tip: You can view the progress of your single export by heading over to Simply Static > Settings > Activity Log.
Need even more control over what gets exported? Like adding specific pages, files, or directories you’d Simply Static to export or delete in your static site? That’s where the build export type comes in.
How to use build exports
Build exports are somewhat similar to single exports, but the idea behind it is slightly complex.
Generally, build exports let you define a custom list of page URLs, files, and directories you’d like to export or delete on your static site. You can reuse a build whenever you need to update the same parts of your site again.
Why use build exports
You can use build exports to get more control over which parts of your site get updated. Here’s how they’re useful.
You can:
- Create a custom list of the exact pages, files, or folders you care about.
- Save that list as a reusable build. So the next time you update those items, you won’t have to start from scratch.
- Assign the build to specific pages or posts, like blog posts, docs, product pages, or other custom post types. That way, when any of them change, you can export just what’s needed.
This method is not only fast, easy, and efficient, but it’s also flexible. You choose exactly what gets deployed and when. Since you always know what’s included, this can reduce errors.
It is also handy for pages or files you update often. Let’s see how you can set it up.
How to perform a build export:
Follow these simple steps to set up a build export:
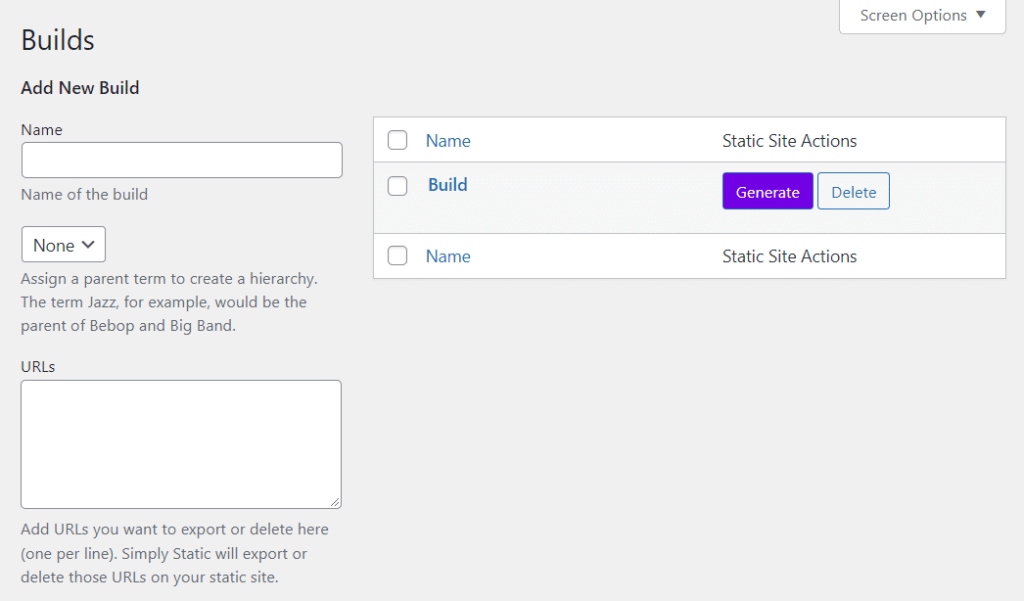
- Go to Simply Static > BuildsIn the context of Simply Static, builds are the process of creating a static version of your WordPress website. in the WordPress dashboard.
- Give your build a name that you can easily remember (or that shows its purpose).
- Next, type or paste your list of page URLs and file paths in the relevant fields. Each URL or file path should be on its own line.
- Then, click Add new build to add your build export. Your newly created build is added on the right side of the screen.
- You can also assign Builds to posts, pages, or any other custom post type that isn’t recognized by the Single export type.
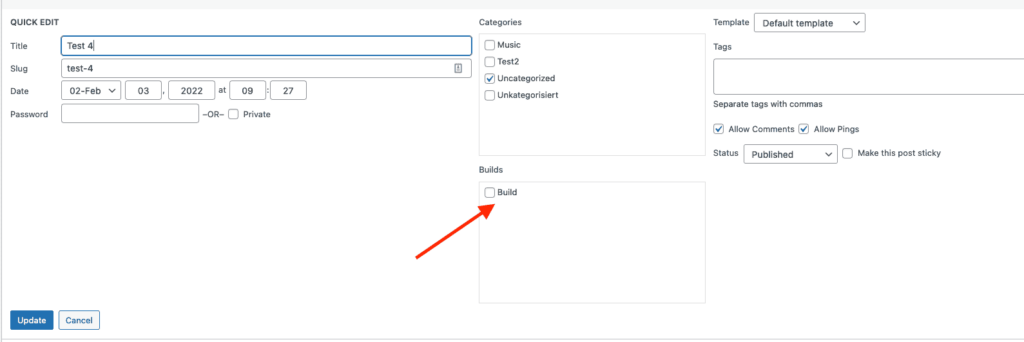
To run a Build you just created, you can simply click the Export Static button that appears next to it. That’s pretty much it.
Choose the right static export option for your site
It’s easy to select the right static export option for managing your content once you understand what each option does.
Full export is the default static export in Simply Static. Because of this, it’s great when you’re launching a brand new site or making large-scale updates at once.
From there on, you can use:
- Incremental updates to export updates for parts of your site you’ve changed.
- Single exports to deploy quick updates on a single page.
For pages or posts that don’t recognize single exports, you can create and assign build exports to make your work easier and save time. Overall, the choice of which static export type to use depends on the scale and frequency of your content updates.
In this guide, we’ve also taken an extra step to describe how you can easily configure each of these static export types in Simply Static Studio and WordPress.
It’s up to you now. Get started with Simply Static Studio today and simplify your static site management!
Table of Contents

