Table of Contents
Hosting your static WordPress site on NetlifyA platform for automating web projects that provides hosting and serverless backend services for web applications and st… WordPress can offer you a seamless, fast, and secure experience.
If you’ve ever wondered how to integrate the power of WordPress with the efficiency of Netlify, you’re in the right place.
We’ll dive into the world of Netlify and WordPress, ensuring you have all the knowledge you need to make an informed decision.
In this (beginner-friendly) guide, we’ll cover:
- What Netlify is.
- Why you might want to host WordPress on Netlify.
- How to host your static WordPress site on Netlify.
So before we get into the how, first, let’s take a look at Netlify itself.

What is Netlify?
Netlify is an all-in-one static hosting provider. Think of it as a platform that allows you to deploy websites without the complexities of traditional web hosting.
With automatic deploymentThe act of pushing the static files generated by Simply Static to a live environment where users can access them. from platforms like GitHubA web-based platform for version control and collaboration, allowing multiple people to work on projects at once., Netlify offers features such as forms, analytics, and artifact exports.
This means you can have staging sites for your static websites, allowing for quick previews before going live.
In simpler terms, Netlify makes the process of getting your website online smoother and more efficient.
What is a static website?
Static websites are primarily composed of fixed content, with each page as a separate HTMLHyperText Markup Language. It’s the standard language for creating web pages. file.
Unlike dynamic websites, which utilize server-side languages like PHPA widely-used programming language especially suited for web development. to generate real-time content based on user interactions or database queries, static websites deliver the same pre-built content to every visitor.
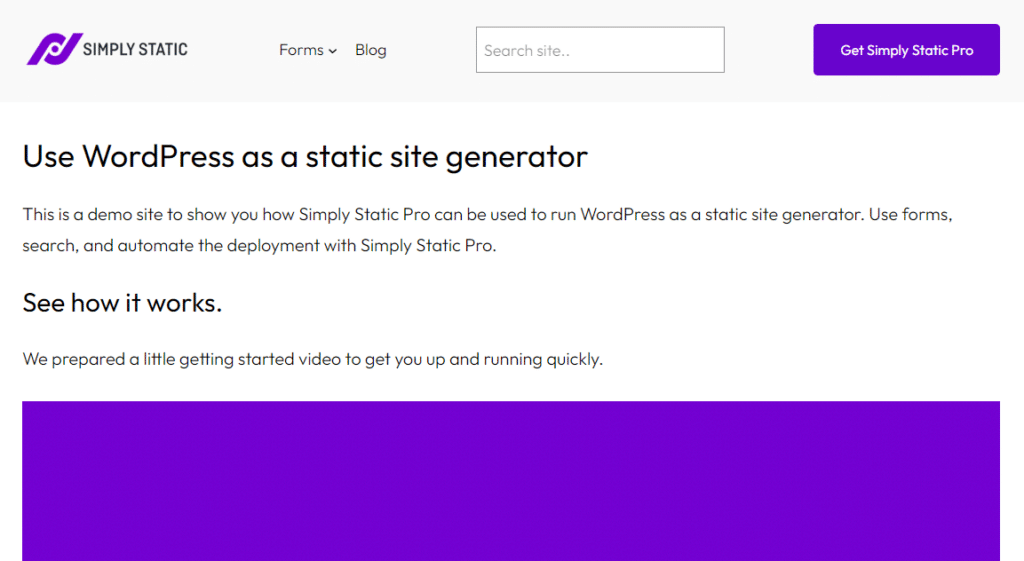
This structure, often enhanced with JavaScriptA programming language used in web development to create interactive elements on a webpage. for interactivity, ensures rapid loading times since there’s no wait for server-side content generation or database fetches.
These websites, devoid of server-side processing, are ideal for relatively consistent content, such as portfolios, blogs, and informational pages. When paired with platforms like Netlify, they offer unparalleled performance, security, and deployment ease.
Why host WordPress on Netlify?
There are a few very good reasons why you might want to host your static WordPress site on something like Netlify.
Speed and performance
Static sites are inherently faster than dynamic sites. By hosting your WordPress site on Netlify, you leverage the speed of static sites, ensuring your visitors get the best experience.

But speed’s benefits extend far beyond user satisfaction; they play a pivotal role in search engine optimization (SEO).
Google values site speed, often rewarding faster sites with better rankings. Additionally, quick-loading sites cater to on-the-go users in the mobile-centric digital age, further boosting SEO.
In essence, a faster site retains visitors and amplifies its visibility in search results, giving you a competitive edge.
Better security
Static sites, like the ones you’d host on Netlify, are safer. Without all the moving parts that dynamic sites have, there’s less that can go wrong.
This means there’s a smaller chance of someone hacking your site or causing trouble.
Automatic deployments
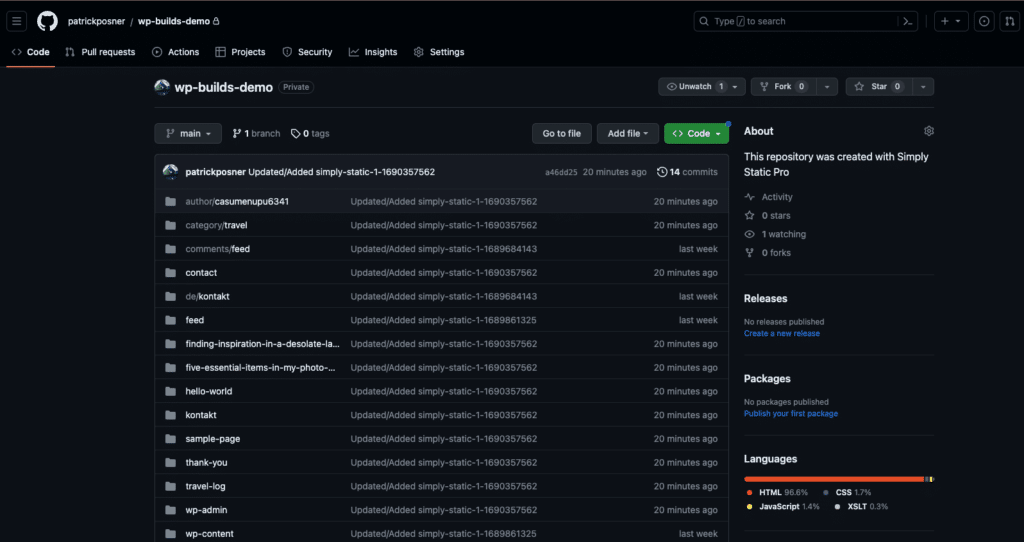
Netlify’s integrationThe act of combining different systems, software, or functionalities to work together as a unified whole. with platforms like GitHub can automatically deploy any changes you make, ensuring your site is always up-to-date.
Scalability
Netlify is designed to handle varying amounts of traffic. Whether your site has a few visitors or experiences a sudden surge in users, Netlify ensures it remains accessible and responsive at all times.
Who would benefit from Netlify the most?
Front-end developers, back-end developers, full-stack developers, and even DevOps specialists can benefit from the speed and security offered by Netlify.
For instance, a front-end developer might build a web application requiring rapid content rendering. By hosting their application on Netlify, they ensure users experience smooth and responsive interactions.
Similarly, a back-end developer might develop an API or a service that needs to be accessed frequently and reliably. Hosting on Netlify ensures that these services are always available with minimal latency, providing a seamless experience for users.
How to host your static WordPress site on Netlify
Taking your WordPress site to the next level means optimizing for speed, security, and efficiency.
One of the best ways to achieve this is by making your WordPress site static and hosting it on platforms like Netlify. In this tutorial section, we’ll guide you through the process step-by-step.
Step 1: Make your WordPress website static
To begin with, you’ll need to convert your dynamic WordPress site into a static one. This might sound complex, but with the right tools, it’s a breeze.
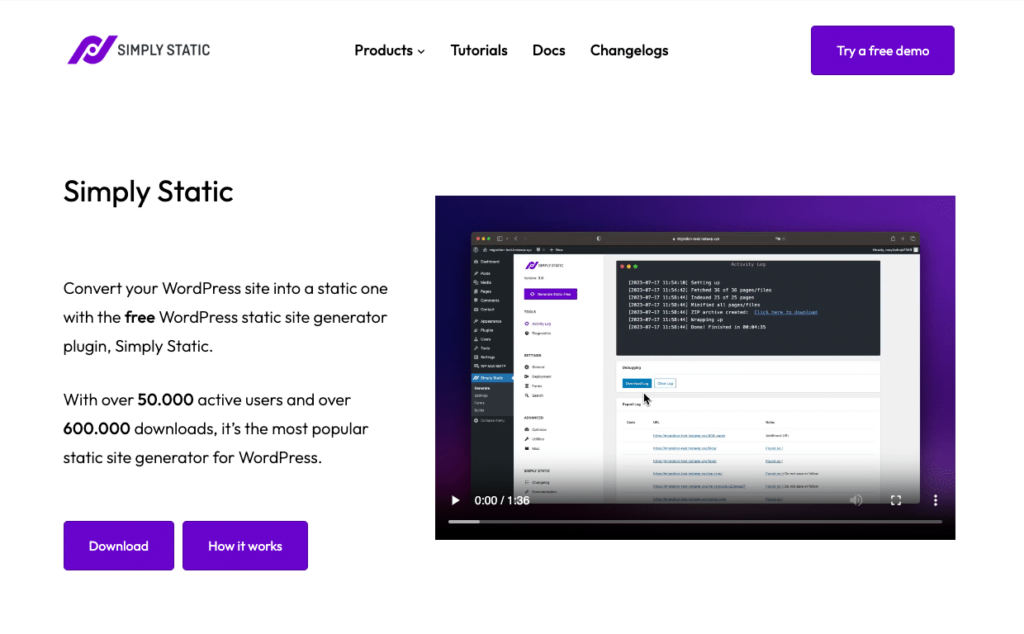
Enter Simply Static, the best static site generator for WordPress.
Why use Simply Static?
Simply Static is a WordPress pluginA piece of software that adds specific features to WordPress. designed to transform your dynamic WordPress site into a static one.
Using Simply Static, you can easily convert your dynamic content into a static format with just a click. This not only enhances the speed and security of your site but also eliminates the need for caching plugins and frequent updates that can sometimes introduce vulnerabilities.
Try static WordPress hosting free for 7 days
No credit card. No maintenance. No headaches.
Make your WordPress website static
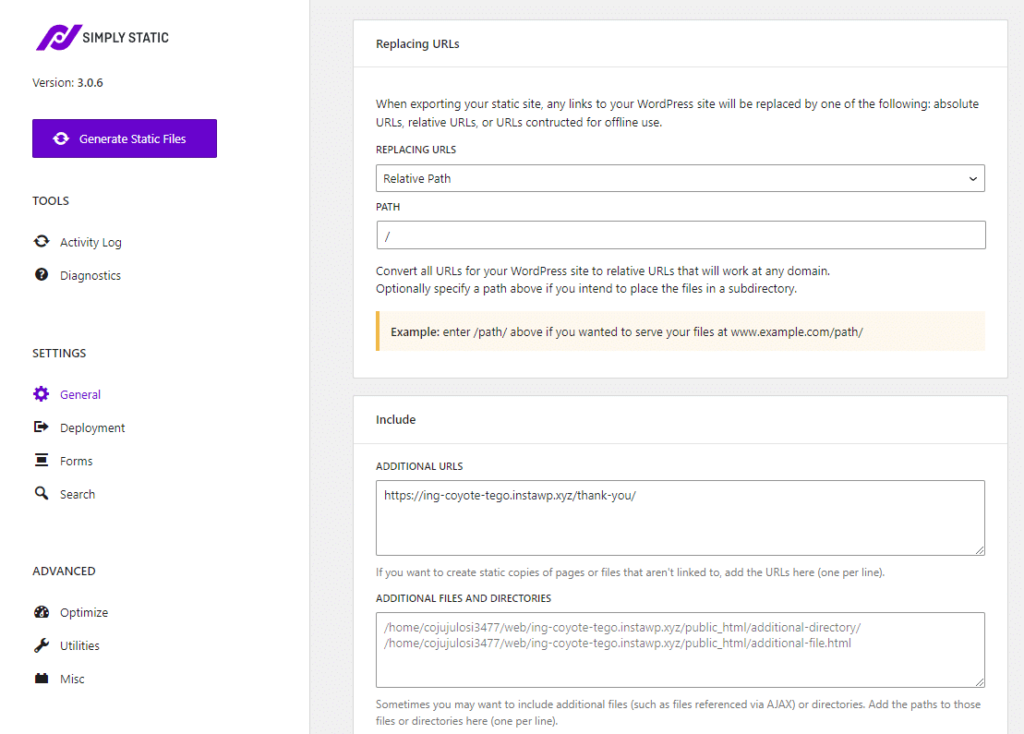
Once you’ve added Simply Static to your WordPress website, take the following steps to get it set up on your existing site:
Prepare your website for conversion
- Go to the Simply Static Settings from your WordPress dashboard and click on the General tab.
- Select the type of URL structure you want for your static site.
- In the Include/exclude section, specify any URLs of pages you want to exclude from the static site generation.
Next, we’ll link Simply Static with Github. Git is useful in this case because it has version controlA system that records changes made to files and directories so that you can recall specific versions later. functionality and allows us to use collaboration.
Because Netlify integrates with Github, every time we push a change to GitHub, Netlify will deploy it to our live site too.
Step 2: Link up Simply Static with Github
Integrating Simply Static with GitHub ensures that every change, and every update, is tracked and managed efficiently.
This provides a safety net for your website’s development and streamlines the deployment process.
- Start by preparing for the GitHub integration. If you’re new to the world of GitHub, head over to github.com and create an account.
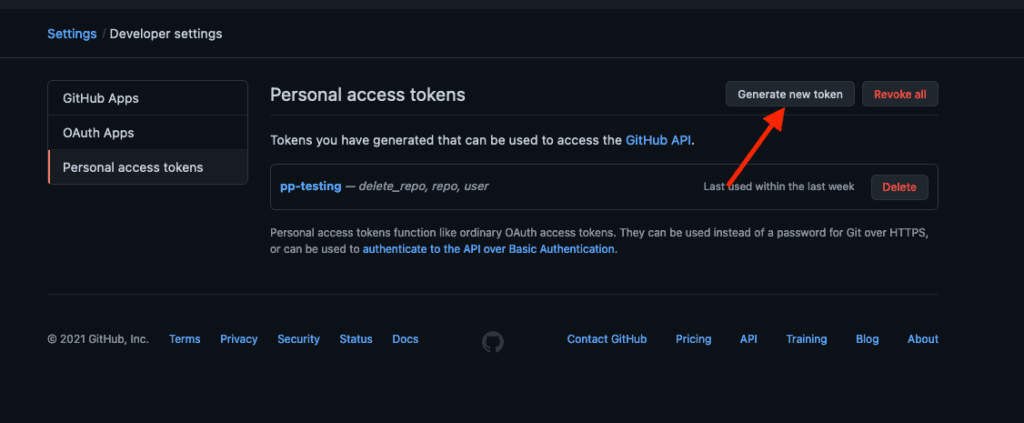
- This account will be your static website files’ repositoryIn version control systems like GitHub, a repository is the most basic element, a folder where all the files for a parti… (or storage). Once set up, you’ll need to create a personal access token. This token acts as a bridge, allowing Simply Static to communicate with GitHub and send files over.
- For detailed steps, see our GitHub integration guide.
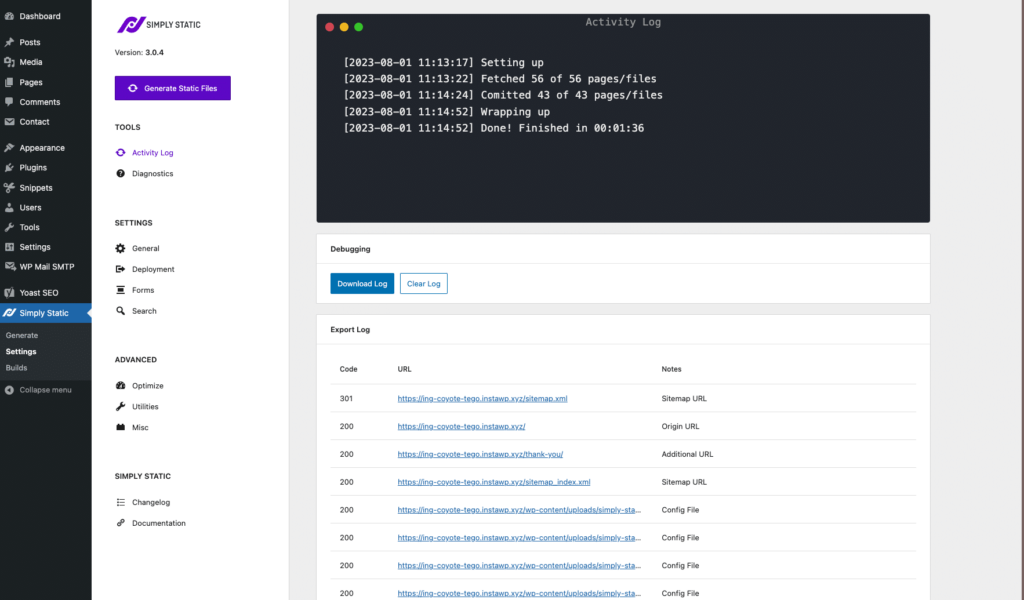
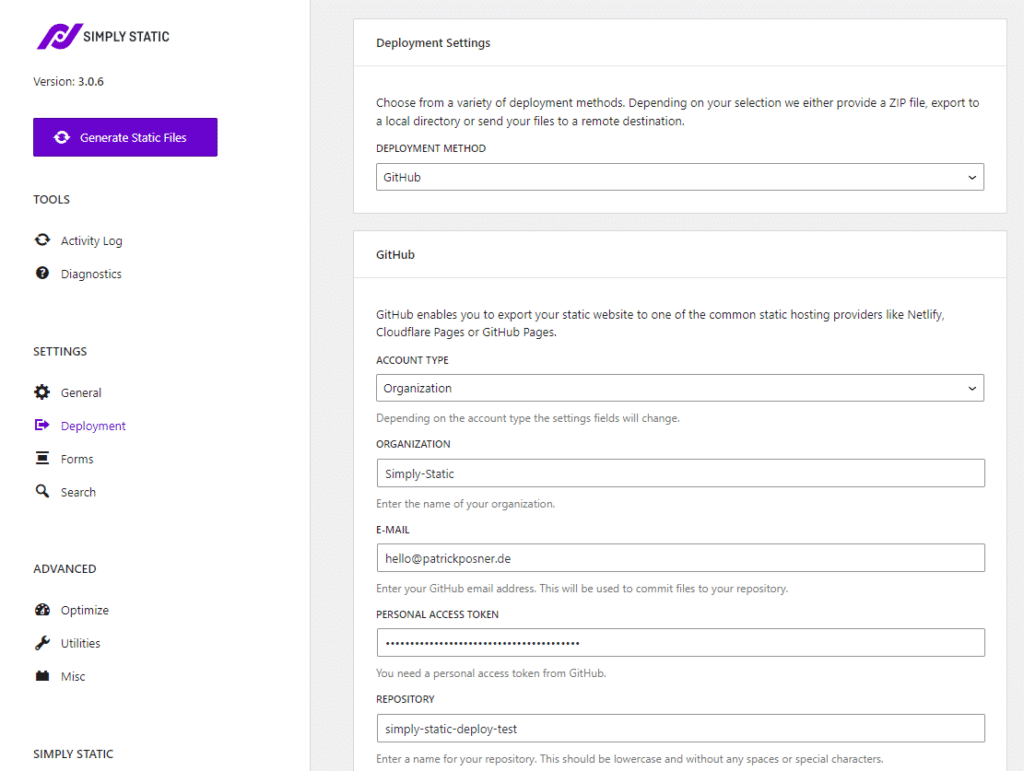
- With GitHub ready, return to your WordPress dashboard. Navigate to Simply Static > Settings > Deployment.
- Here, you’ll see an option for GitHub as a deployment method. By selecting this, you’re telling Simply Static where to send your static website files. Fill in the required details, ensuring that the repository you specify is the one you just set up on GitHub.
- Now, it’s time to exportThe process of saving the files and data from your WordPress site to create a static site. your website files to GitHub. In the Simply Static settings, there’s an option labeled Generate Static Files.
- Clicking this starts converting your dynamic WordPress site into static files and sending them to GitHub.
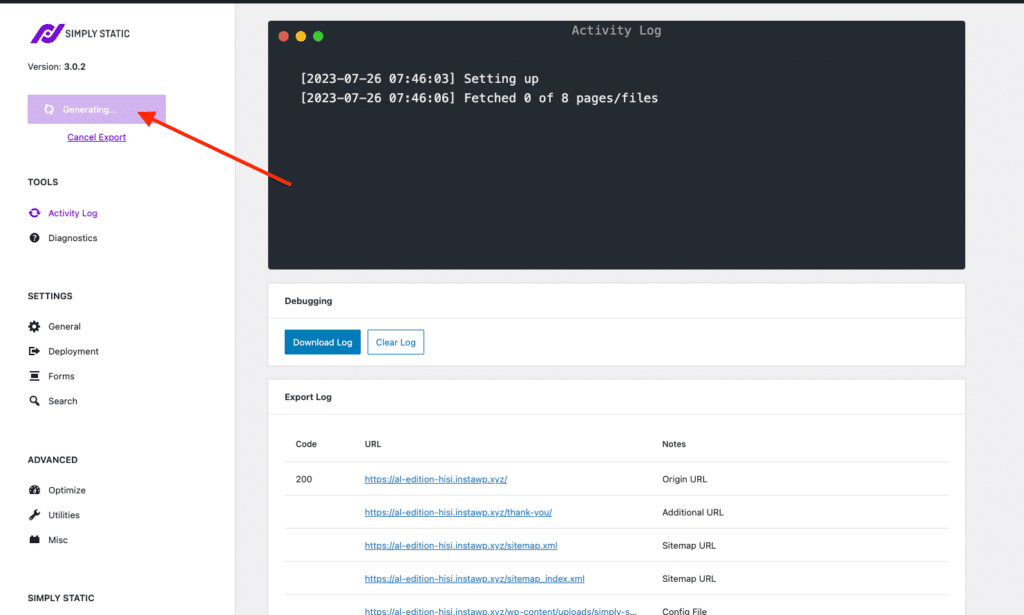
Once complete, your static website files will reside safely in your GitHub repository, ready for deployment.

Step 3: Create your Netlify account
Having set up GitHub, we now turn our attention to Netlify.
Netlify is a platform optimized for deploying static websites. It’s efficient, fast, and integrates seamlessly with GitHub. This means every change you make on your website and update on GitHub can be automatically reflected on your live site hosted on Netlify.
To get started with Netlify, visit netlify.com and sign up. While various plans are available, the free plan is robust enough for most projects.

When signing up, using the GitHub login option is a good idea. This links Netlify and your GitHub account directly, making future deployments smoother.
Step 4: Deploy your site to Netlify
With your static website files in GitHub and your Netlify account set up, it’s time to bring it all together.
- In your Netlify dashboard, you’ll find an option labeled Add new site. Clicking this presents you with various options, one of which is Import an existing project.
- Since your static website files are already in GitHub, this is the option to choose.
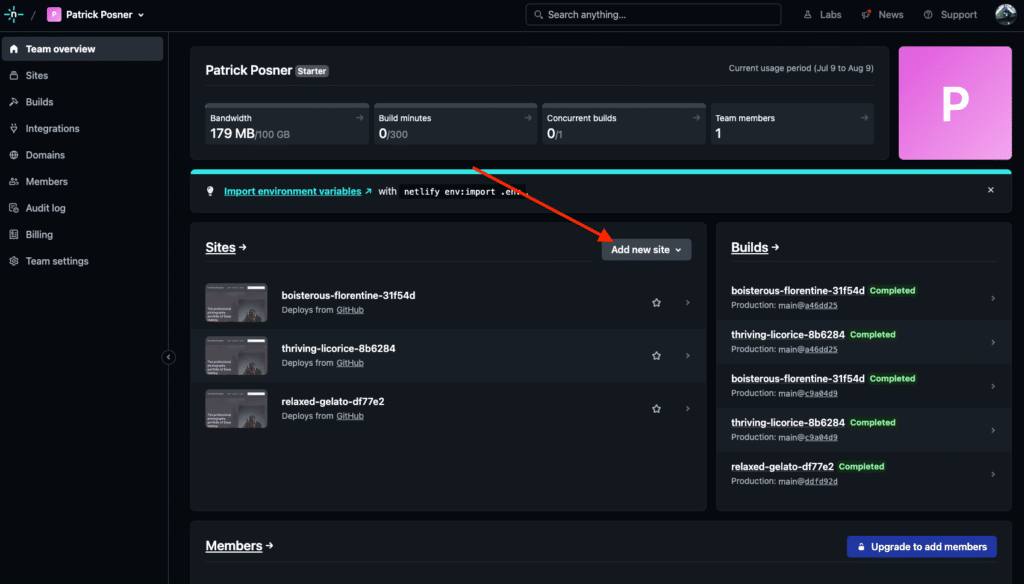
- Following this, you’ll be prompted to select GitHub as the provider. This action tells Netlify where to fetch the website files from. After selecting your GitHub repository, Netlify will present some optional settings. Review them, and once satisfied, click Deploy.

- As the deployment process kicks off, you can monitor its progress. Once complete, Netlify provides a temporary custom domain to view your website.
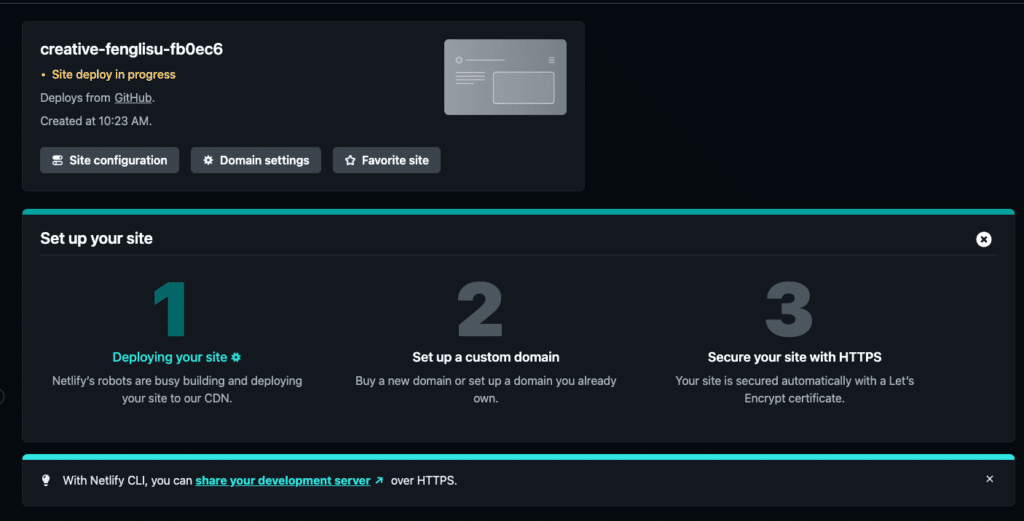
Step 5: Pointing your custom domain to your Netlify site
After deploying your site on Netlify, you’ll notice that it’s accessible via a Netlify subdomain, something like [name-of-your-site].netlify.app.
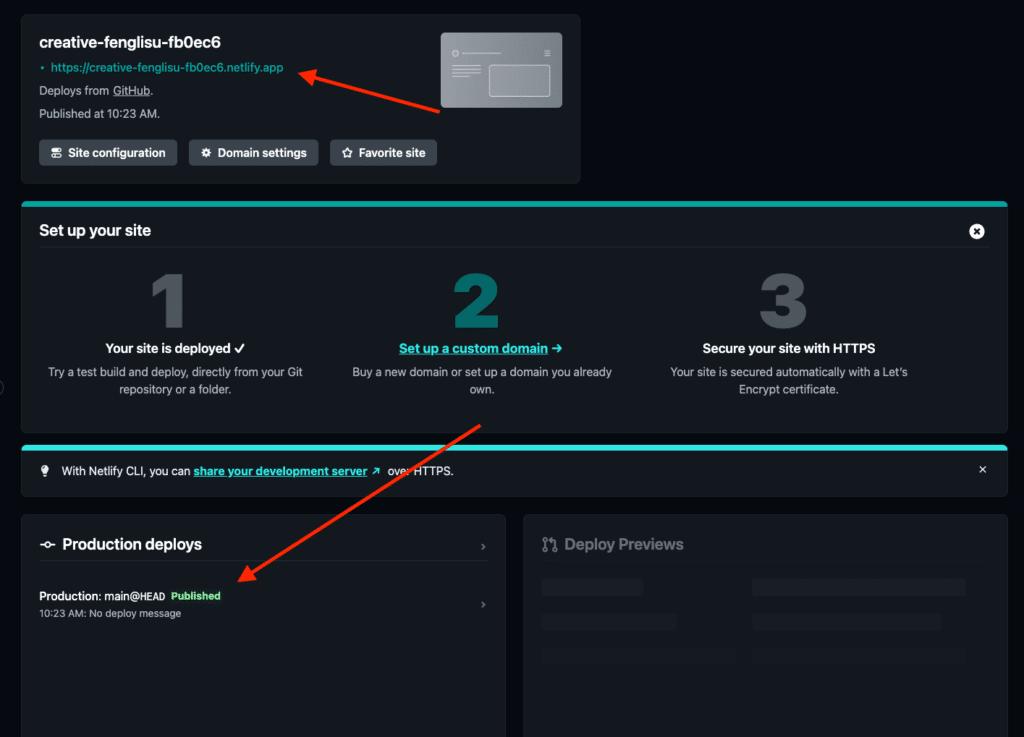
While this is great for testing and previewing, for a professional look and to make it easier for your audience to find you, you’ll want to use your own custom domain.
Setting up your custom domain with Netlify
- Assigning the domain:
- In your Netlify dashboard, go to Site settings > Domain management > Production domains.
- Here, you’ll see an option to Add a domain. Enter your desired domain name and click on Verify.
- Domain registration status:
- If your domain is unregistered, Netlify allows you to register it. By doing this, your domain will automatically use Netlify DNS, simplifying the entire process.
- If your domain is already registered (you own it), you’ll need to confirm that you’re the owner. Once you’ve done that, select Yes, add domain to link the custom domain to your site.
- Domain setup:
- If your domain was registered through Netlify or uses Netlify DNS, the setup is automatic. You can explore additional options like domain aliases, redirects, and branchIn version control systems like GitHub, a branch is a separate line of development that can be merged back into the main… subdomains.
- If your domain was registered elsewhere and you wish to keep using your current DNS provider, you’ll need to update DNS records at your provider to direct your domain or subdomain to your site on Netlify. This usually involves setting up CNAME or A records, and Netlify provides clear guidance in their docs on how to do this with various domain registrars.
- Final steps:
- After you’ve directed your custom domain to Netlify, there’s a standard waiting period for DNS propagation. During this time, the changes spread across the internet.
- Once propagation is complete, entering your custom domain in a browser should display your website hosted on Netlify.
While the default Netlify subdomain remains active even after you’ve set up a custom domain, it’s the custom domain that you’ll want to share.
And just like that, your static website, started in WordPress, transformed by Simply Static, and stored in GitHub, is now live on Netlify.
Use Netlify and WordPress together
The digital landscape is constantly evolving, and with it comes the need for websites that are both dynamic in content and efficient in delivery. This guide has highlighted the benefits of integrating WordPress with Netlify, which offers flexibility and performance.
At the heart of this integration is Simply Static, a WordPress plugin that efficiently converts dynamic content into a static format. This transformation improves site speed and enhances security, making it less susceptible to common vulnerabilities.
This integration offers a compelling option for those seeking a practical and efficient solution for their WordPress sites. Consider leveraging Simply Static and Netlify to optimize your site’s performance and security.

