Table of Contents
Just a quick heads-up!
This article is more than 24 months old and might contain outdated information.
If you want to learn the latest about Simply Static, visit our documentation or watch our video course.
One mission before the release of the new Simply Static Pro was to make my own website entirely static. This helps a lot checking everything is working fine and to further improve the process.
Initial planning
Starting with Why
Besides the fact that I believe in Simply Static and the future of static hosting, I wanted to get all the benefits a static website can provide: better performance as there a no database requests required anymore, better security for my website as there isn’t a direct connection between my system and public static website anymore and to reduce the costs of running a larger WordPress project with a fair amount of premium plugins for things like search and SMTP mailing.
The starting point
My website is a WordPress Multisite and with weekly blog posts, documentation, and pages it obvious that I have a couple of images. The total page size per subsite was around 250 MB. I’ve hosted my website on a droplet on Digital Ocean (Hello SpinupWP) and used CloudflareA company that provides services like security and website speed improvement. It acts as a protective layer between the … for my DNS management. One of the requirements of the static conversion was to not drastically increase the number of tools to get that working and instead reduce the number of plugins and services involved.
Cloudflare Pages
I had a couple of requirements for my new static hosting provider:
- free
- some kind of caching
- a GitHubA web-based platform for version control and collaboration, allowing multiple people to work on projects at once. integrationThe act of combining different systems, software, or functionalities to work together as a unified whole. with build-to-deploy
- SSLSecure Sockets Layer. A technology that encrypts the data transferred between a user and a website.
While you can do most of these things with additional services (like Cloudfront with AWS) or getting the SSL certificate directly from your domain provider, I like to keep things as simple as possible.
After visiting and evaluating a couple of different services like NetlifyA platform for automating web projects that provides hosting and serverless backend services for web applications and st…, GitHub PagesA hosting service from GitHub for publishing static websites directly from a GitHub repository., Vercel, and cloud providers like AWS or Google Cloud Storage, I decided to give Cloudflare Pages a try.
One thing you will notice is, that all of those static providers have some kind of limitations in their free tier, so take a closer look to evaluate the right tool for the job. Sometimes is just a small note within their terms and conditions, like the exclusion of commercial usage when going with Vercel (ugh).
The limitations for Cloudflare Pages are:
- 500 buildsIn the context of Simply Static, builds are the process of creating a static version of your WordPress website. per month
- 20,000 files
- 25 MB maximum file size
These are the important ones, as long as you don’t need 10 domains per project (which seems kind of weird to me). One problem for me (and most WordPress-powered websites) will be the maximum file size of 25 MB. If you don’t optimize your images you will end up hitting the limit even with a small portfolio website.
Image Optimization and CDN
TinyPNG
To fix that, I started optimizing my images. I used the TinyPNG API for that. They do have a WordPress Plugin to bulk optimize all your images in one run.
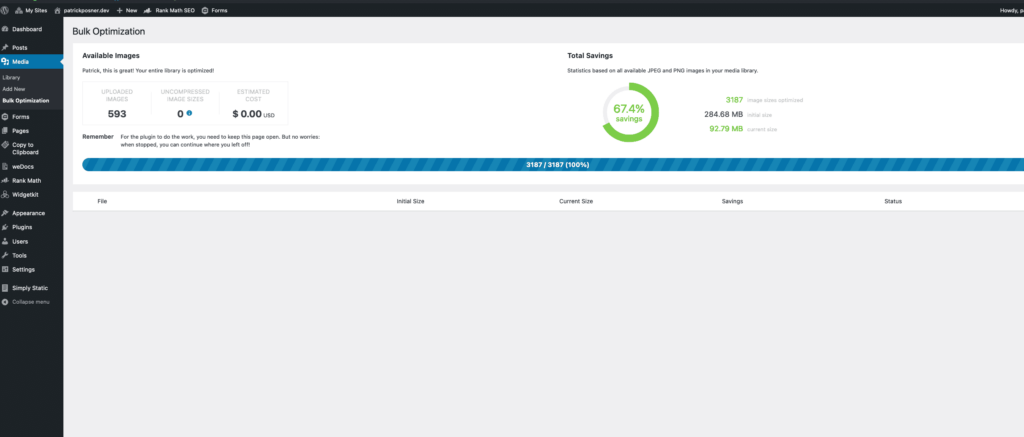
I paid $23 for the entire optimization of all images for all subsites of my network, seemed fair enough for me.
CDN
I optimized my images, but the overall file size (including all image files) was still around 50 MB per website (as you can imagine by viewing the remaining file size in the screenshot above).
The next step was to find a good CDNStands for Content Delivery Network. It’s a system of distributed servers that deliver web content quickly to users base… solution to deliver my media files from. I decided to use a space from Digital Ocean for that job, as I already used them to host my WordPress website. To sync my media files I used the pluginA piece of software that adds specific features to WordPress. WP Offload Media from the awesome team at Delicious Brains (which by the way are now the new developers behind Advanced Custom Fields).
The configurationThe setup process where you specify the settings and options for how a software or system will operate. was pretty easy here:
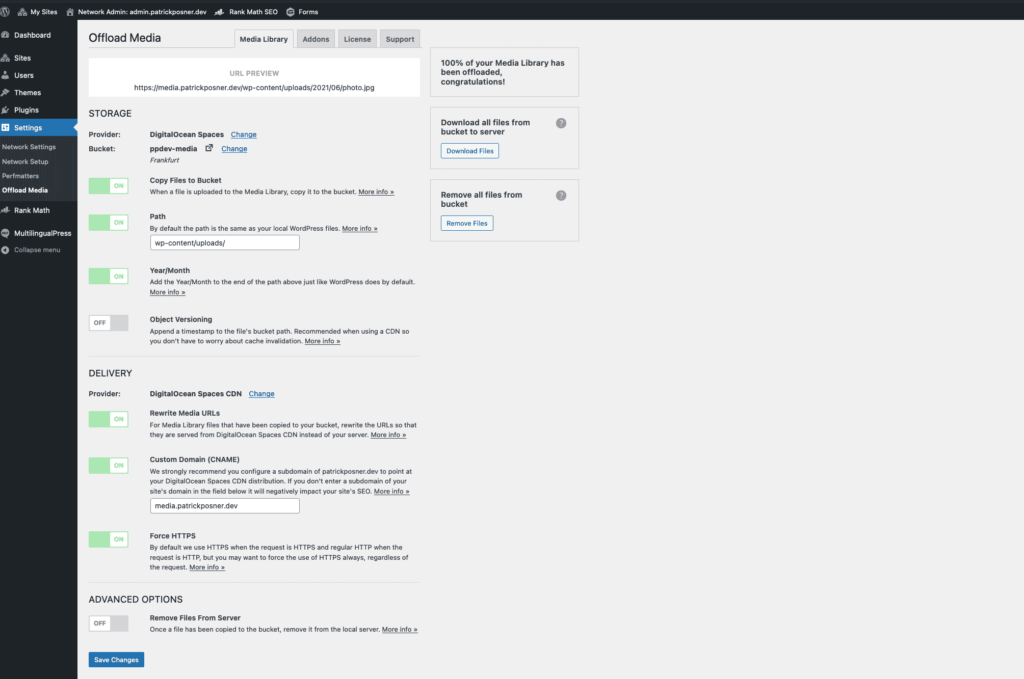
As you can see, there was not that much configuration involved here. I copied all files to the Digital Ocean Space and removed them from my server. I decided to keep the month/year structure from the media library but deactivated the object versioning. That’s something I would recommend to you, as versioning can bring some problems with your paths when converting to a static website.
The hard part here was to add a subdomain to the Digital Ocean space. At first, it seemed required to move the entire domain to Digital Ocean to be able to manage the DNS here and map the subdomain to the space – that’s not true, but really bad documented.
As I use Cloudflare for my DNS and domain management, I will show you the quick way to get that up and running:
- Generate an origin certificate
- Set up the space
- Point the subdomain to the space
Generate origin certificate
Go to your domain in your Cloudflare settings then SSL -> Origin Server
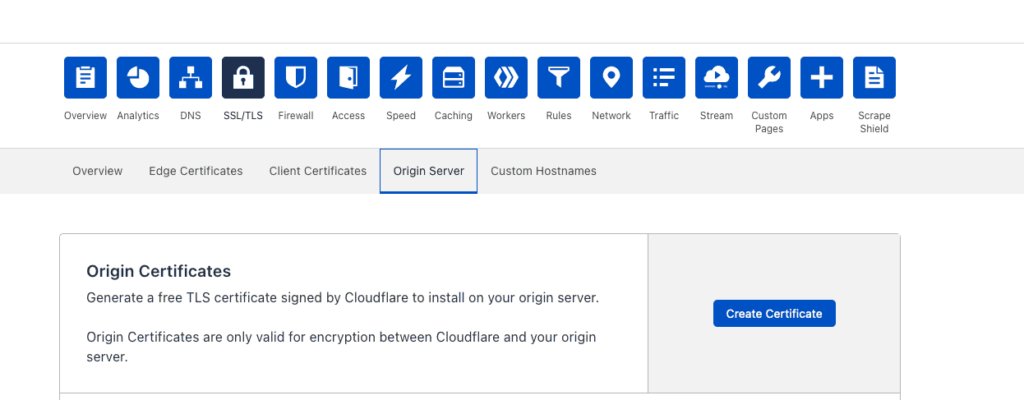
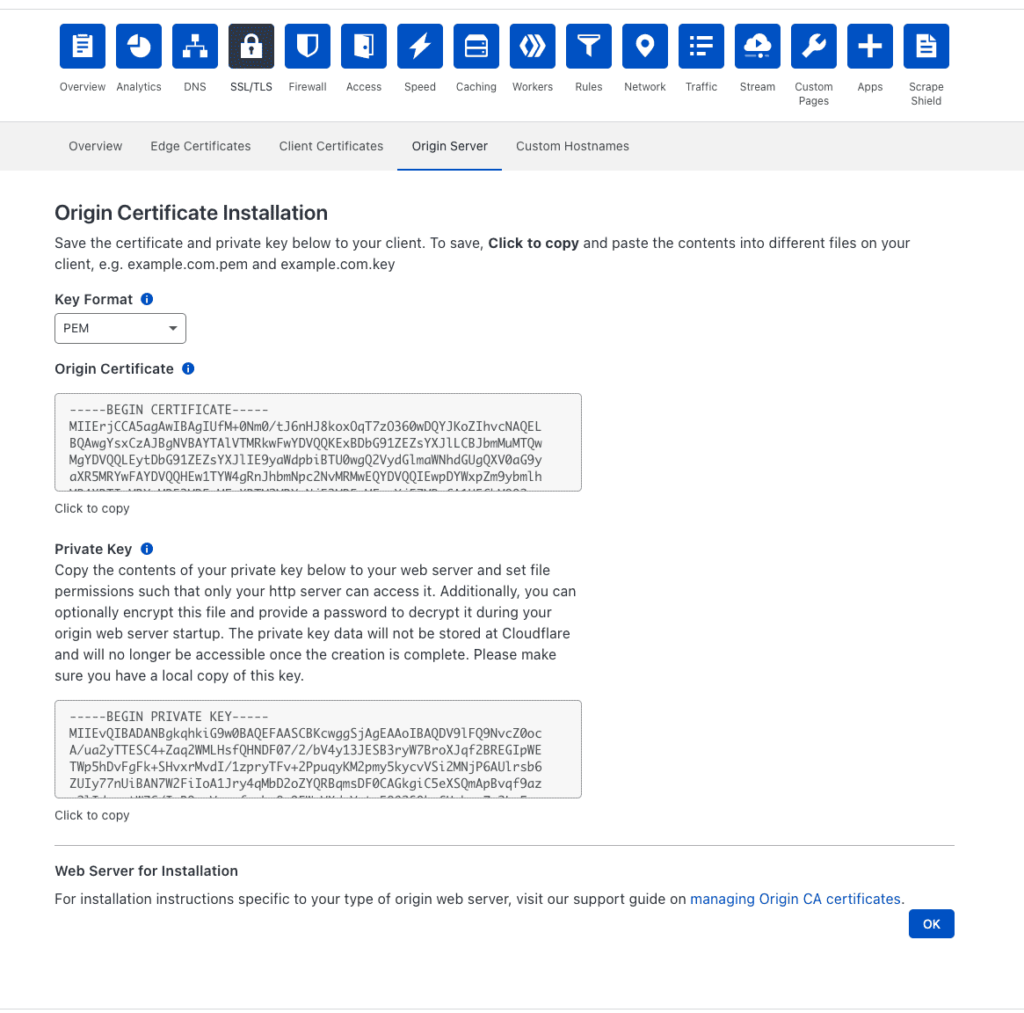
Click on “Create certificate”, you can skip the next settings and click “create” again. You should see the following information:
Set up the space
Leave the tab open or copy that information anywhere you can find it again. Let’s move on to Digital Ocean and create a Space.
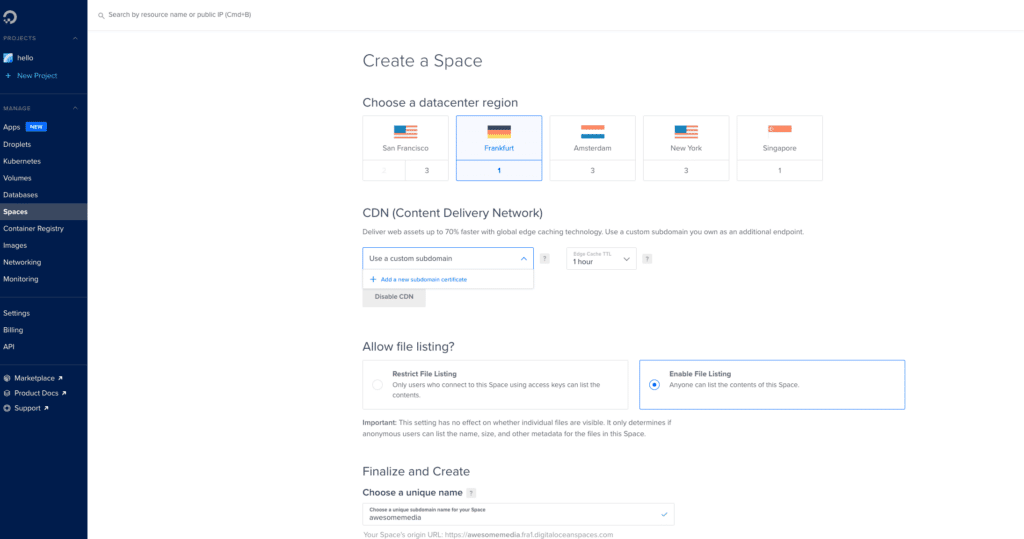
Choose the data center closest to you, choose “Use a custom subdomain” and allow the file listing, the last thing is to give it a name. One thing you will notice is the small link asking you to “Add a new subdomain certificate”. By clicking on it, it opens a small modal window to set up your SSL certificate:
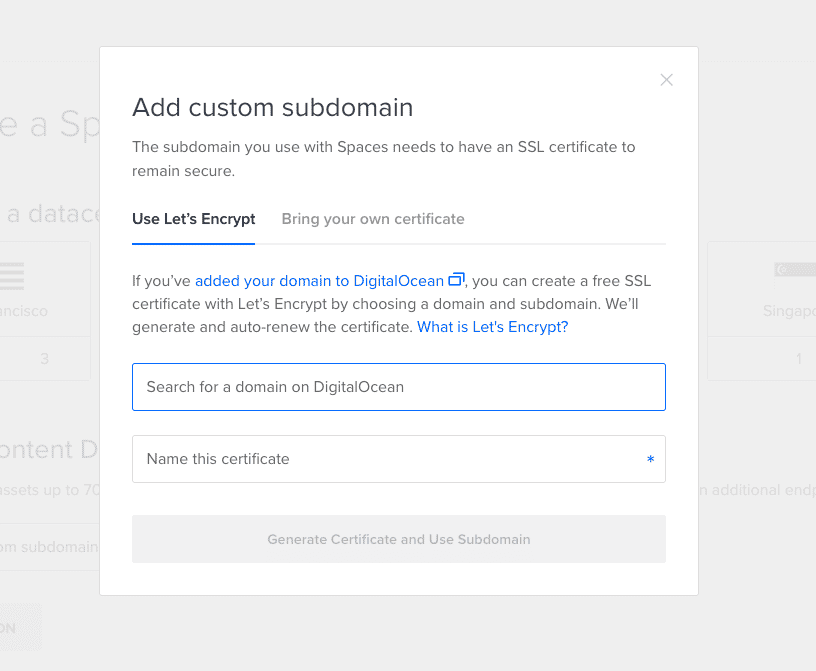
Choose “Bring your own certificate” and paste in the information from Cloudflare. Then save it and finish the setup process for your space. You will get an URL to your space like: awesomemedia.fra1.cdn.digitaloceanspaces.com (depends on your chosen data center), copy that.
Point the subdomain to the space
Now we are moving back to Cloudflare, go to DNS and click on “Add record” and choose CNAME. Enter the name of your subdomain and paste in the URL from your space as a value:

That’s it, you can now move back to the WP Offload media settings within your WordPress admin area and start transfer your files.
Problems after migrating my images to a CDN
For most themes and plugins this should be it, but for me, it wasn’t. Turned out that yootheme.com has its own caching system implemented for images and that can not be deactivated completely. That’s a problem as WP Offload media can not replace that images. I found a good bug fix for that here. Maybe that’s not even needed in future updates, but for now, it worked well.
Generate the static website
I moved back to the backend of WordPress. I had Simply Static and Simply Static Pro already installed here. We will now start with the exact configuration I used to make that work within my multisite.
General
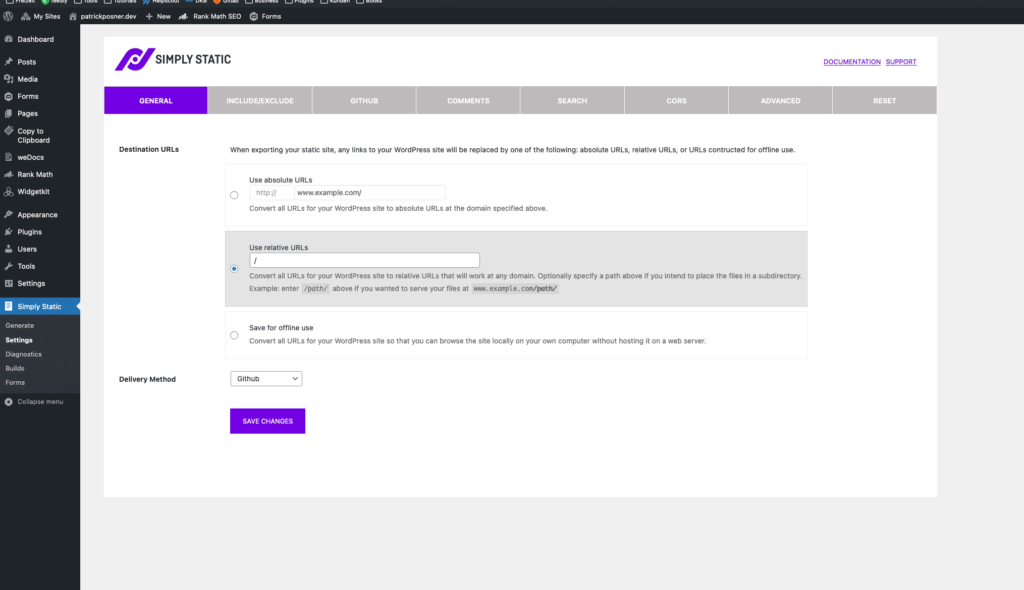
I used “Use relative URLs” because you get a random domain name from Cloudflare Pages when setting up a new static site and I chose “GitHub” as my delivery method as it is required to host your static site on Cloudflare Pages.
Include/Exclude
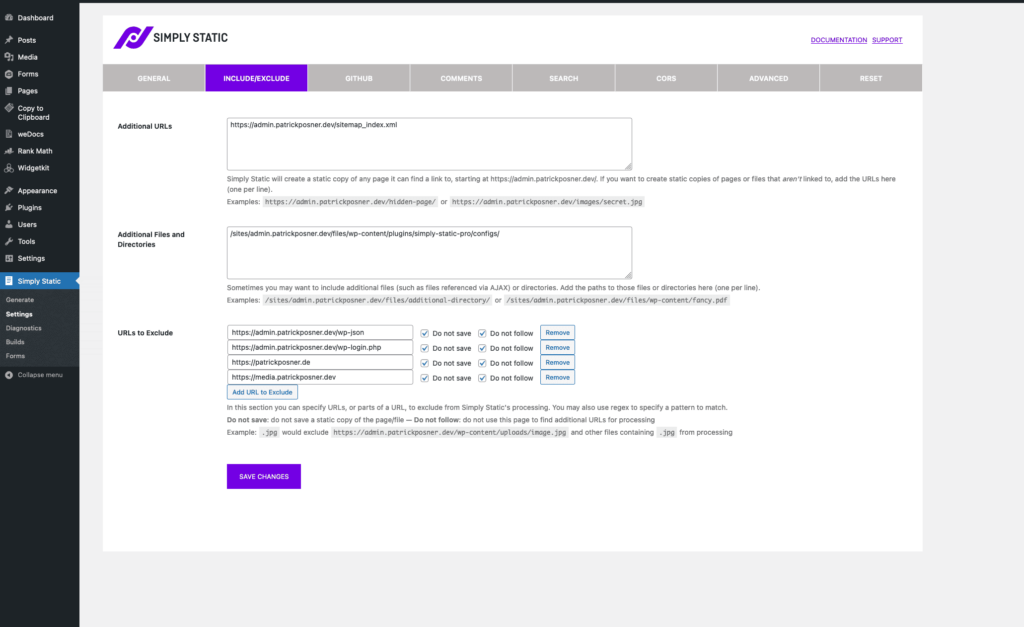
I included the URL to my sitemap which is generated by the RankMath plugin. The link to the path of the config is set automatically as soon as you are using the forms, comments, or search integration from Simply Static Pro.
I also excluded two additional URL’s here:
media.simplystatic.com – that’s the domain for my CDN where all my images are coming from and patrickposner.de because that’s the URL from my other subsite within my network.
GitHub
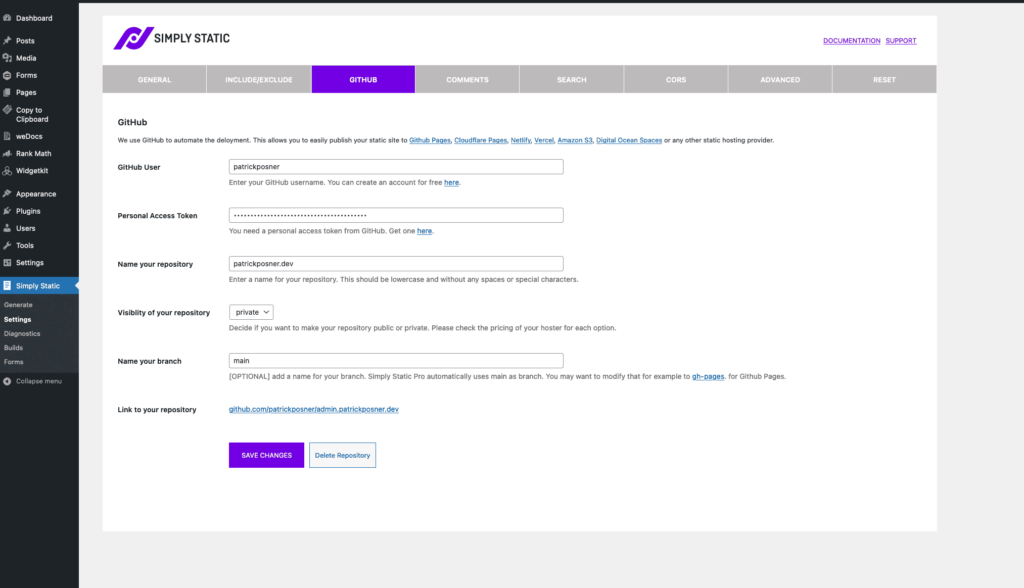
I added the details for my account and named the repositoryIn version control systems like GitHub, a repository is the most basic element, a folder where all the files for a parti… the same as the domain I will be using for that. In my case, I’ve done that for both subsites and used simplystatic.com and patrickposner.de as my repository name.
I skipped the next settings as I don’t use comments on my website and I don’t have the URL for my static website (which is required for Search and CORSCross-Origin Resource Sharing. A security feature in web browsers that controls how different websites can interact with… settings).
Generate
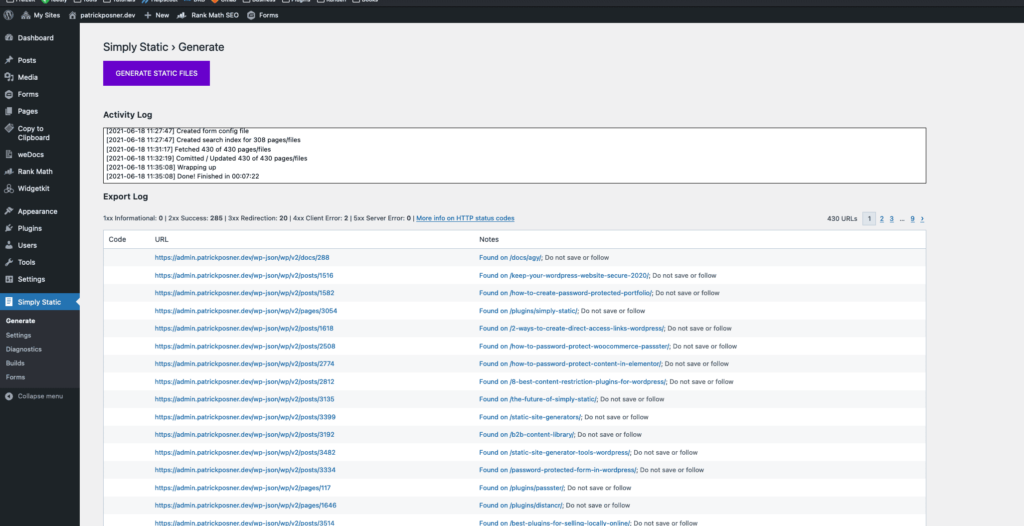
Then I moved to the “Generate” tab of Simply Static and started the generation process of my static website:
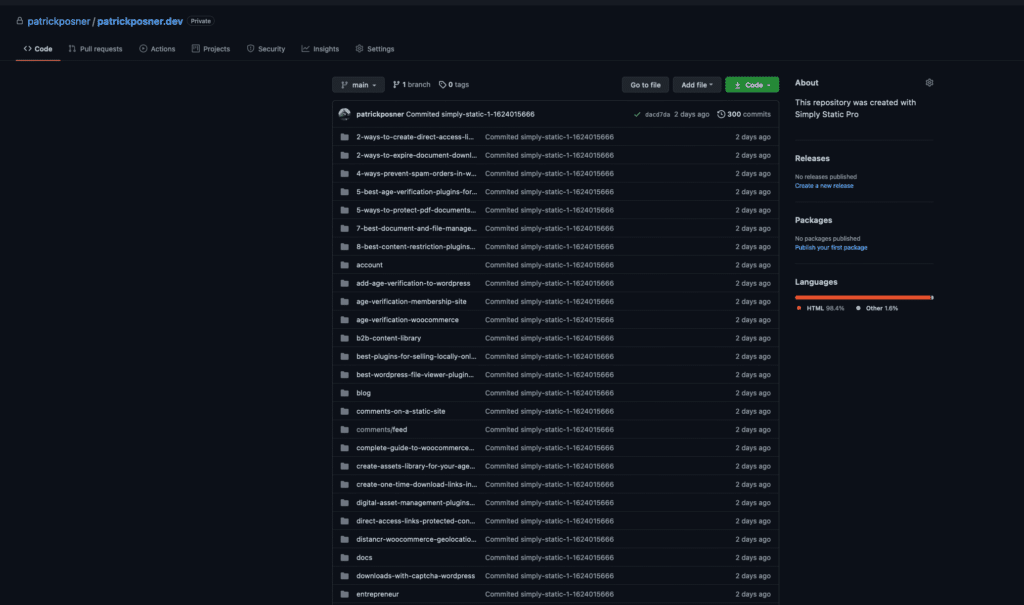
Due to the fact that I used the GitHub integration that resulted in a filled up GitHub repository:
Cloudflare Pages
Then I moved to my Cloudflare account and switched to “Pages” from the menu to create a new project.
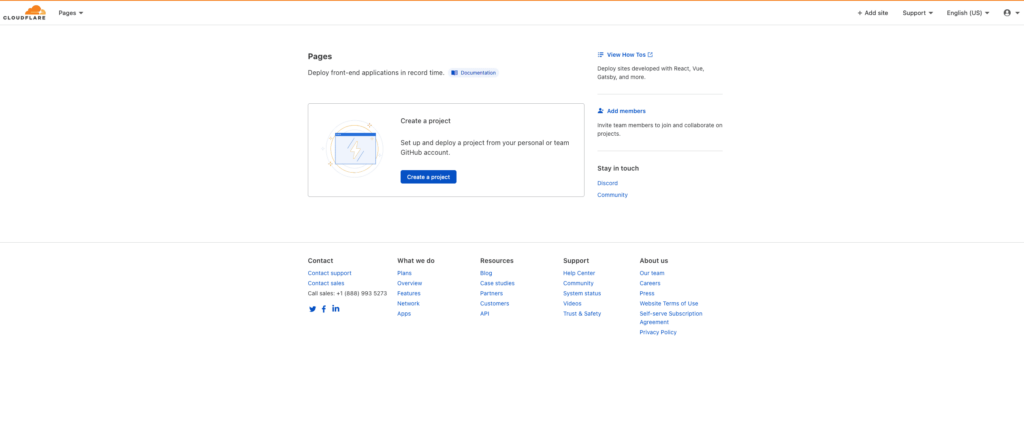
I chose my created GitHub repository and clicked on “Begin setup”.
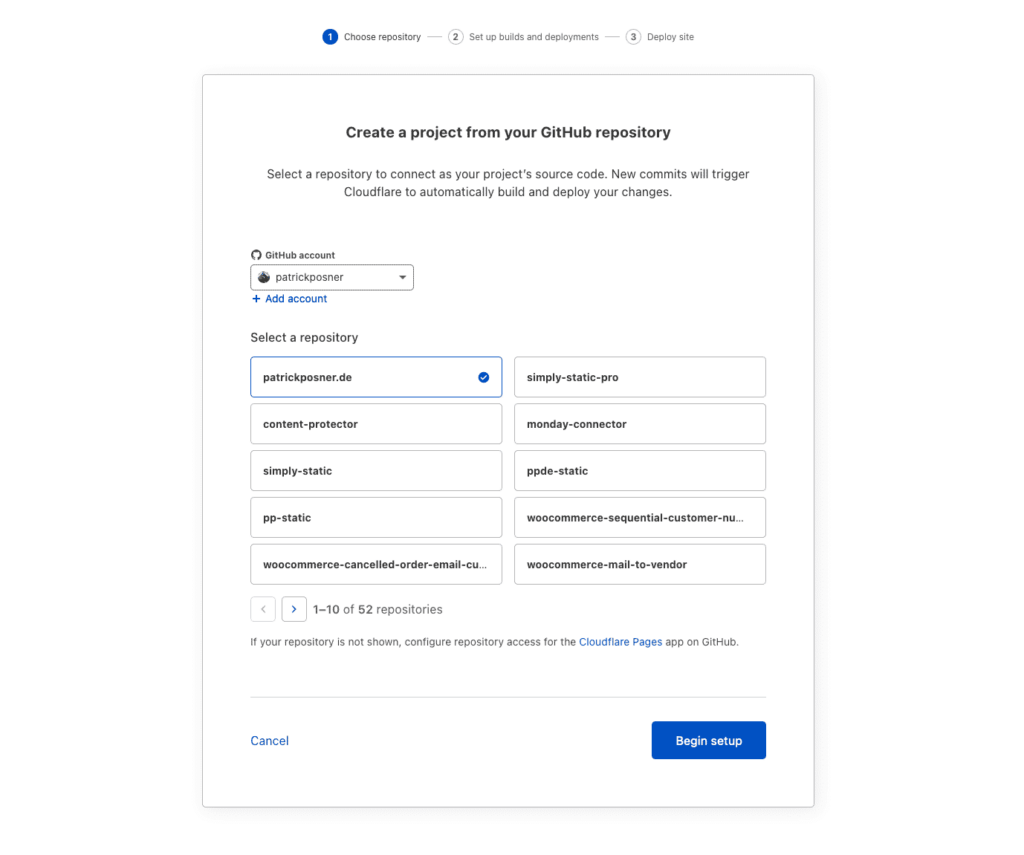
I skipped the next configuration part, as I don’t there was no reason for me to use further builds steps.
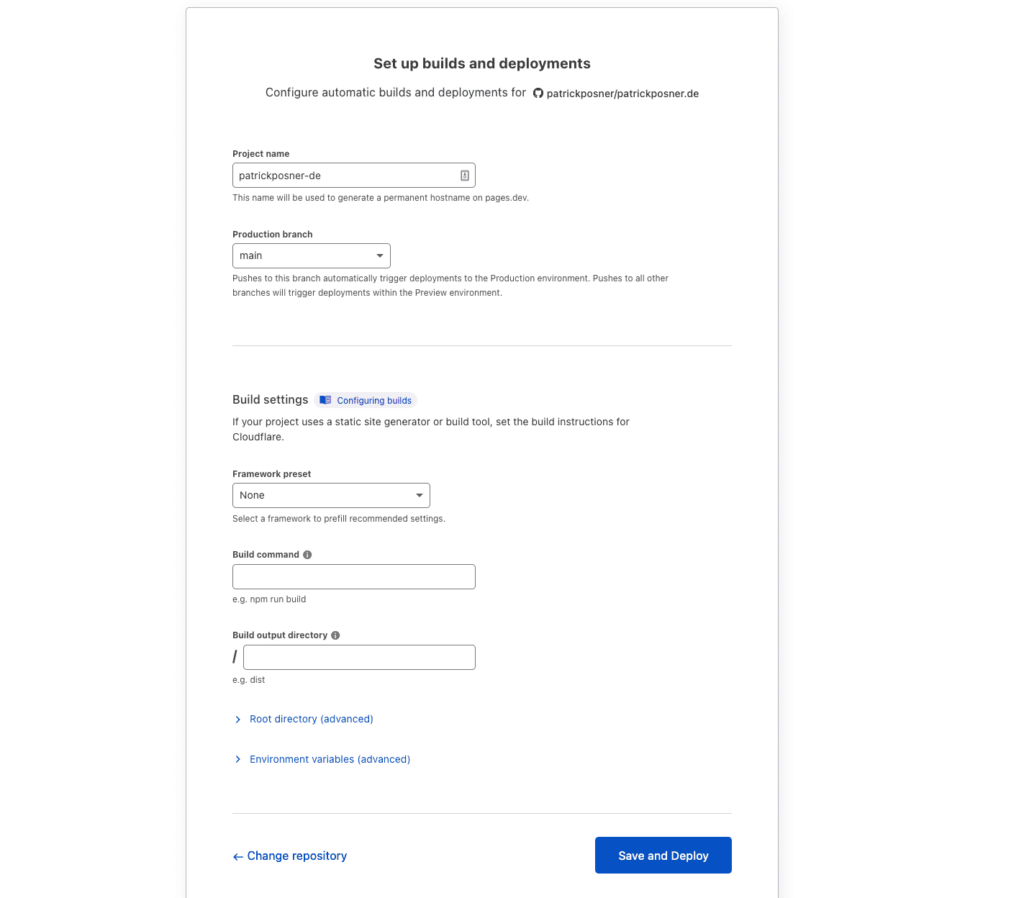
After a couple of seconds I got the result:
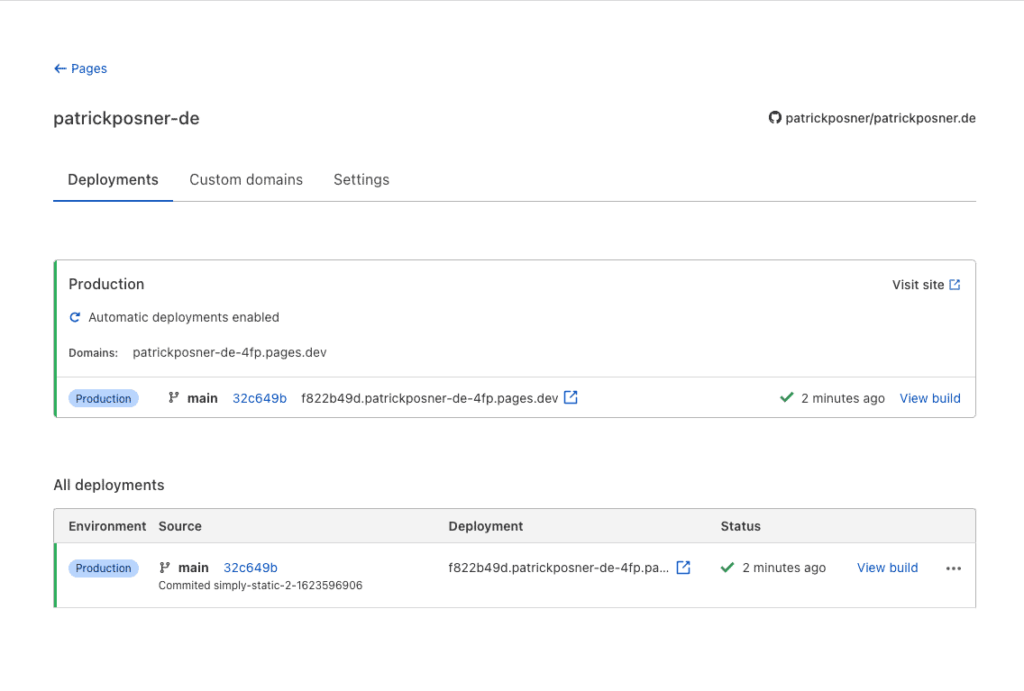
Custom Domain
The last step was to add the correct domain under “Custom Domains”. I used my simplystatic.com domain and added it. Due to the fact that I manage my DNS in Cloudflare, it created the required CNAME record automatically for me, for other providers you simply copy the domain and add a CNAME yourself.
Change URLs in WordPress Multisite
The last step was to change the URLs for my multisite. I decided to follow the pattern admin.domain.com for all subsites. After I changed the URLs in the wp_sitemeta, wp_blogs, and both wp_options tables, I used the plugin Better Search and Replace to find all remaining URLs and rewrite them to the new structure. As Simply Static will convert those URLs on every exportThe process of saving the files and data from your WordPress site to create a static site. you don’t have to worry about that again.
Finally I added a password via htaccess to protect my entire WordPress website from external access.
Okay, I had a running static website hosted on Cloudflare Pages now and a secure way to access my old WordPress installation to manage my content, but a couple of things were missing: Search and Forms.
Finishing the Simply Static configuration
Search
As mentioned earlier, you need the static website URL to use the search and CORS settings in Simply Static. Well, now I had one and was able to finish up the setup.
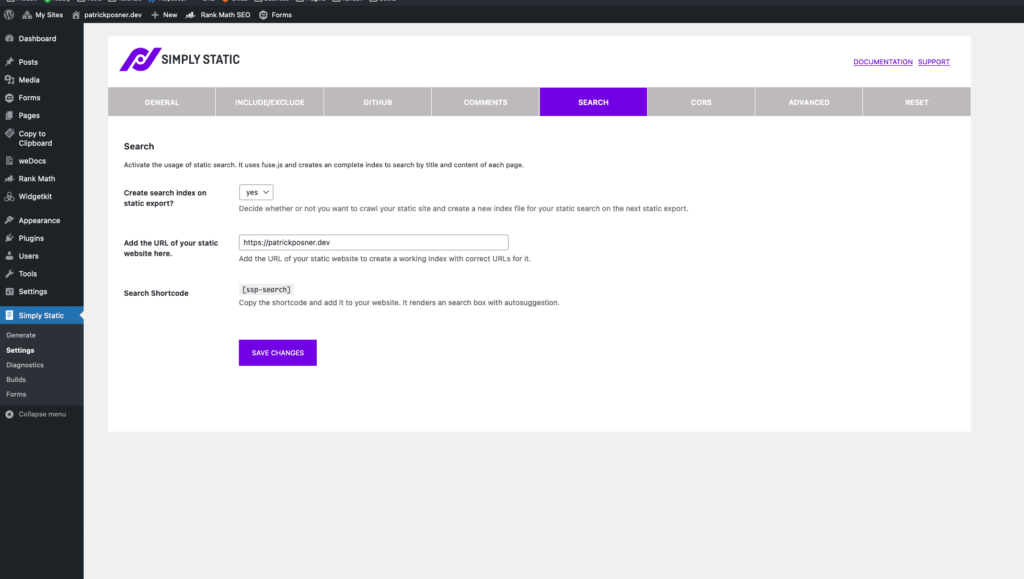
I added the shortcode [ ssp-search ] to my support page as that’s the only search bar on my entire website for now. Before I used the awesome SearchWP plugin here, but will it’s great it was part of my clean-up to switch to Simply Statics implemented (static) solution.
A new search indexA list or database used to make searching faster. based on the static website is created, every time a new static generation is started. Before I did that, I moved on to the “CORS” configuration tab:
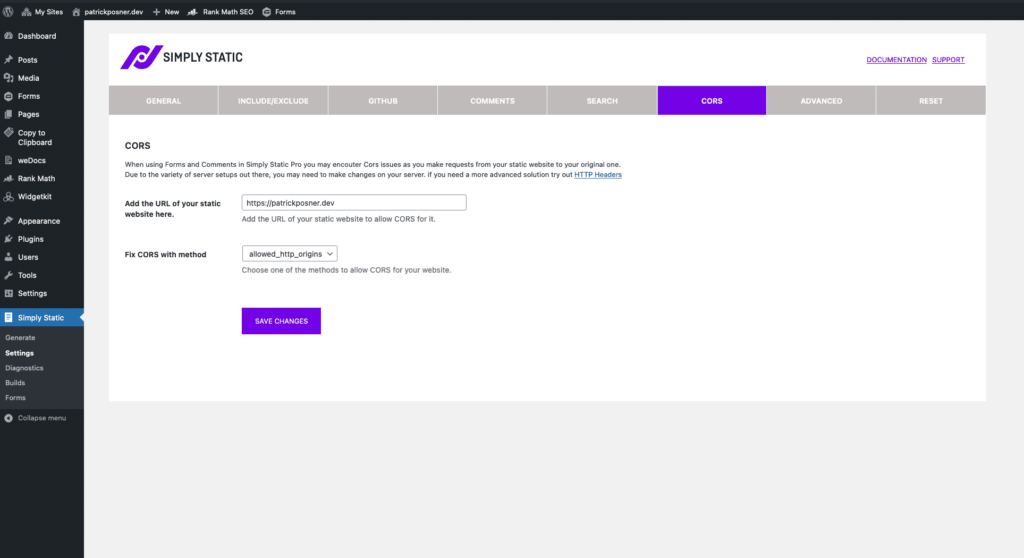
You will notice, that adding the static URL within the search tab (and saving the settings) will automatically update the CORS setting as well (and vice-versa).
Forms
The last thing was adding the form support. I’m using Gravity Forms on my website, which is directly supported by Simply Static, but I had one problem: I use Helpscout as my support system.
Before that, I used the official Helpscout addon from Gravity Forms which is not supported for usage within a static environment. That’s why I decided to create an account at Zapier.
As Simply Static also supports external webhooks when submitting a form on a static website, the setup was pretty easy. I like to mention that using the webhooks feature in Zapier it is required that you have at least the Starter plan which isn’t really cheap at around $17 per month.
If you want a cheaper alternative for sending mails with a webhookA method of altering the behavior of a web page with custom callbacks. These are triggered by specific events, like push… and you don’t need the Helpscout integration, I would highly recommend IFTTT as an alternative. They support webhooks within their free plan, so you can go completely static with your WordPress website without spending any money on external subscription services.
Here is my configuration within Simply Static for the Simply Static Launch form:
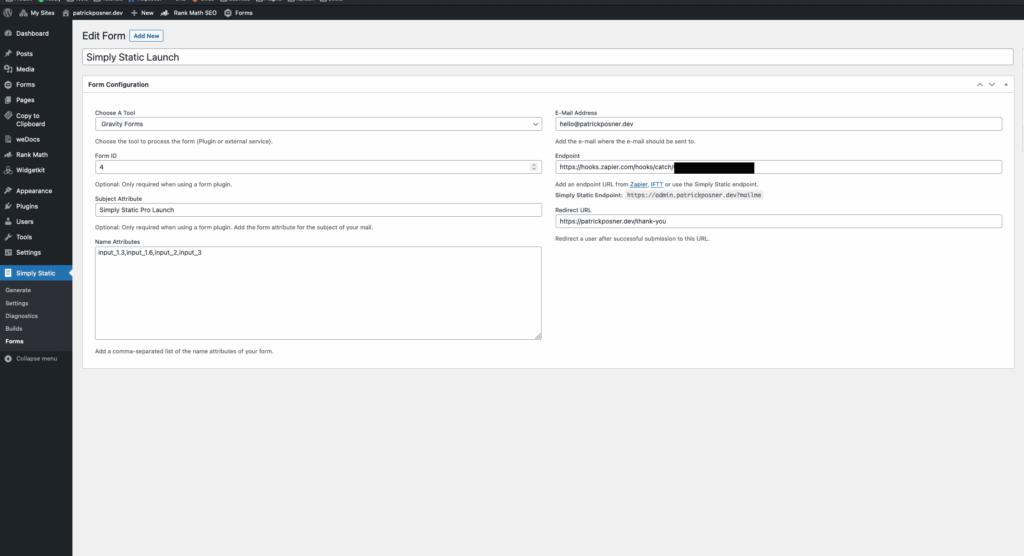
You need to add the name attributes from your form here. The naming is not that straightforward in Gravity Forms and it seems that you can not really set custom name attributes here. Besides that, it works fine.
To find the correct name attributes, I visited the page where it’s embedded, opened the browser consoleA tool within web browsers that helps developers troubleshoot issues by displaying errors, warnings, and other informati…, and inspected the elements:
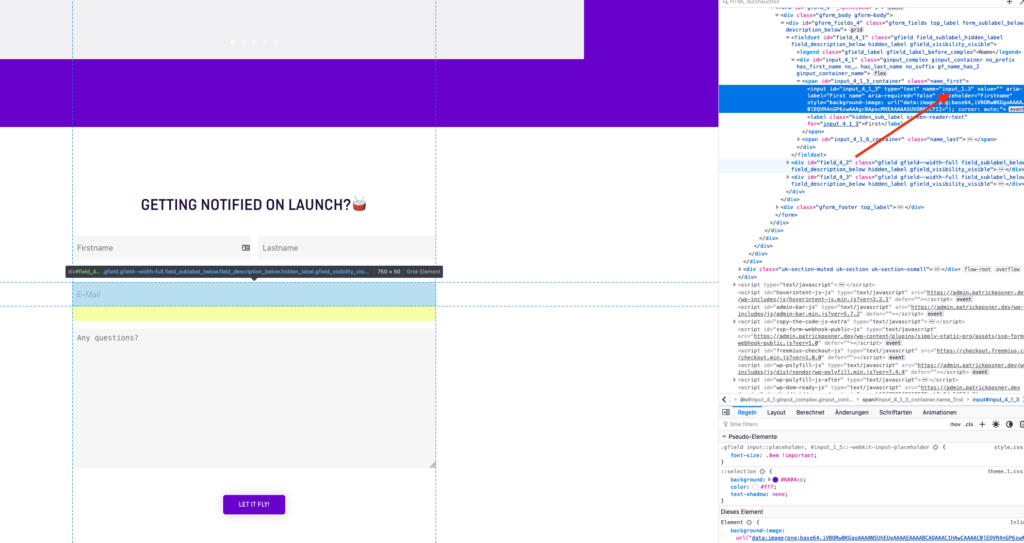
Now I had all information in place to start a new static generation. Instead of running a full export (which isn’t a good idea as you have a limitation of 500 builds per month on Cloudflare Pages, and each file is a separated commit due to the limitations of the current GitHub API), I created a build and added a couple of pages (like the support page where I added the search shortcode) and used that:
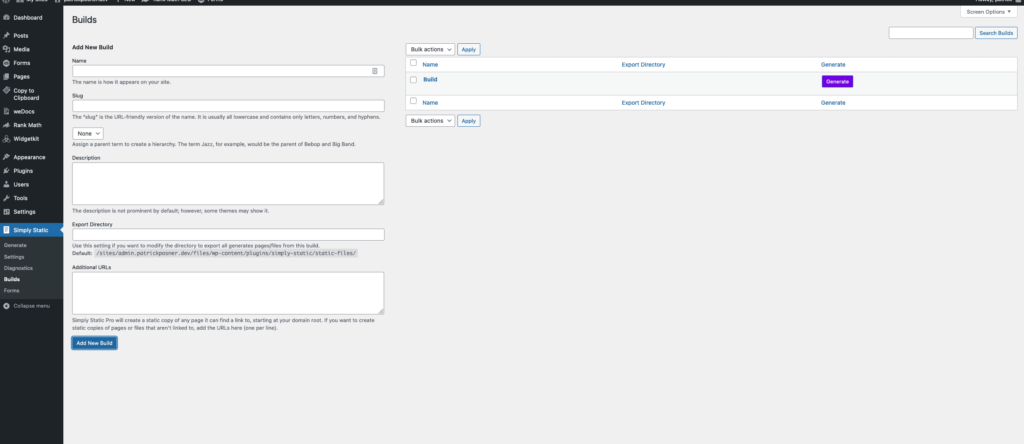
Because I activated the creation of the search index within the settings, it took a while, but once finished I had an updated support page, a JSONJavaScript Object Notation. A lightweight format for storing and exchanging data. file for my search index, and the config file for my forms.
Zapier
I don’t want to make a full introduction to Zapier here, as I will cover that in all detail later as a blog post, but just to show you how I connected everything.
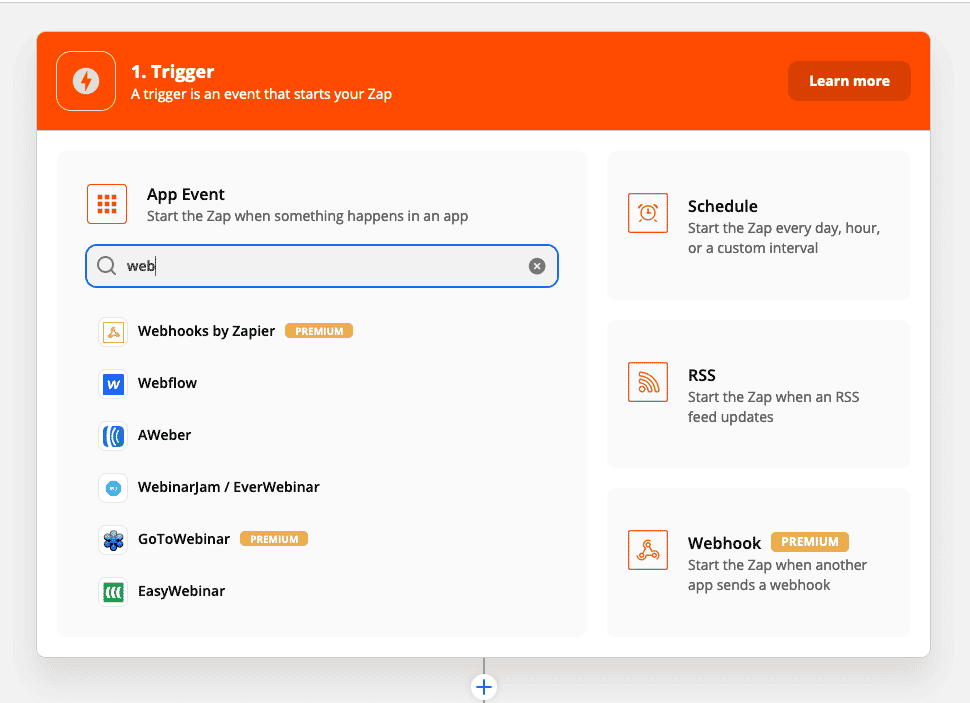
I started searching for “Webhooks by Zapier”:
Then I used “Catch hook” within the trigger configuration:
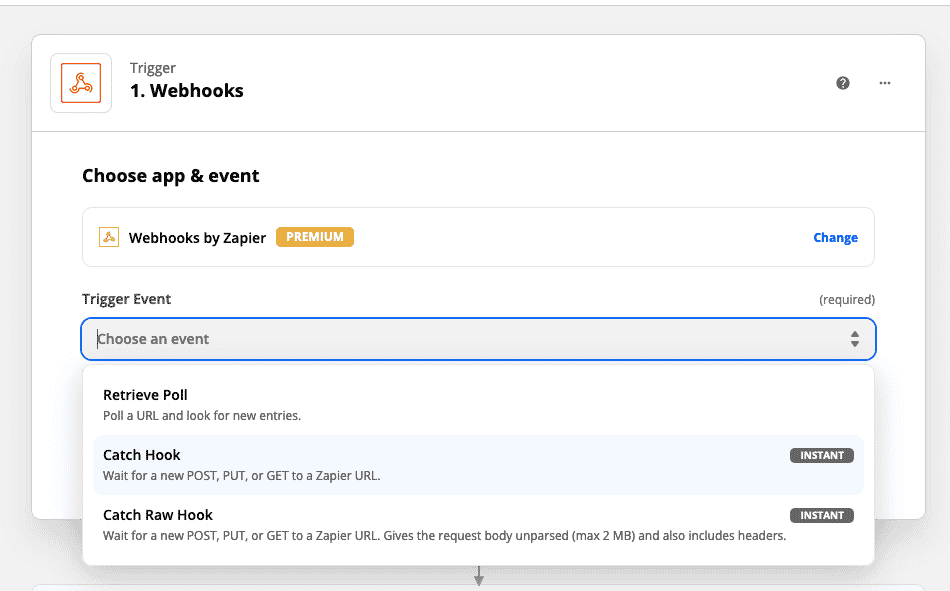
I copied the generated webhook URL that Zapier provides and added them to the form configuration of my form within Simply Static -> Forms.
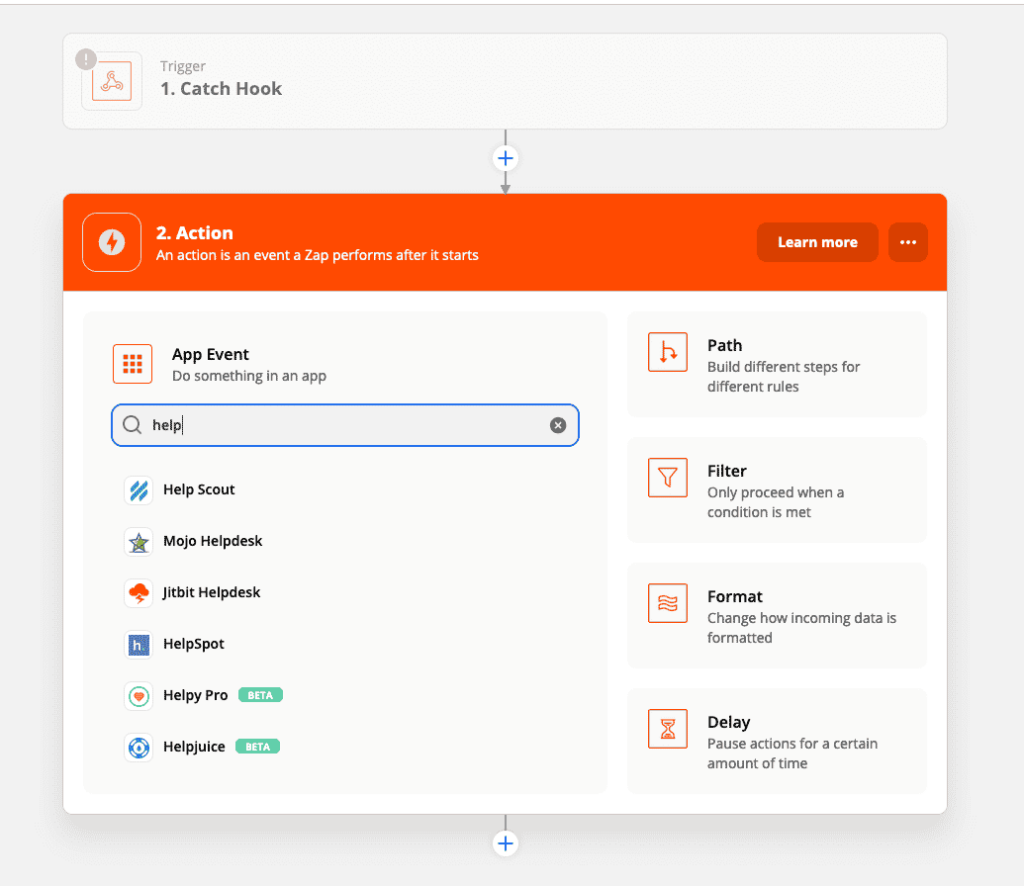
Then I search for “Helpscout” within the “action” setting:
I selected “Create conversion”:
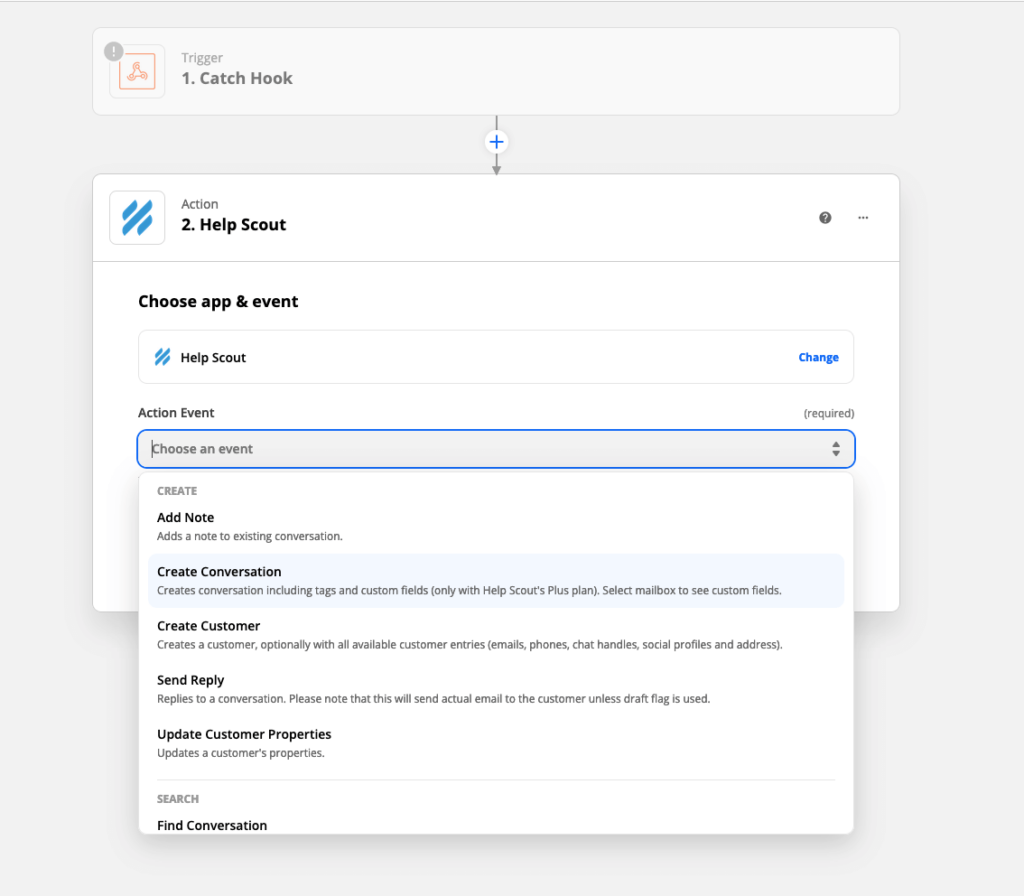
I had to connect my Helpscout account to move further. I clicked on the link, connected my Helpscout account, and was ready to test. Zapier waits for a test webhook to receive, so I switched to my static website, filled out the form and Zapier received a response that allowed me to further configure the settings.
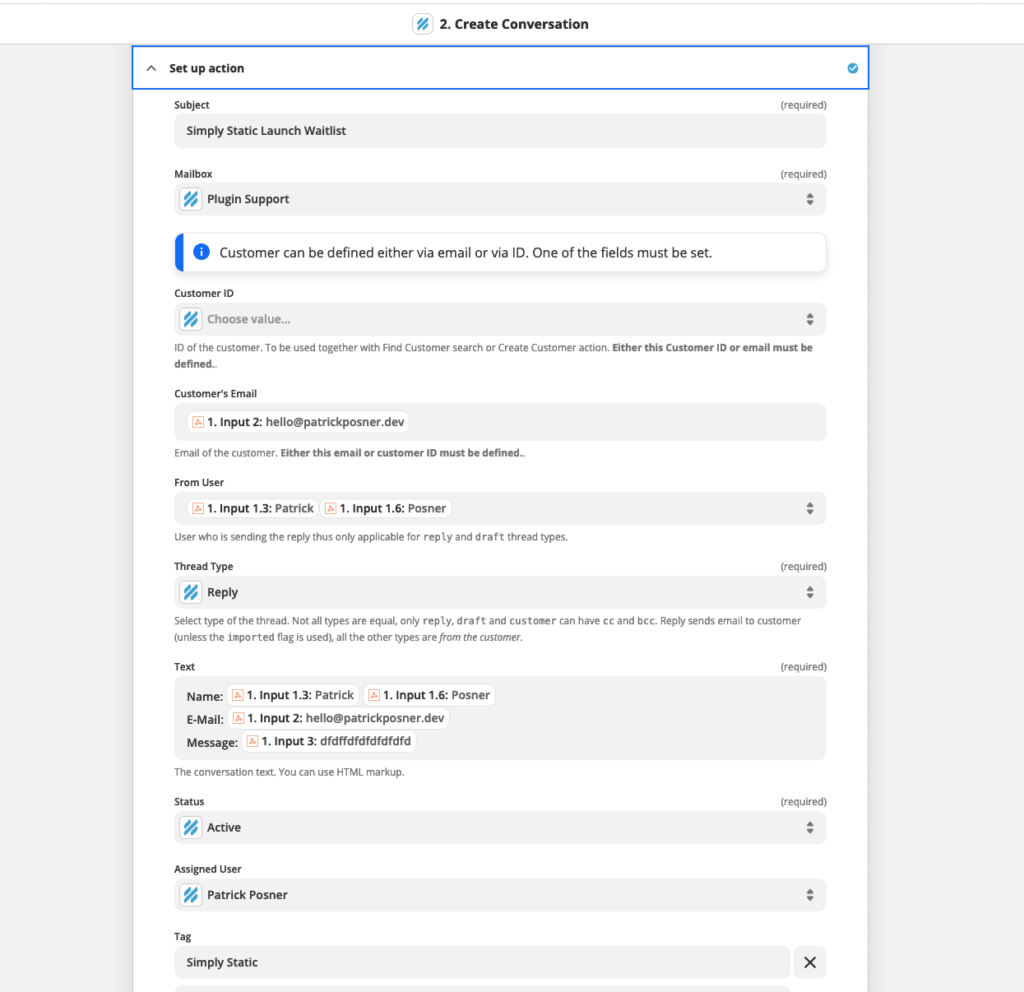
You will see the result of the webhook and use it to dynamicallyActions or processes that occur in real-time, often without requiring a full page reload. For example, a search box that… fill out the required fields. Here is the configuration I ended up for the Simply Static launch form:
Conclusion
That was the entire process of “How I made my website static”. I hope you enjoyed it and that it can help you to start converting your own website to static as it has immensely massive benefits for performance, security, and cost reduction. Stay tuned as I will publish a lot of tutorials in the next couple of months to cover almost every detail about static websites from hosting to external services and more.
