If you’re trying to figure out how to deploy a website, this guide covers everything you need to know.
The word ‘deployment’ can mean different things depending on who you ask and the specific type of website you’re building. Depending on whether you’re a developer or a business owner, launching or deploying a site will look different.
In this guide, we’ll address both perspectives by explaining:
- What it means to deploy a website.
- Where to build a site before you can deploy it.
- What you need to deploy a site.
- The main methods for deploying a website.
- How to deploy a static WordPress website the easy way using Simply Static Studio.
What does it mean to deploy a website?
Deploying a website is the process of making it available on the internet. Until you deploy, your site exists only where you built it (your local machine, a staging environment, or a development tool). Deployment is what moves it from there to a public URL anyone can visit.
Mechanically, two things have to happen. Your site’s files need to be hosted on a web server, and your domain name needs to point to that server. Once both are in place, your site is live.
For developers working on web apps or frameworks like Next.js, deployment can involve more: CI/CD pipelines, staging and production environments, automated updates, and so on. For most WordPress site owners, none of that applies. You build the site, get the files onto a host, and connect a domain.
The catch is that before a site can be deployed, it has to be built somewhere private first.
Where do you build a website before it gets deployed?
Before a site goes live, you generally choose to build a website in one of three places:
- A local environment. This means building the site on your own computer using tools like LocalWP. It’s fast because you don’t need the internet to work, and you can preview changes instantly without anyone else seeing them.
- A staging environment. This is usually a private area where you can test new features or updates to ensure nothing breaks before you can push them to a live site. Many WordPress hosting providers offer staging environments specifically for this purpose.
- A live server. Some people, especially those who’re new to WordPress, build directly on their hosting account from day one. While this is the most direct approach, it also means your ‘work in progress’ is technically live as you build it.
Generally, the place where you build your website determines how involved you’ll be during the deployment process.
For example, if you build locally on your computer, you’ll definitely have more steps to move those files to the web than someone who is already building directly on a web host.
Neither approach is ‘better.’ Most people just choose the workflow they find most comfortable.
What do you need before you deploy a website?
Normally, before you move your site from your private workspace to a live server, you’ll typically need a few things ready to go:
- A ready-to-go website. Your site doesn’t need to be perfect, but it should be functional.
- A domain name. This is your website’s address (like simplystatic.com).
- Reliable web hosting. This could be a standard host like GoDaddy, a cloud service like AWS, or static hosting like Simply Static Studio.
- An SSL certificate. This is the ‘padlock’ icon you see in your browser. It keeps your site secure and helps you show up better in Google searches. Most good hosts give you this for free.
- The necessary access credentials. Depending on your method, you’ll need specific login info. This might be your hosting dashboard password, FTP details, or a GitHub account.
Quick example: If you’re deploying a WordPress site from a local machine to a server, you’ll usually need FTP credentials. These allow you access to your server’s folders so you can drop your website files inside.
Once you have these items checked off, you’re officially ready to move your site from your workspace to the web.
Since there’s no single strict method for deploying all types of websites, let’s look at the main methods. These methods depend on your use case or technical experience.
The main methods for deploying a website
The following are five different ways to deploy a website:
FTP and SFTP
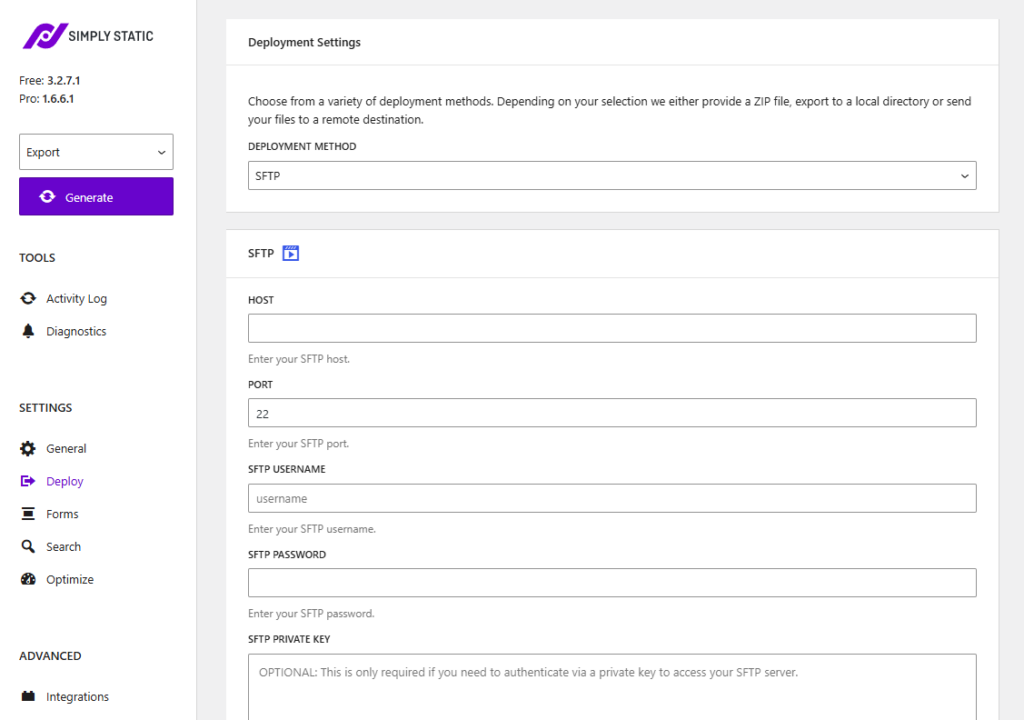
FTP stands for File Transfer Protocol. It’s a way to move your website files (PHP, HTML, CSS, JavaScript, and so on) between your computer and your web server. The method is still common today, especially on shared hosting plans. You connect to your hosting account using an FTP client and manually move your website files into the correct server directory.
SFTP (Secure File Transfer Protocol) does the same job, but encrypts the connection so your files and login details can’t be intercepted in transit. It’s built on top of SSH, a separate protocol used for secure remote access to a server. Most modern hosts prefer SFTP over plain FTP.
Who it suits
FTP deployment is reliable and fairly easy to understand. However, it is also very manual.
That makes it ideal for:
- Simple websites with few moving parts.
- Quick fixes to a single file (like a CSS tweak).
- Situations where setting up an automated tool feels like overkill.
But if you update your site daily or you’re building a complex project, you might need to skip this one and look into other methods.
Git-based deployment and GitHub
Git-based deployment is popular among developers and teams working on larger or more active projects. Git is a version control system, which is a fancy way to say you can track changes made to a website or application over time.
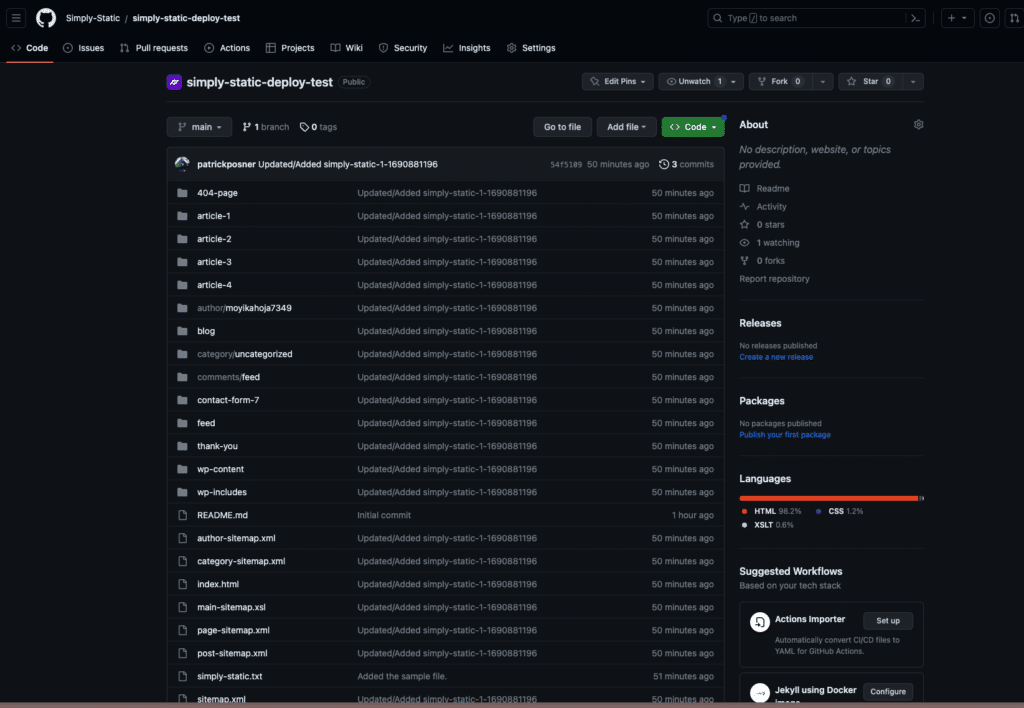
With Git, you don’t ‘upload’ files in the traditional sense. Instead, you push your website files or code to a Git repository, often on platforms like GitHub. From there, your changes can be deployed manually or automatically to a live server.
This is often one of the best ways to deploy in static WordPress setups. For example, let’s say you turned your WordPress site into a static website. You can then push your code to GitHub and have it automatically deploy to platforms like Vercel, Netlify, or GitHub Pages.
Generally, this method is useful if you’re working with a team and you manage updates frequently. However, it is slightly more technical than standard WordPress hosting setups.
cPanel and hosting dashboards
Many people launch their first website using a dashboard provided by their hosting company, like cPanel. This dashboard gives you a visual way to manage your site without writing code or using a terminal.
They usually include tools for:
- One-click WordPress installation (using tools like Softaculous).
- Creating email accounts.
- Uploading your site files.
- Managing domains.
- Setting up SSL certificates.
- Accessing databases.
For many people, especially first-time website owners, this is the easiest and most familiar way to deploy a website. Everything is managed through a visual interface rather than a terminal or command line.
Cloud platforms and PaaS
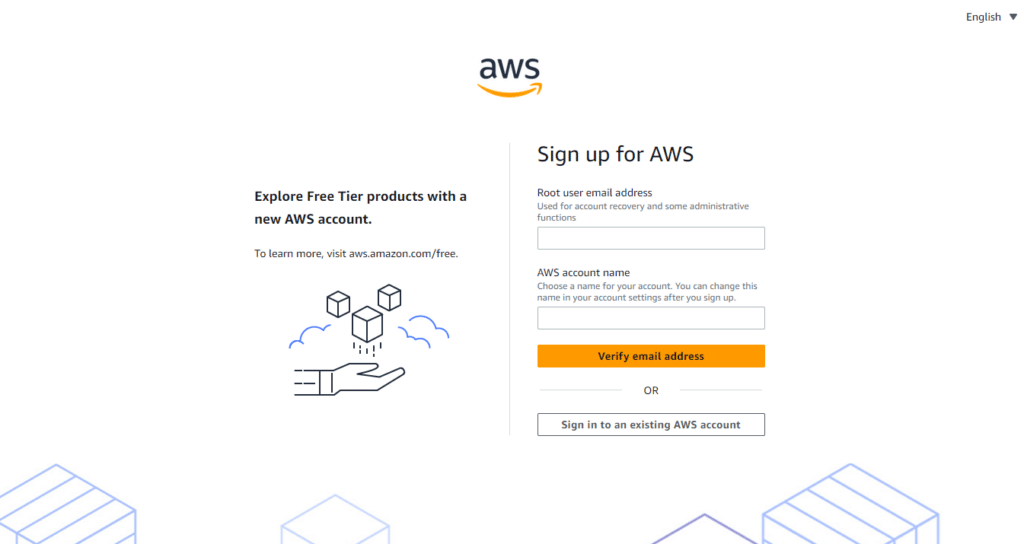
Cloud platforms like AWS and Google Cloud fall into the category called PaaS (platform as a service). These are incredibly powerful systems that let you rent high-performance virtual servers that scale as your traffic grows.
While these are among the most famous names in tech, they are typically built for large web applications and complex software. To use them well, you basically need a team with DevOps experience. People who know how to build and manage digital infrastructure from scratch.
For an average WordPress site owner, these platforms might be more powerful than you actually need. They require a lot of technical knowledge to set up and keep secure.
Purpose-built deployment tools
A purpose-built tool is just a specialized platform that’s designed to handle most or all of the deployment process on your behalf. These tools automate much of the technical settings, so you don’t have to.
Essentially, a tool like this will:
- Generate your site. It creates a high-performance version of your website files.
- Optimize it for speed. It automatically cleans up code and compresses images so your site loads instantly.
- Publish your site to the web. It helps you deploy website files to a live hosting environment or global delivery network.
- Handle technical settings. Many tools also manage SSL certificates, caching, updates, and other technical tasks for you.
The goal is to make site deployment as easy as possible, while also making your site much faster and more secure.
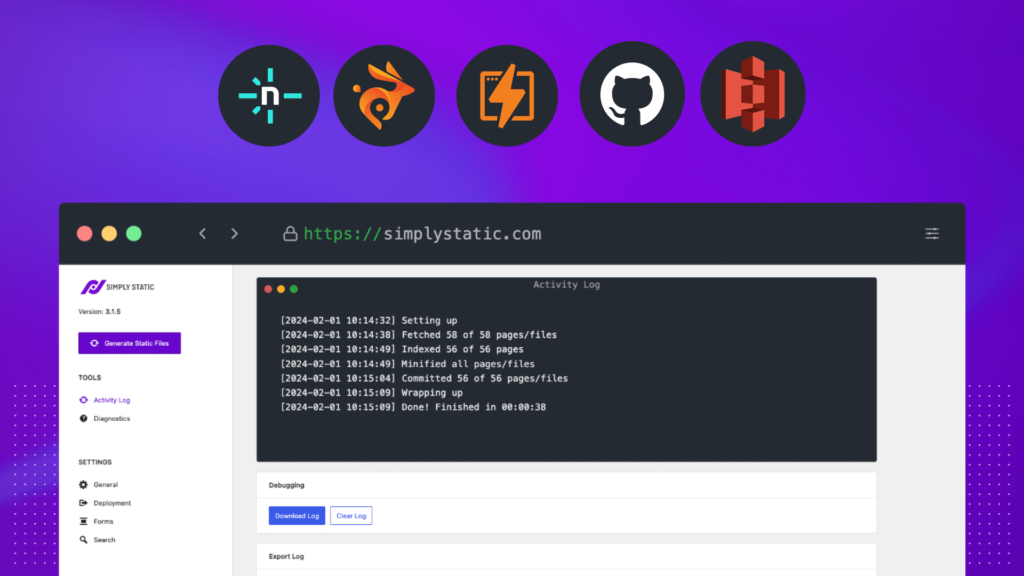
One great example is a Static Site Generator (SSG). Some of these tools let you convert WordPress into a secure, static website and then publish it directly to the web. Of course, there are still a few things you’ll do yourself, like connecting to custom domains, but it’s greatly simplified.
In fact, our focus in this guide is to show you how to easily deploy a WordPress website using one such tool: Simply Static Studio.
How to deploy a WordPress website using Simply Static Studio
Simply Static Studio works differently from other deployment methods because it handles all the technical setup for you. It’s a platform that manages both the WordPress dashboard where you work and the static frontend that your visitors see.
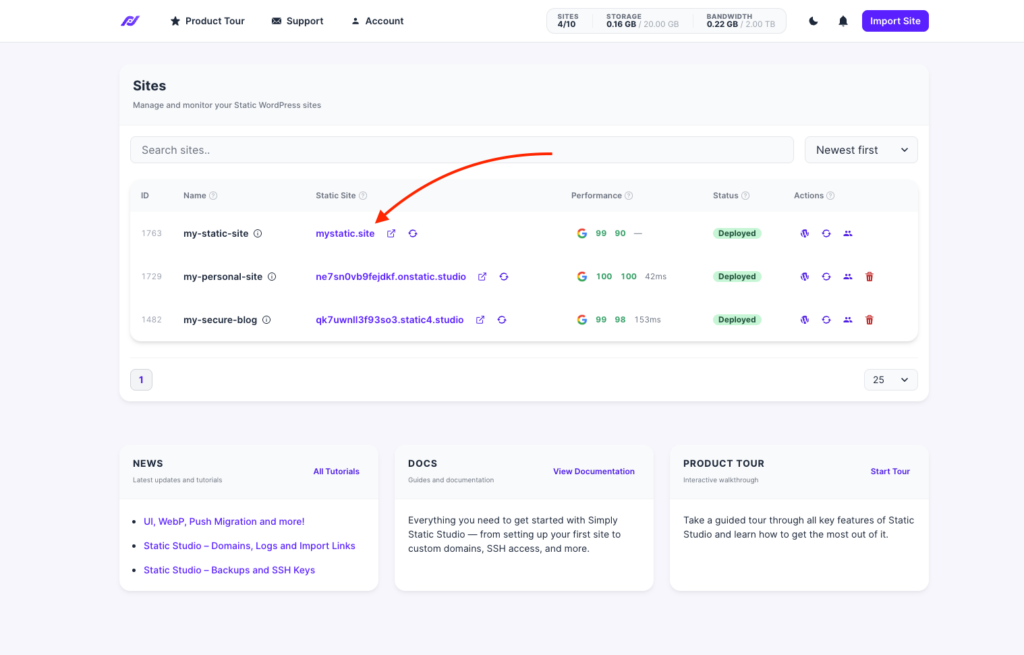
It automatically turns your site into a fast static version, hosts it on a global network, and publishes it online. You don’t need separate tools for each. At the same time, you don’t have to set up servers, manage a database, or upload website files yourself. That is what makes Static Studio easier for both beginners and developers building WordPress sites locally alike.
Here’s a step-by-step process on how to deploy a website using Static Studio:
Step 1: Sign up for a Static Studio account
To get started, create an account on Static Studio using your email address. After signing up, you will receive a one-time login code by email. Copy and paste the code, and you get logged in.
Step 2: Import your WordPress site
If you already have an existing WordPress website, there’s no reason to start over from scratch. Simply Static Studio lets you upload a backup file of your existing site by clicking the blue Import Site button in the top-right corner of your Studio dashboard. This opens a modal screen where you can drag and drop your backup file to start migration.
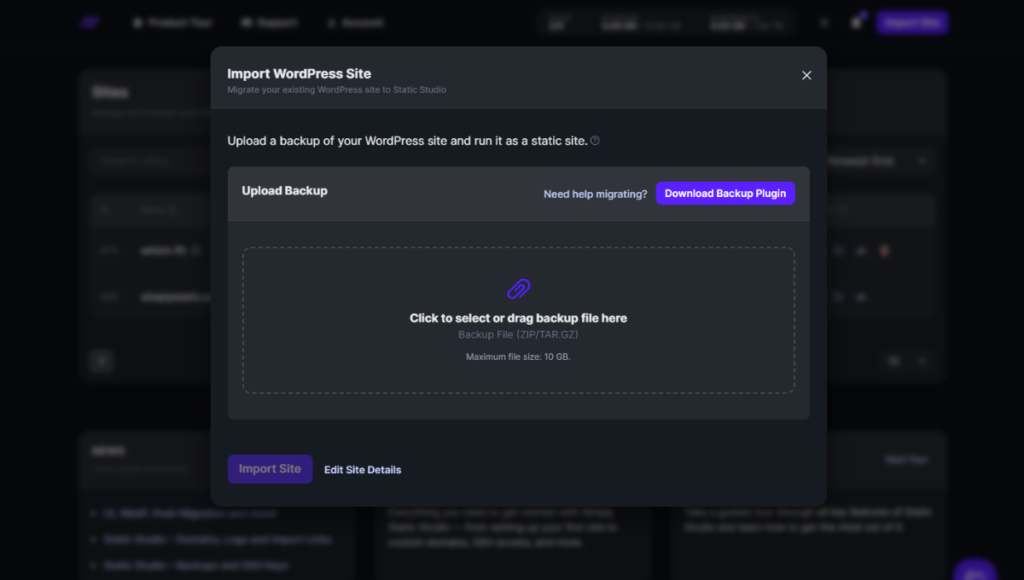
You can import your site via our Backup & Migrate plugin (if you don’t already have a backup file ready or need help migrating).
Here’s how this ‘push migration’ works:
- Download the Backup & Migrate plugin.
- Install it and activate the plugin on your existing WordPress website.
- After activation, you’ll be redirected to the backup page where you can create a backup of your website.
- Click the Backup site button and wait for the backup process to finish. At this stage, you can either upload this manually into the Simply Static Studio dashboard or send it automatically by connecting your account and pushing it over with the click of a button.
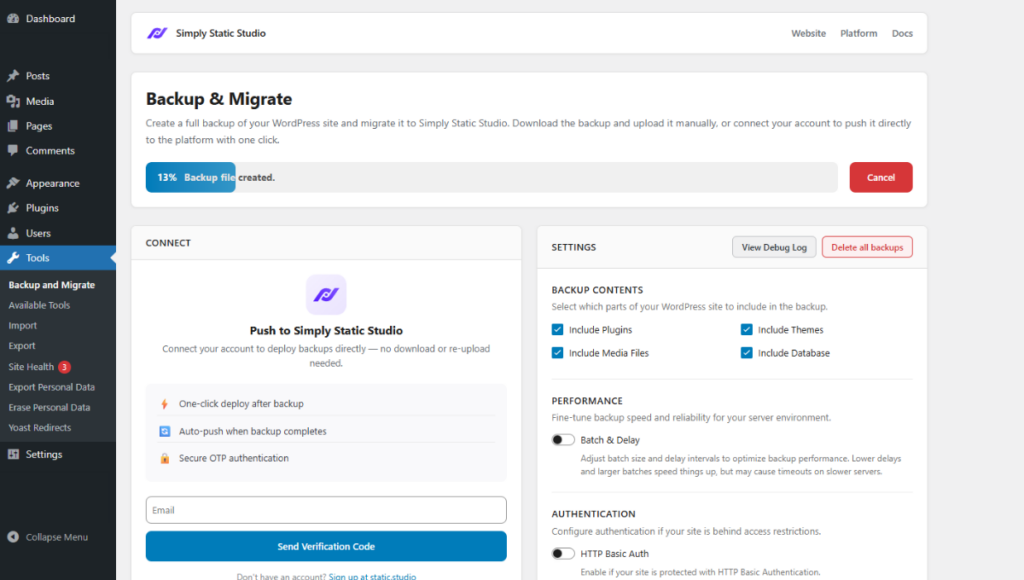
- Next, log in to your Static Studio account again. This allows you to connect your WordPress site directly to Static Studio without leaving your dashboard.
- Enter your email and send yourself the OTP code for verification.
- Once connected, simply click Push to Studio. The plugin will send your website backup directly to Static Studio and automatically initiate the migration process.
From here, Simply Static Studio handles the technical side for you. It automatically converts your WordPress site into a static website, prepares it for deployment, and queues it for live deployment.
Step 3: Connect your domains and issue SSL certificates
Once Static Studio finishes deploying your static site, it will list it in a table like this, with an ID, name, performance, and various actions you can take (such as updating content in WordPress or inviting team members).
For this tutorial, we’ll focus on connecting your domain name and enabling SSL. To get started, click on your site name to open the Site Details page, then switch to the Domain tab.
Connecting your custom domain only takes two main steps:
- Copy the CNAME record shown inside Static Studio.
- Log in to your domain registrar (like GoDaddy, Namecheap, or Cloudflare). Then, paste your CNAME value into your domain’s DNS settings.
- We’ll not get into too much detail on DNS configuration here. If you need a little help, read this doc on how to connect to a domain to see how it’s done.
- Once you’re done, return to your Studio dashboard, enter your domain name in the provided field, and click Connect Domain.
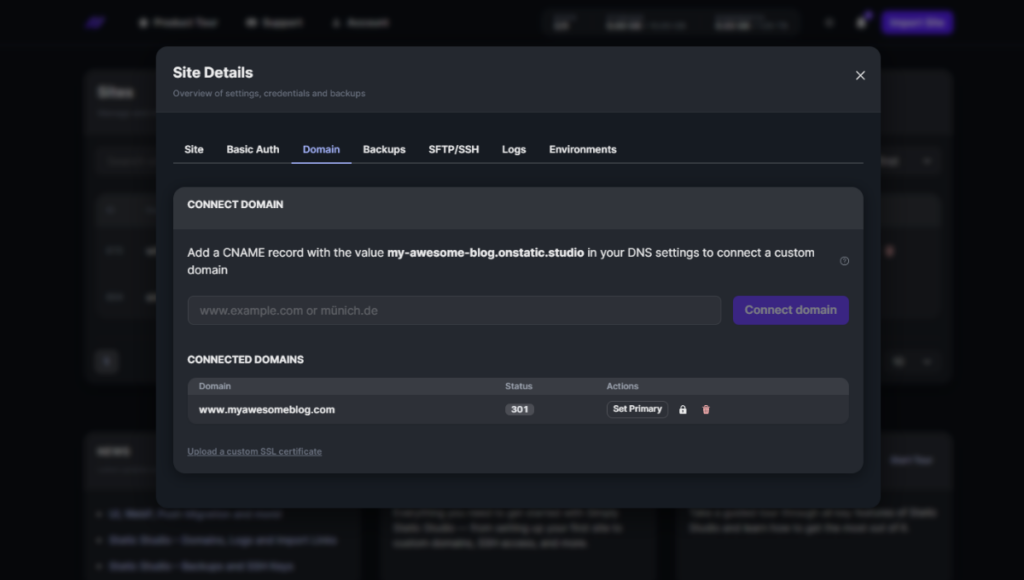
- Once your domain is connected, click the Issue SSL Certificate button. Static Studio handles the certificate for you, including automatic renewals, so you don’t need to manage it yourself.
Step 4: Connect your site via SSH or SFTP (optional)
If you’re a developer or you prefer working closer to the server, Static Studio also supports SFTP and SSH access.
This lets you connect directly to your site’s server and manage files manually when needed. It’s useful if you want more control or need a way to push static files to another CDN or remote server.
- To do this, switch to the SFTP/SSH tab on the Site Details page.
- Next, add your SSH public key and click Add Key. The approval process may take a little time, but you can safely close the window and return later if needed.
- Once approved, your key will appear under Current SSH Keys. From there, simply check the box to grant that SSH key access to your website.
Each project is only accessible through secure SSH keys, so you won’t use passwords for this connection. This keeps access more secure and controlled.
Step 5: Create different environments (optional)
Static Studio also lets you create different environments to test your static website before making changes live. When you enable environments, Static Studio automatically creates a ‘production’ environment using your current site setup.
From there, you can create as many additional environments as you like, such as:
- A development environment for testing changes.
- A staging environment for reviewing updates privately.
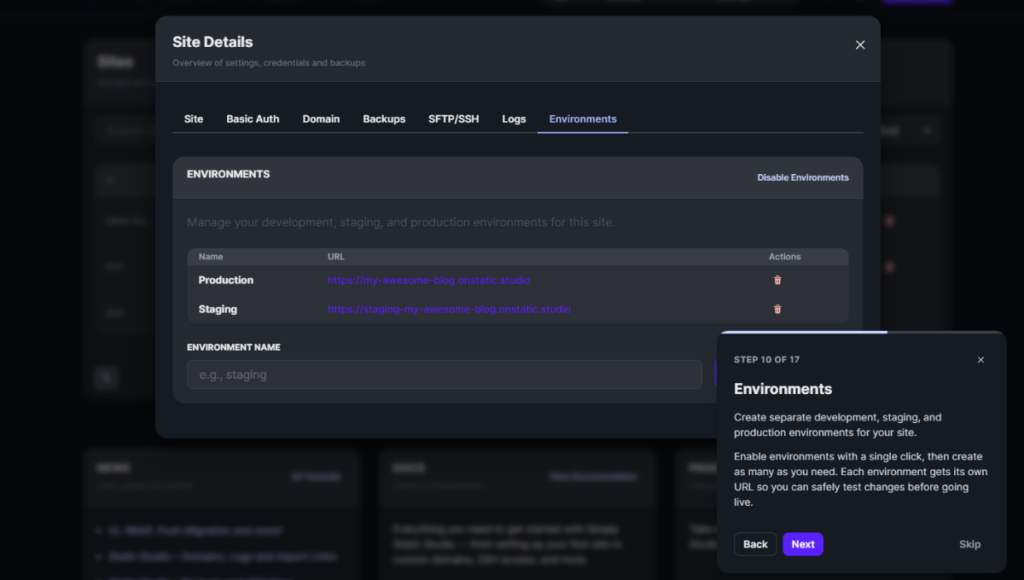
How to create an environment:
- To create a new environment, open the Environment tab on the Site Details page.
- Next, enter a name for the environment and click the Create Environment button.
- Once created, the environment will appear in a table and receive its own unique domain based on your current domain.
- To use an environment, log in to your WordPress dashboard and open the Command Center.
From there, you can switch between environments whenever needed. Each environment can also have its own Simply Static Studio settings. This means you can use different configurations for development, staging, and production without affecting your live website.
Essentially, this feature gives users a safer way to test content updates before they push them to a live site.
But for smaller websites or personal projects, you may never need multiple environments. Still, it’s helpful to know the option is available if your workflow grows later on.
Step 6: Congratulations, your static site is live!
The moment you connect your domain, your static WordPress website goes live and becomes available to visitors online.
Visitors can interact only with a fast, secure, static version of your website. On the other hand, WordPress stays private, hidden from the public.
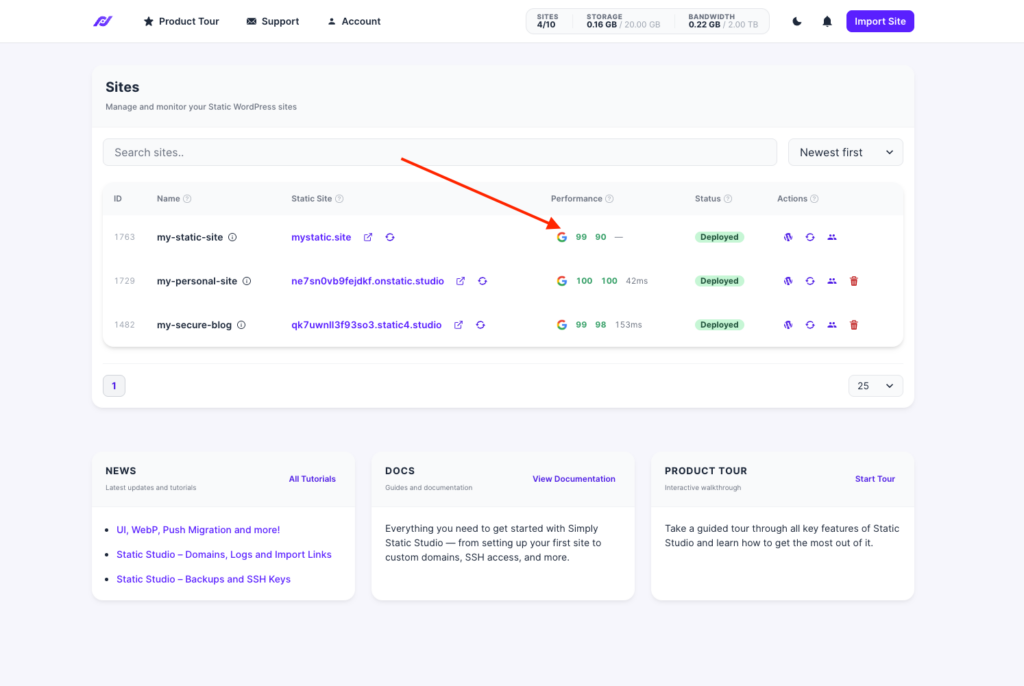
What happens after deployment?
You can still log in to your WordPress dashboard and update content as usual. When you finish, you can automatically push only the changes you made or redeploy the entire site.
From your Static Studio dashboard, you can also track your website’s performance, including global TTFB, storage usage, bandwidth, and cache hit rate in real time. Studio updates PageSpeed results automatically every 24 hours.
If you work with a team, you can invite members to specific projects and manage their access directly from the dashboard.
Staying on top of these details is important for keeping your site visitors happy and engaged.
Deploy your website the easy way
There are many ways to deploy a website, as we’ve covered in this guide. If you want total control, Git or SFTP is a good option. If you prefer something simple, cPanel and hosting dashboards can help you get a site online quickly.
But if you want a faster, more secure, and more automated process, a purpose-built tool is often the best choice. For most WordPress website owners, this means less technical setup, less maintenance, and an easier way to manage deployment over time.
You can start your Simply Static Studio free trial today to generate, host, and deploy your static WordPress website in one place.
Table of Contents