Table of Contents
Diving into AWS S3Amazon Web Services (AWS) is a cloud computing platform that offers various services, including storage solutions like S… WordPress hosting? Amazon Web Services (AWS) isn’t just a powerhouse in the cloud world; it’s a game-changer for WordPress enthusiasts.
If you’re pondering the magic that happens when WordPress meets AWS, you’re in for a treat. This guide will unravel the dynamic duo’s secrets, equipping you with the wisdom to elevate your hosting game.
In this beginner-friendly step-by-step guide, we’ll discuss:
- What AWS is.
- The advantages of hosting WordPress on AWS.
- Steps to host your WordPress site on AWS.
Let’s start by understanding what AWS is.
What is AWS?
Amazon Web Services (AWS) stands as a behemoth in the cloud computing landscape, offering a diverse range of services tailored to meet the multifaceted needs of modern businesses.
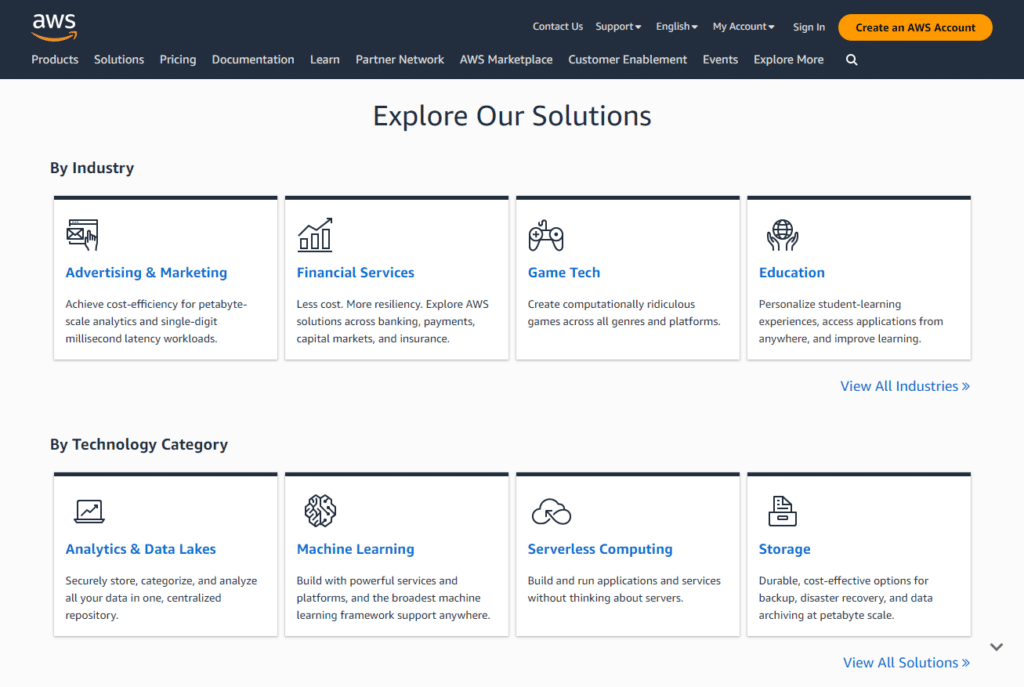
Here are just a few of its services:
- Amazon EC2 (Elastic Compute Cloud): EC2 provides scalable computing capacity in the cloud. It allows users to run virtual servers, scale up or down based on demand, and only pay for what they use.
- Amazon Lightsail: AWS Lightsail offers virtual servers, storage, and networking capabilities, making it ideal for simpler workloads, quick deployments, and getting started with AWS.
- Amazon Route 53: This is AWS’s scalable and highly available domain name system (DNS). Route 53 effectively connects user requests to infrastructure running in AWS, such as Amazon EC2 instances (AWS EC2), and can also be used to route users to external infrastructures.
- AWS Marketplace: Think of this as the app store for AWS. The Marketplace offers a curated selection of software applications and development stacks. It simplifies software licensing and procurement with features like one-click deploymentThe act of pushing the static files generated by Simply Static to a live environment where users can access them..
In terms of this guide and for using AWS WordPress hosting, Amazon S3 is the service we’ll be taking a closer look at.
What is Amazon S3?
One of the standout services in the AWS suite is Amazon Simple Storage Service (Amazon S3). It’s designed to provide scalable object storage. Think of it as a vast, secure, and durable space where you can store and retrieve any amount of data at any time.
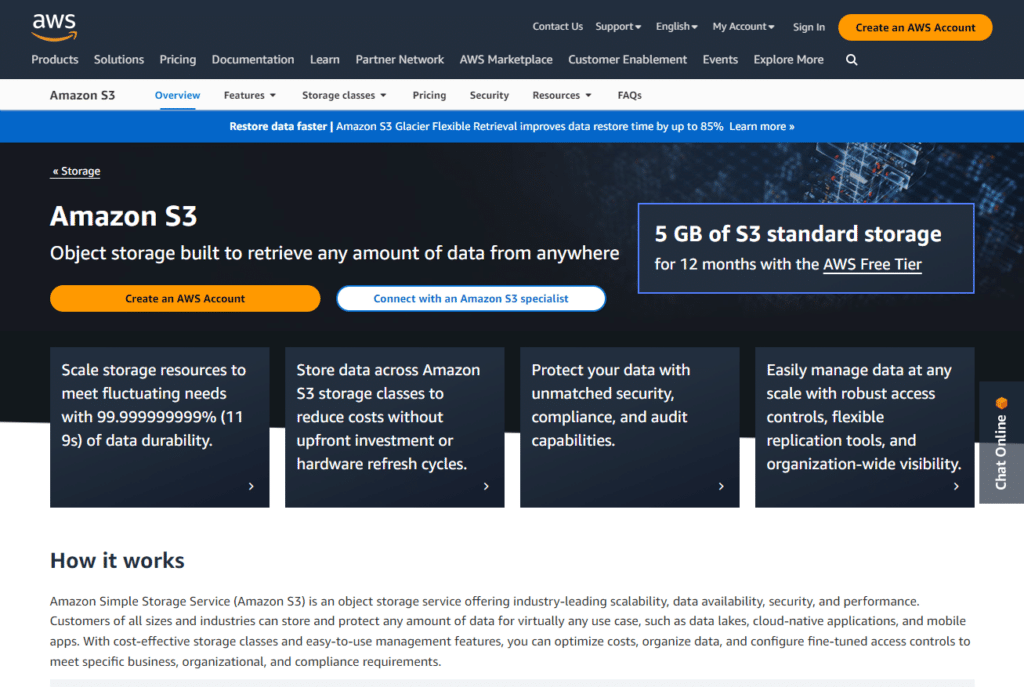
For WordPress enthusiasts, especially those leaning towards static websites, Amazon S3 is a game-changer. Static sites, known for their speed and reliability, need a reliable hosting service.
Amazon S3 offers precisely that. It ensures that your static website is not only stored securely but is also delivered to your audience rapidly, thanks to its global infrastructure.
Why host WordPress on AWS?
When considering a hosting solution for your WordPress site, AWS (Amazon Web Services) emerges as a top contender, and for good reasons:
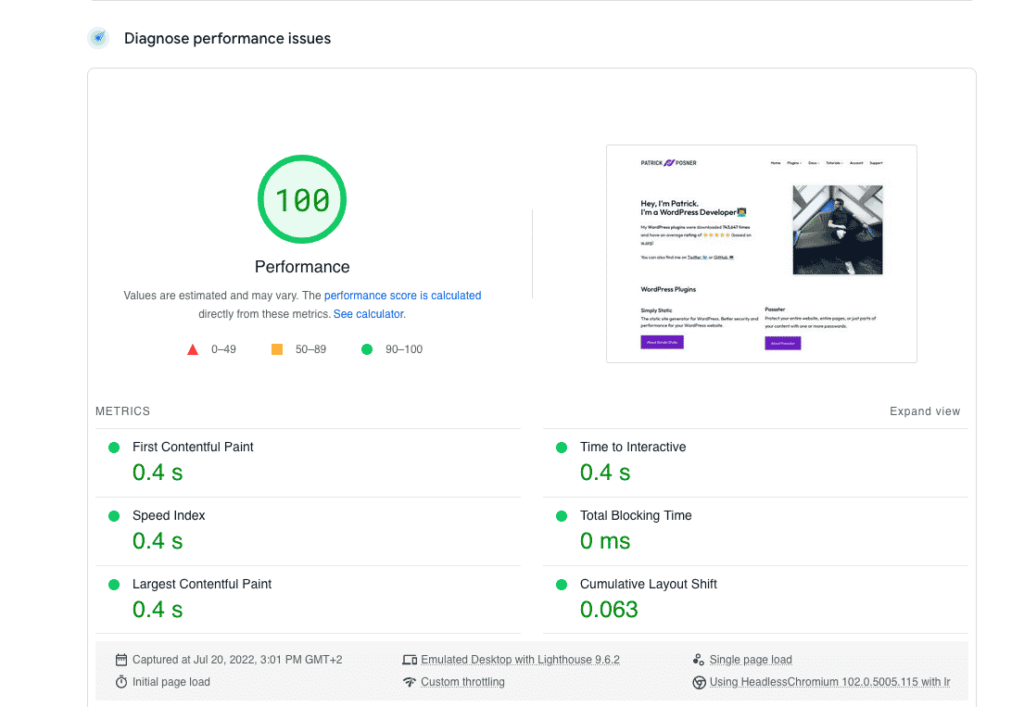
Performance and speed
AWS operates an extensive global network of data centers. This means that your website’s content is stored in multiple locations, ensuring faster access for users no matter where they are.
The direct benefit? Improved site speed, which is a critical factor for both user experience and search engine rankings.
Reliability
AWS’s infrastructure is built with redundancy in mind. If one data center faces issues, the load is automatically shifted to another, minimizing downtime. This distributed approach ensures that your WordPress site remains accessible, even in the face of unforeseen challenges.
Flexibility
AWS offers a suite of services beyond just hosting. Need a database? There’s Amazon RDS. Looking for content delivery (CDNStands for Content Delivery Network. It’s a system of distributed servers that deliver web content quickly to users base…)? Amazon CloudFront has you covered.
The vast array of tools and services means you can tailor your hosting environment to your specific needs, scaling resources up or down as your website grows or traffic patterns change.
How to host Your WordPress website on AWS
To truly elevate your WordPress site, it’s essential to focus on faster load times, robust security, and streamlined efficiency.
Transforming your WordPress site into a static format and choosing AWS as your hosting platform is a strategic move. Let’s dive into the steps (tutorial) to make this transition seamless.
Step 1: Make your WordPress website static
Amazon S3, part of AWS, is a storage solution designed to house vast amounts of data, making it an ideal place for hosting static websites.
But before you can utilize Amazon S3 for your WordPress site, you need to ensure your site is in a static format. This is where the magic of the Simply Static pluginA piece of software that adds specific features to WordPress. shines.
Why use Simply Static?
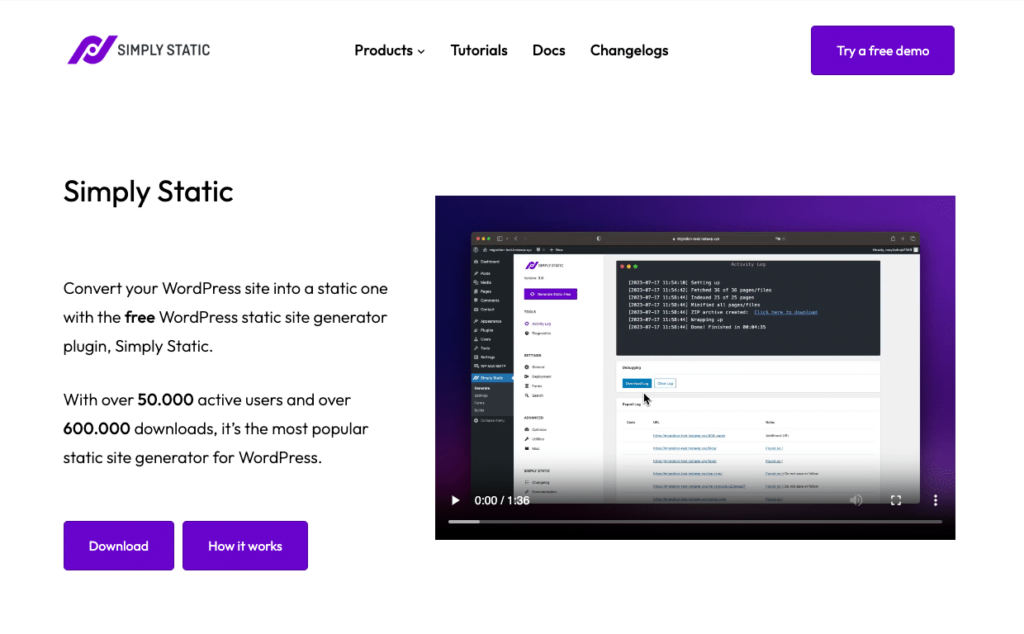
Simply Static is a WordPress plugin crafted to convert your dynamic WordPress website (including pages, posts, WordPress theme, and more) into static versions.
With Simply Static, the transition from dynamic to static content becomes straightforward. By doing so, you not only boost your site’s speed and security but also bypass the need for caching plugins and regular updates, which can occasionally pose security risks.
Setting up your WordPress site for AWS
Try static WordPress hosting free for 7 days
No credit card. No maintenance. No headaches.
After installing Simply Static, follow these steps to prepare your site:
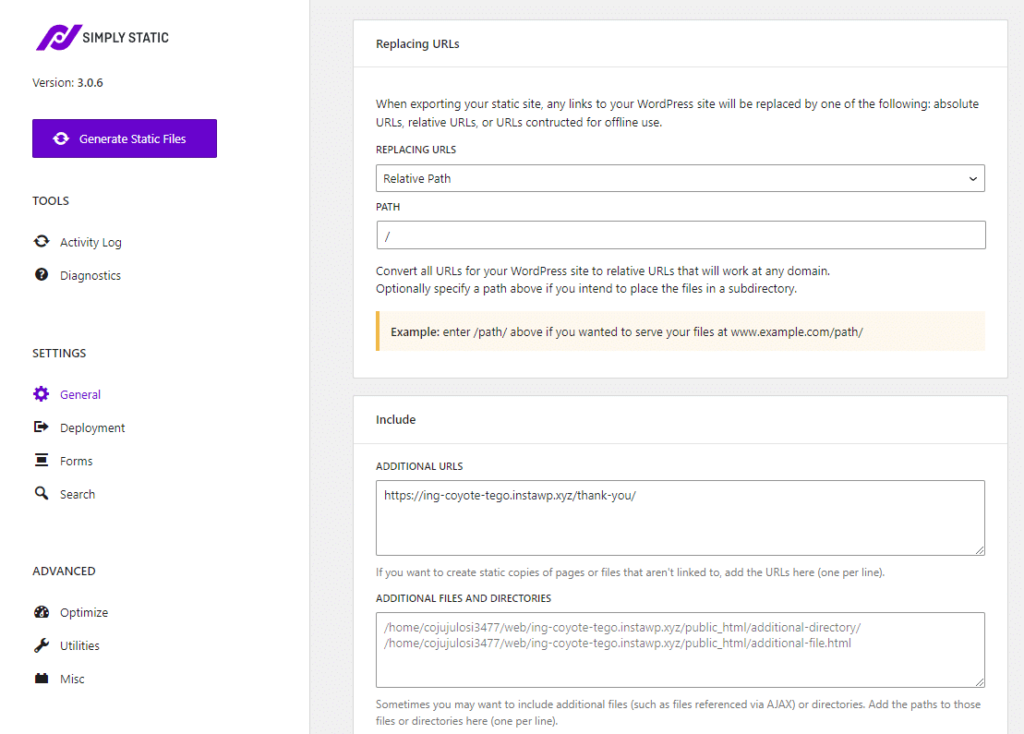
- Navigate to the Simply Static Settings within your WordPress dashboard.
- Under the General tab, choose the desired URL structure for your static site.
- In the Include/exclude section, list down any URLs or pages you wish to omit during the static site creation.
Next, we’ll create our AWS account and sync it up with Simply Static.
Step 2: Create your AWS Account
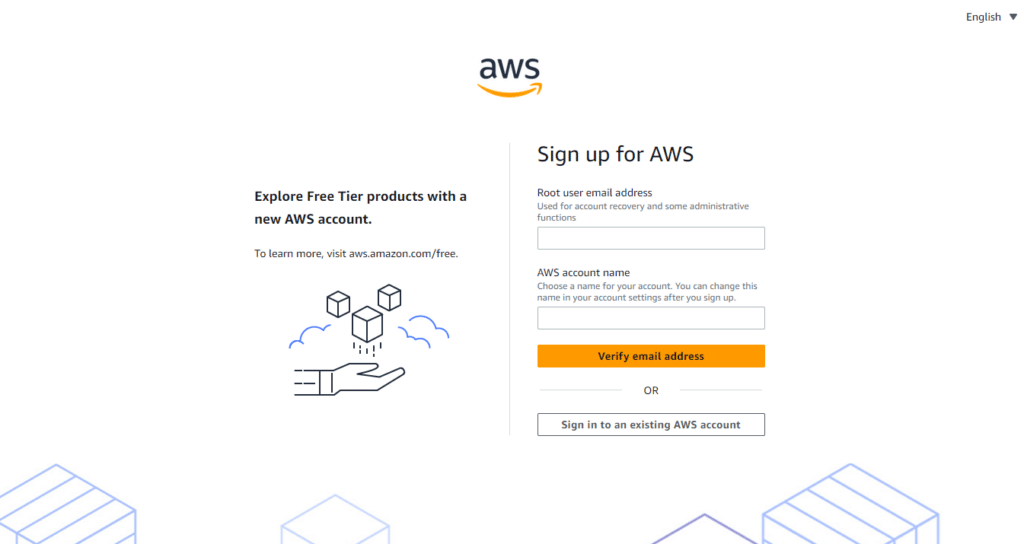
Kickstarting your journey with AWS begins with setting up an account. Navigate to the AWS website and follow the sign-up process.
If you’re new to AWS, they offer a free tier (check their pricing page). This is perfect for those who are just getting started, want to experiment, or have smaller projects. The free tier provides access to a range of services, allowing you to familiarize yourself with the platform without any initial investment.
Once your account is active, we can move onto prepping AWS before we sync it with Simply Static
Step 3: Set up AWS/Amazon S3 for your static WordPress site
Amazon S3, or Simple Storage Service, is a cornerstone of AWS. It’s designed to store and retrieve any amount of data, making it a perfect fit for hosting static websites.
Let’s walk through the process of setting up your AWS account and preparing it for your static WordPress site:
1: Creating an Amazon S3 bucket
Think of a bucketIn the context of Amazon AWS S3, a bucket is a storage location where your static files can be uploaded. as a dedicated space to store your website’s files. It’s like a hard drive in the cloud, holding everything from images to HTMLHyperText Markup Language. It’s the standard language for creating web pages. files.
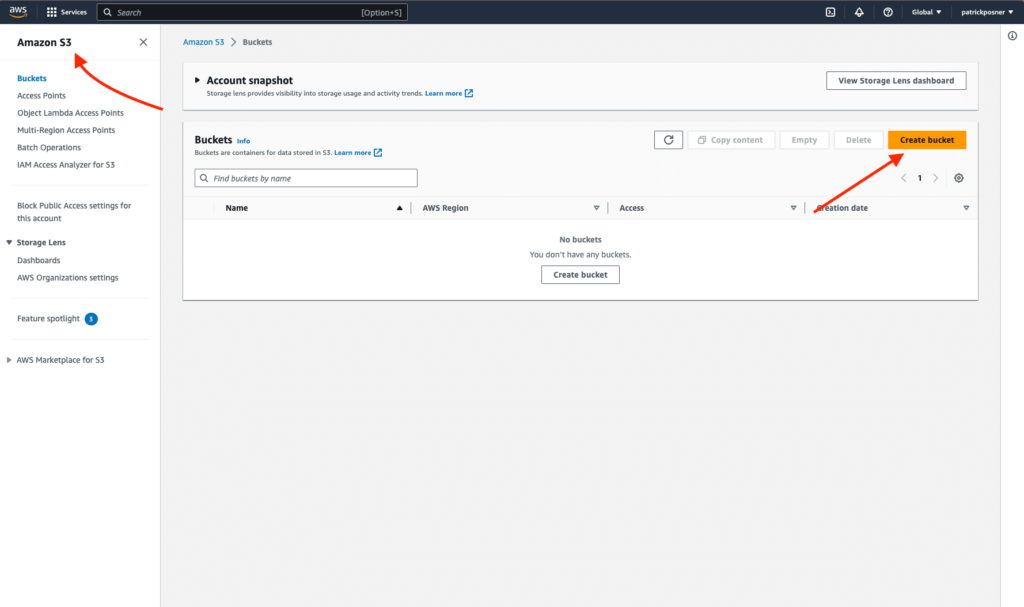
After logging into your AWS account, navigate to the S3 service. Click on Create Bucket, give it a unique name (this will be part of your site’s URL), and select a region close to your primary audience for faster content delivery.
2: Configuring bucket permissions
By default, your bucket is private. To make your website accessible to the public, you’ll need to adjust its permissions.
When preparing your S3 bucket, it’s essential to set the permissions correctly to ensure your static site is both accessible and secure.
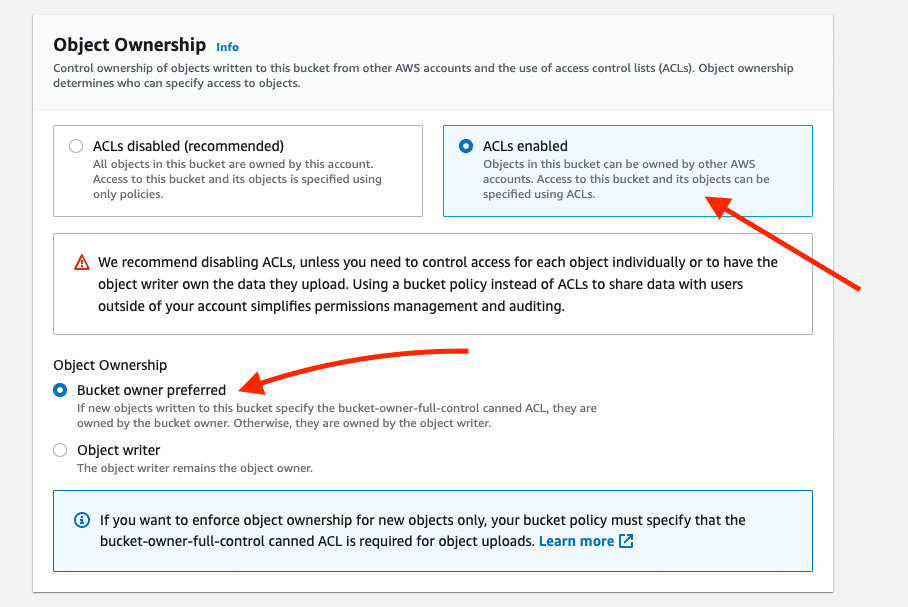
Object ownership
This determines who has ownership of the objects (files) within your S3 bucket.
Set the object ownership to ACLs enabled. Without this setting, your S3 storage will remain private, and the content will only be accessible via authenticated API requests. If you’re the sole individual updating the static site, you can leave the default object ownership settings.
Block public access for this bucket
This setting controls the external visibility of your files. Proper settings ensure that your content is both secure and functional.
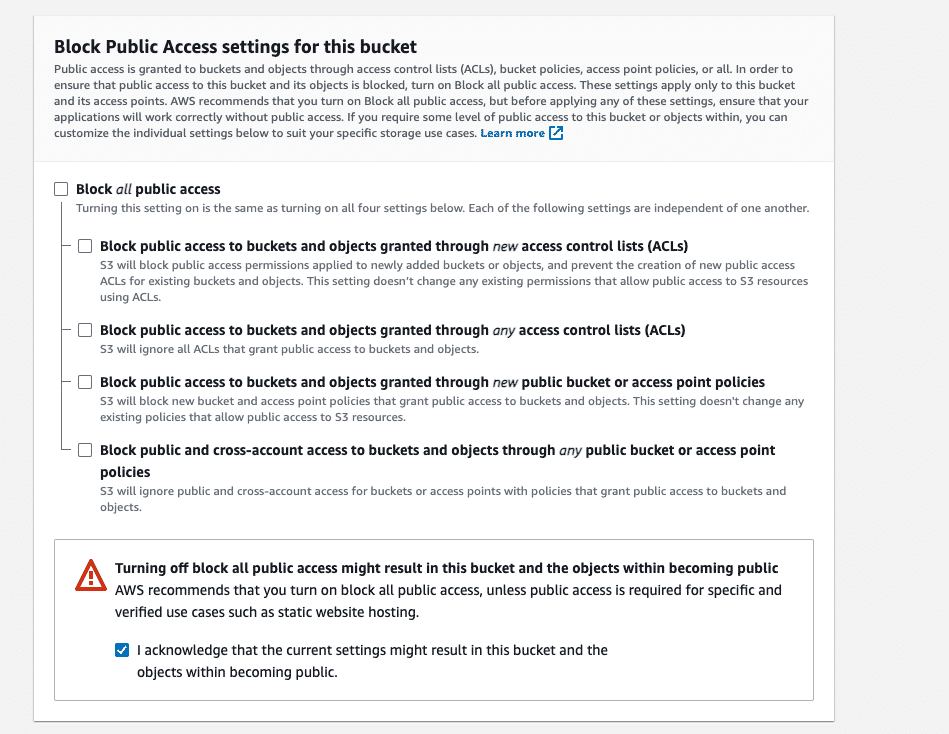
It’s recommended to either turn off this setting or define detailed policies for enhanced security. For instance, if you block access entirely, certain elements like images on your static site won’t be visible to visitors.
After adjusting the above settings, you can leave the rest as default and click on Create Bucket.
3: Obtaining your AWS API key
An API keyA unique code that allows different software applications to communicate with each other. It’s used for identification a… allows tools and plugins, like Simply Static, to interact with your AWS services securely. It’s like a password, granting access to specific services without revealing your main AWS account credentials.
In your AWS dashboard, go to Security credentials, scroll down to Access keys, and click Create access key.
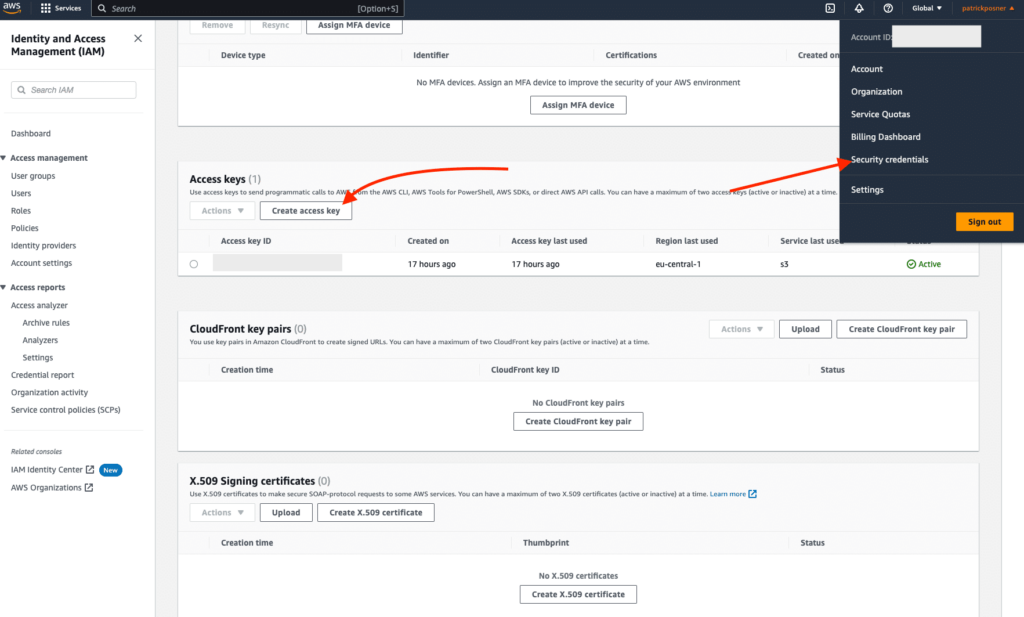
Once created, AWS will provide an ‘Access Key ID’ and ‘Secret Access Key’. Store these safely – you’ll need them for Simply Static.
With your Amazon S3 bucket ready and your API key in hand, you’re all set to move your static WordPress site to AWS. The next steps will involve using Simply Static to generate your static site and then deploying it to the bucket you’ve just created.
Step 4: Connect and deploy WordPress on AWS
Now that you’ve set up your AWS S3 bucket, it’s time to connect your WordPress site to AWS and deploy it.
This is where the magic happens, as you’ll be transforming your dynamic WordPress site into a static one and hosting it on AWS.
Integrate your API key with Simply Static
The API key is like a password that allows Simply Static to communicate with your AWS account and upload your static site files. So let’s connect them together:
- From your WordPress dashboard, navigate to Simply Static > Settings > Deployment.
- Under the Deployment Method section, select Amazon AWSAmazon Web Services (AWS) is a cloud computing platform that offers various services, including storage solutions like S… S3 from the dropdown.
- Now, enter your AWS Access Key IDA unique attribute used to identify a single element on a webpage. It is often used for linking, styling, or scripting. and Secret Access Key. These keys grant Simply Static the permissions to upload files to your S3 bucket.
- Ensure you’ve selected the correct region that corresponds to where you created your S3 bucket, and add the name of your bucket.
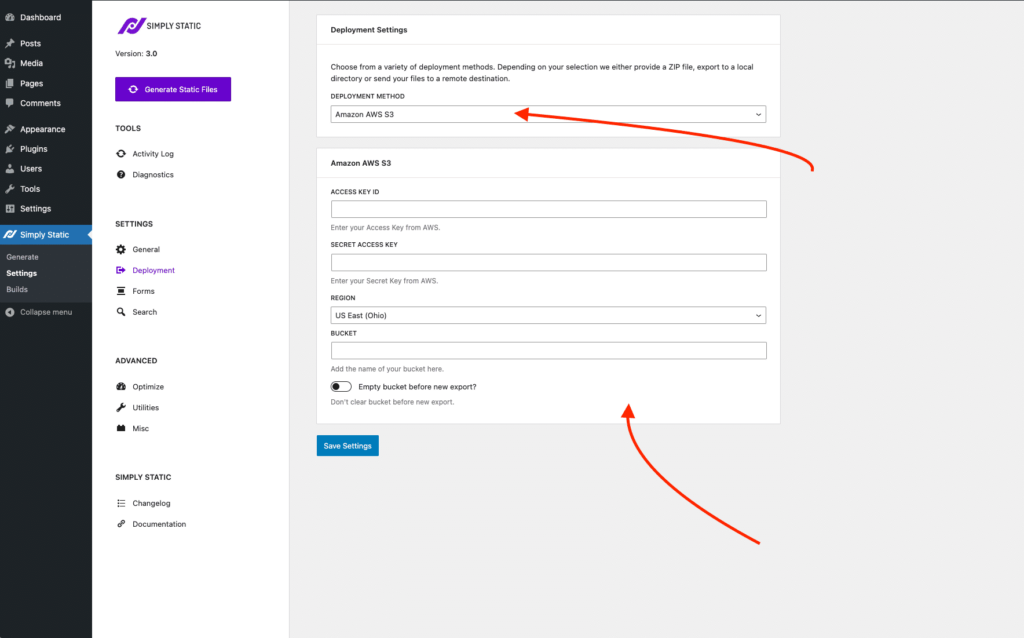
Now we’ve connected up AWS to Simply Static, it’s time to generate your static site.
Generate static files
This step will convert your dynamic WordPress site into a set of static files ready for hosting on AWS.
- Navigate to Simply Static > Generate.
- Click on the Generate Static Files button. Simply Static will now work its magic, converting your dynamic site into static files.
- Once the process is complete, Simply Static will have created a static version of your site and uploaded it to your AWS S3 bucket.
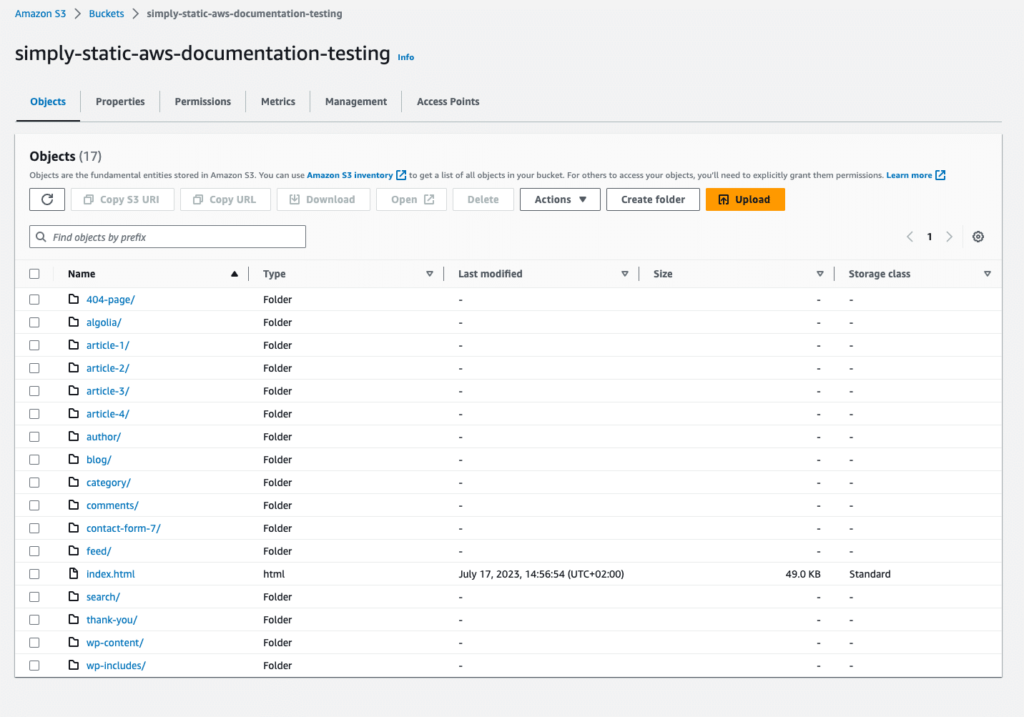
Step 5: Activate static hosting for your S3 bucket
Having your WordPress site converted to static files and stored in your S3 bucket is only half the battle. Now, we need to ensure that AWS S3 serves these files as a website.
Here’s how you can activate static website hosting for your S3 bucket.
Access your S3 bucket
To make any changes or adjustments to your S3 bucket, you need to access its dashboard.
- Log in to your AWS Management Console.
- Navigate to the S3 service and select the bucket you’ve created for your static WordPress site.
Enable static website hosting
By default, S3 buckets are set up as storage containers. Enabling static website hosting will allow your bucket to serve your files as a website.
- Inside your bucket’s dashboard, click on the Properties tab.
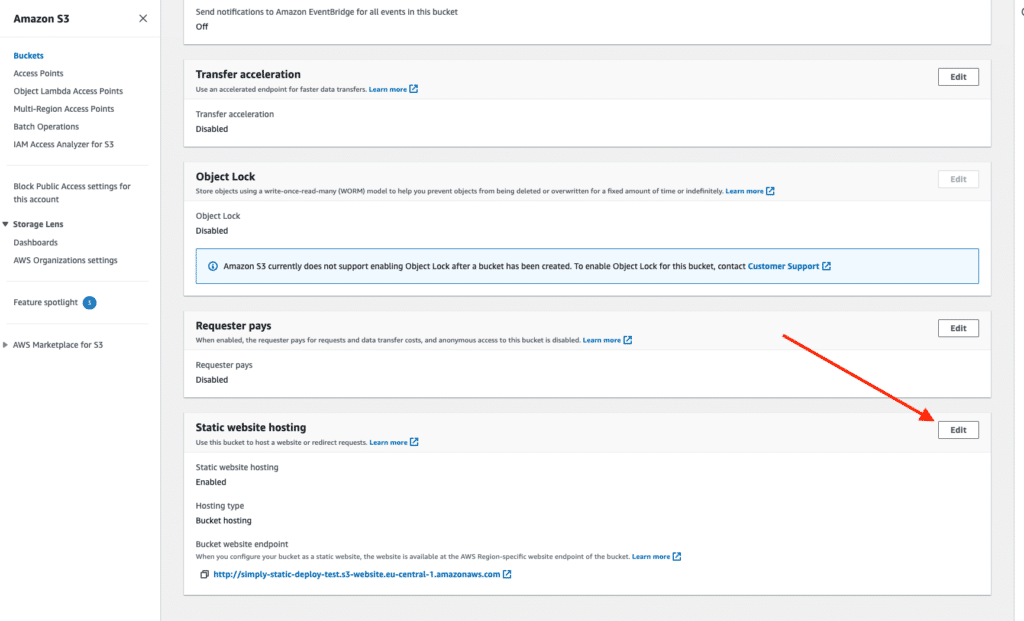
- Scroll down and find the Static website hosting box and click Edit.
- Static website hosting should be enabled.
- Hosting type should be set to Host a static site.
- For the IndexA list or database used to make searching faster. document, enter ‘index.html’.
- You can also specify an Error document if you have one. This is the page that will be displayed if a user tries to access a page that doesn’t exist.
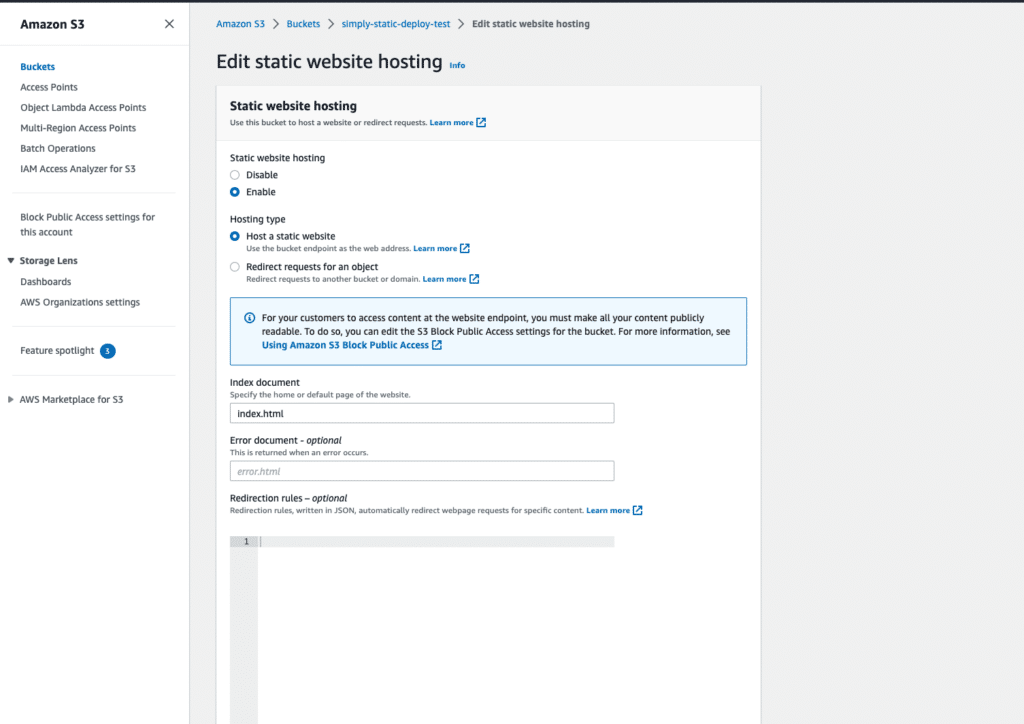
- After enabling static website hosting, AWS will provide an endpoint URL. It will look something like this:
http://your-bucket-name.s3-website-your-region.amazonaws.com/ - Save this URL or bookmark it. This is the URL of your static WordPress site hosted on AWS.
Your static WordPress site is now live and accessible via the provided endpoint URL. You can share this link with anyone, and they’ll be able to access your website.
If you have a custom domain that you’d like to use instead of the default AWS URL, you can set that up using Amazon’s custom domain guide.
Use AWS S3 WordPress hosting today
The digital world demands websites that are both content-rich and performance-optimized. Combining WordPress with AWS offers a solution that’s both scalable and reliable.
With tools like Simply Static, the process becomes even more streamlined, allowing you to focus on content creation and leave the hosting worries to AWS.
If you’re looking for a hosting solution that’s both powerful and flexible, consider AWS WordPress hosting and Simply Static.
