Simply Static allows exporting your static website to Amazon AWSAmazon Web Services (AWS) is a cloud computing platform that offers various services, including storage solutions like S…AWS S3Amazon Web Services (AWS) is a cloud computing platform that offers various services, including storage solutions like S…. This can be a good choice if you are already a user of the Amazon AWS platform.
Table of Contents
What is Amazon AWS S3?
Amazon AWS is the most popular all-in-one deploymentThe act of pushing the static files generated by Simply Static to a live environment where users can access them. and virtual server platform. You can do almost everything with it: host databases, run a Kubernetes cluster, deploy static sites, and so much more. S3 is one service of AWS.
Setup AWS S3
Before we go into the required configurations within Simply Static, we must first set some things up within AWS S3. To deploy a static site with AWS, you need an Amazon AWS S3 bucketIn the context of Amazon AWS S3, a bucket is a storage location where your static files can be uploaded. – a flat (and cheap) online storage to host files, but without connection to a database and without the ability to run PHPA widely-used programming language especially suited for web development. (or any other server-side code).
Create a bucket
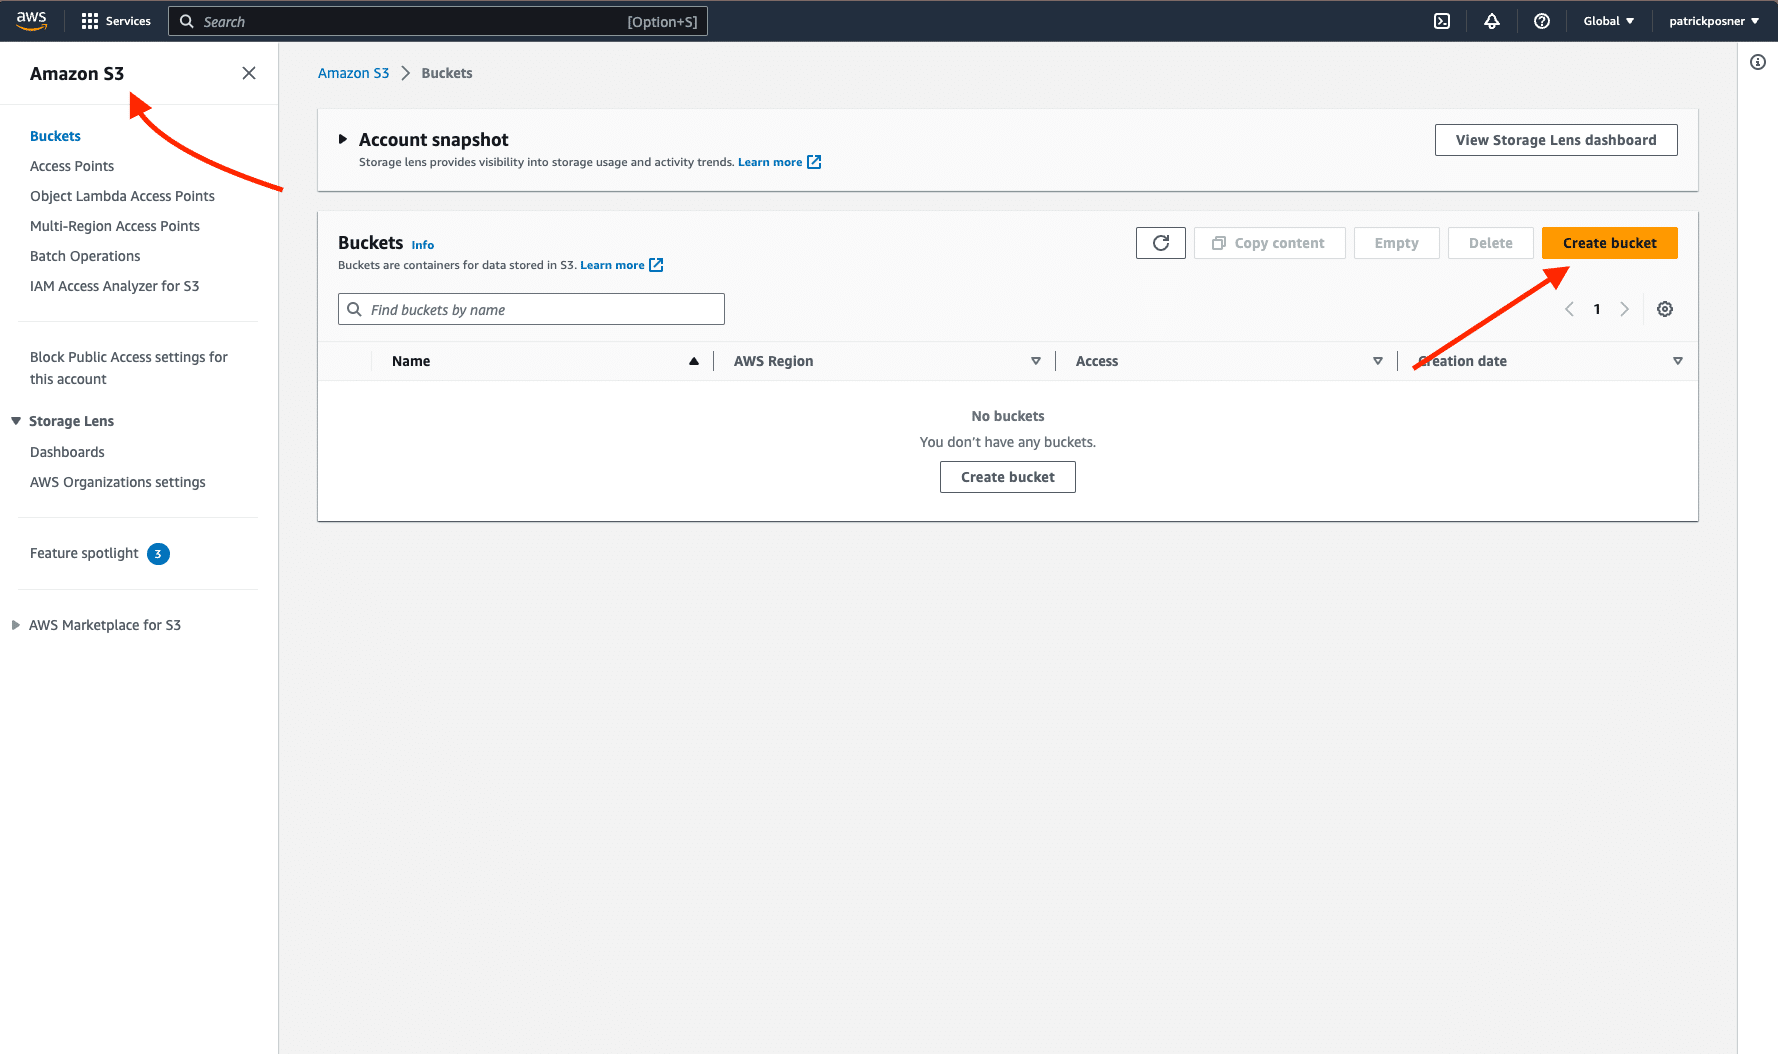
Log in to your AWS dashboard and navigate to “Amazon S3” and click on “Create bucket”:
We have to decide a couple of things within the setup:
Bucket Name
This one is important as we need it to connect Simply Static to AWS S3 later.
Use a recognizable name. You can change the domain later.
Region
Choose the region closest to you. AWS S3 will automatically recommend some regions, but you can always choose one based on your preferences.
Object Ownership
You need to set that to “ACLs enabled”. Otherwise, your S3 storage will be private and only accessible via authenticated API requests. The object ownership is up to you – if you are the only one updating the static site, leave it as is.

Block Public Access for this Bucket
I recommend disabling this setting or defining detailed policies for maximum security. It basically configures the visibility of your files from the outside. If you block the access, you cannot use images on your static site (just an example).
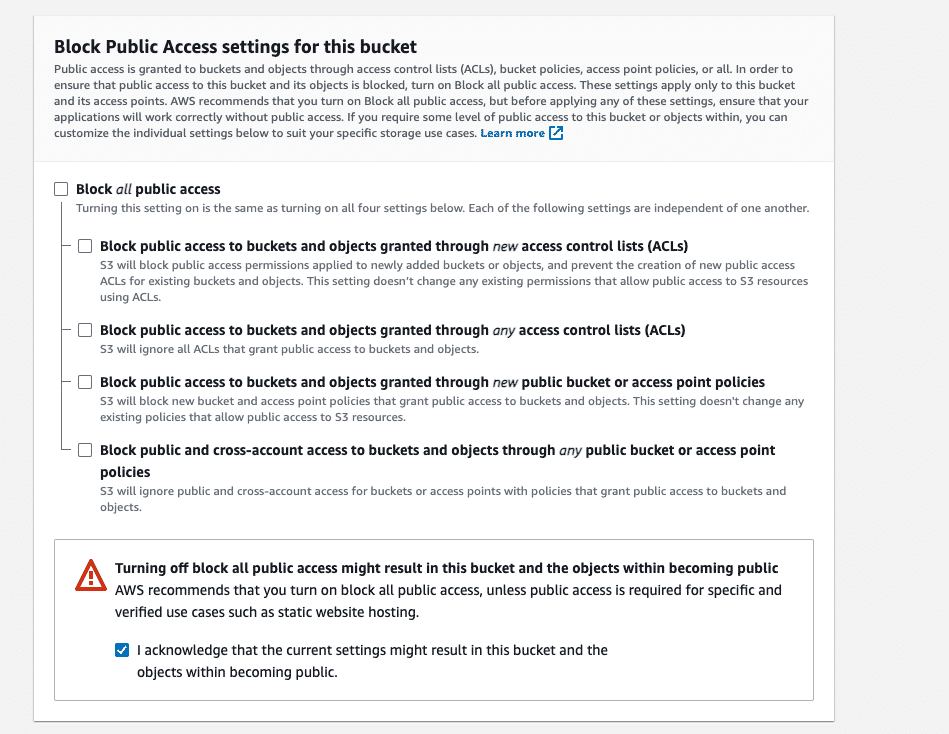
You can leave the rest of the settings as default and click on “Create Bucket”.
Create API Key
In your AWS dashboard, go to “Security Credentials, ” scroll down to “Access Keys” and create a new one:
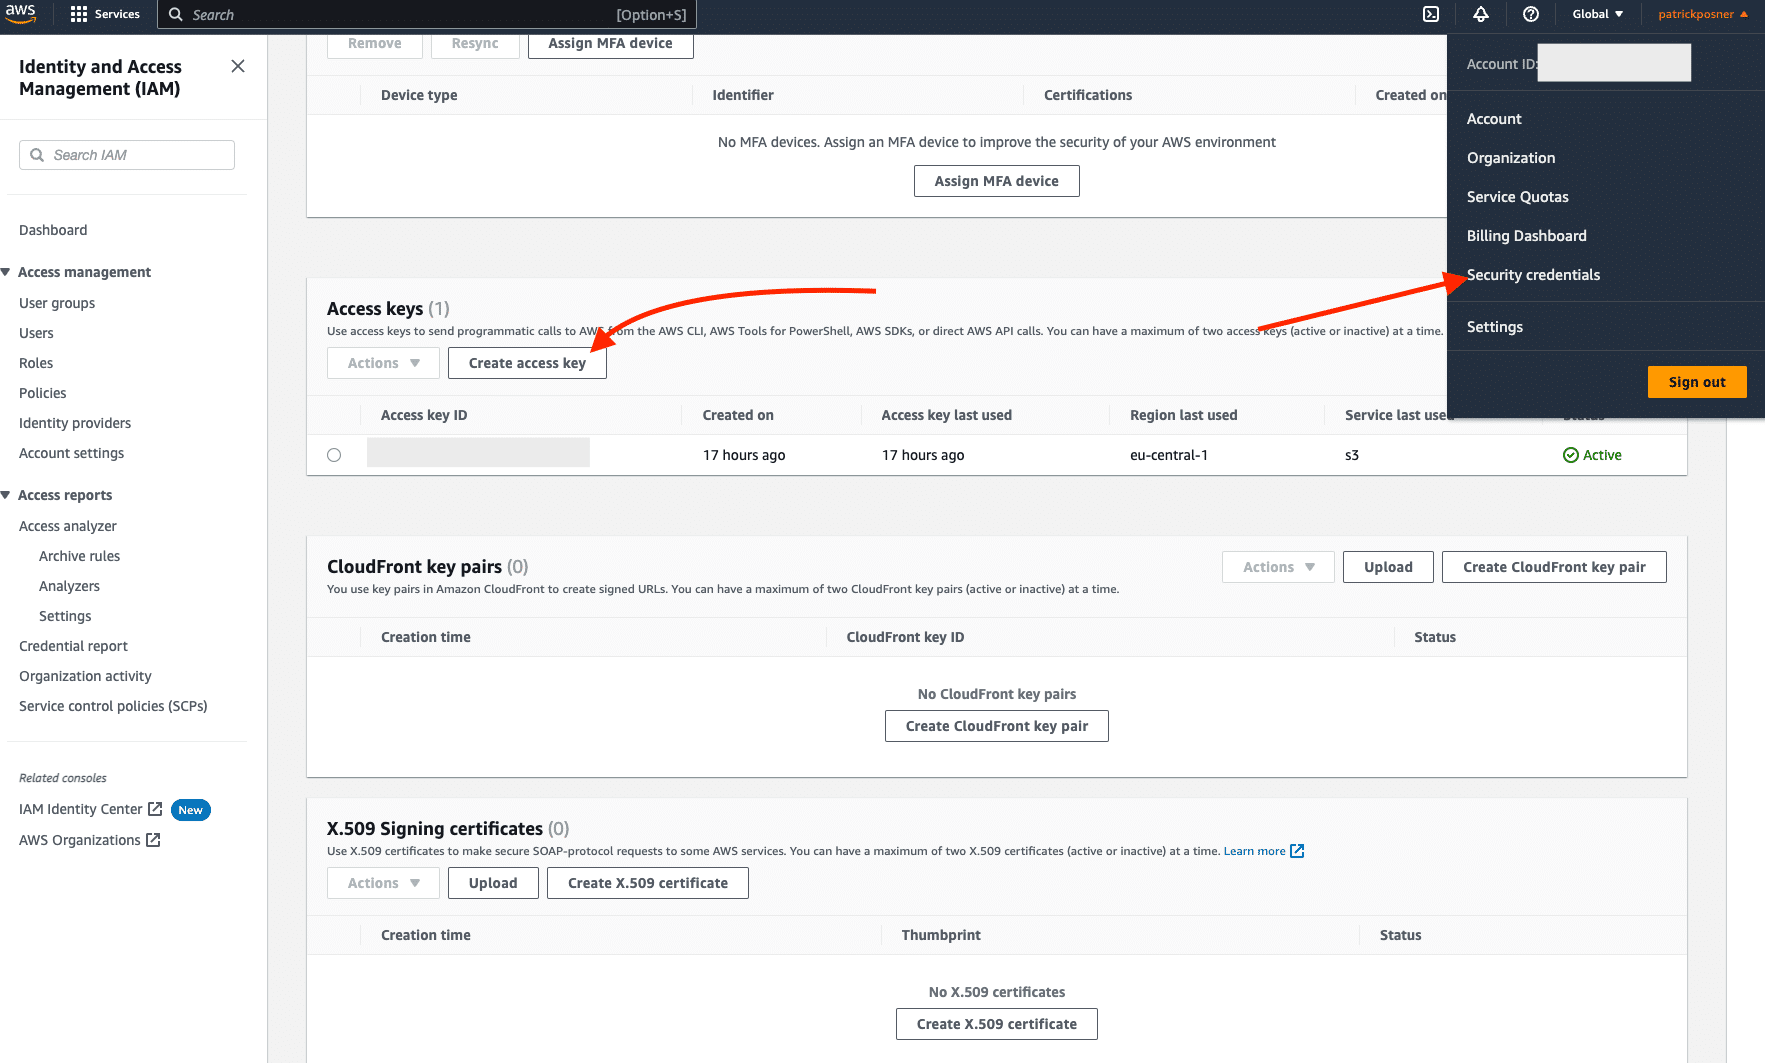
Once done, you can copy your API keyA unique code that allows different software applications to communicate with each other. It’s used for identification a… and API secret.
Connect with Simply Static
Now we have everything in place to connect AWS S3 and Simply Static. Go back to your WordPress installation and go to Simply Static -> Settings -> Deployment and choose “Amazon AWS S3” as a deployment option.
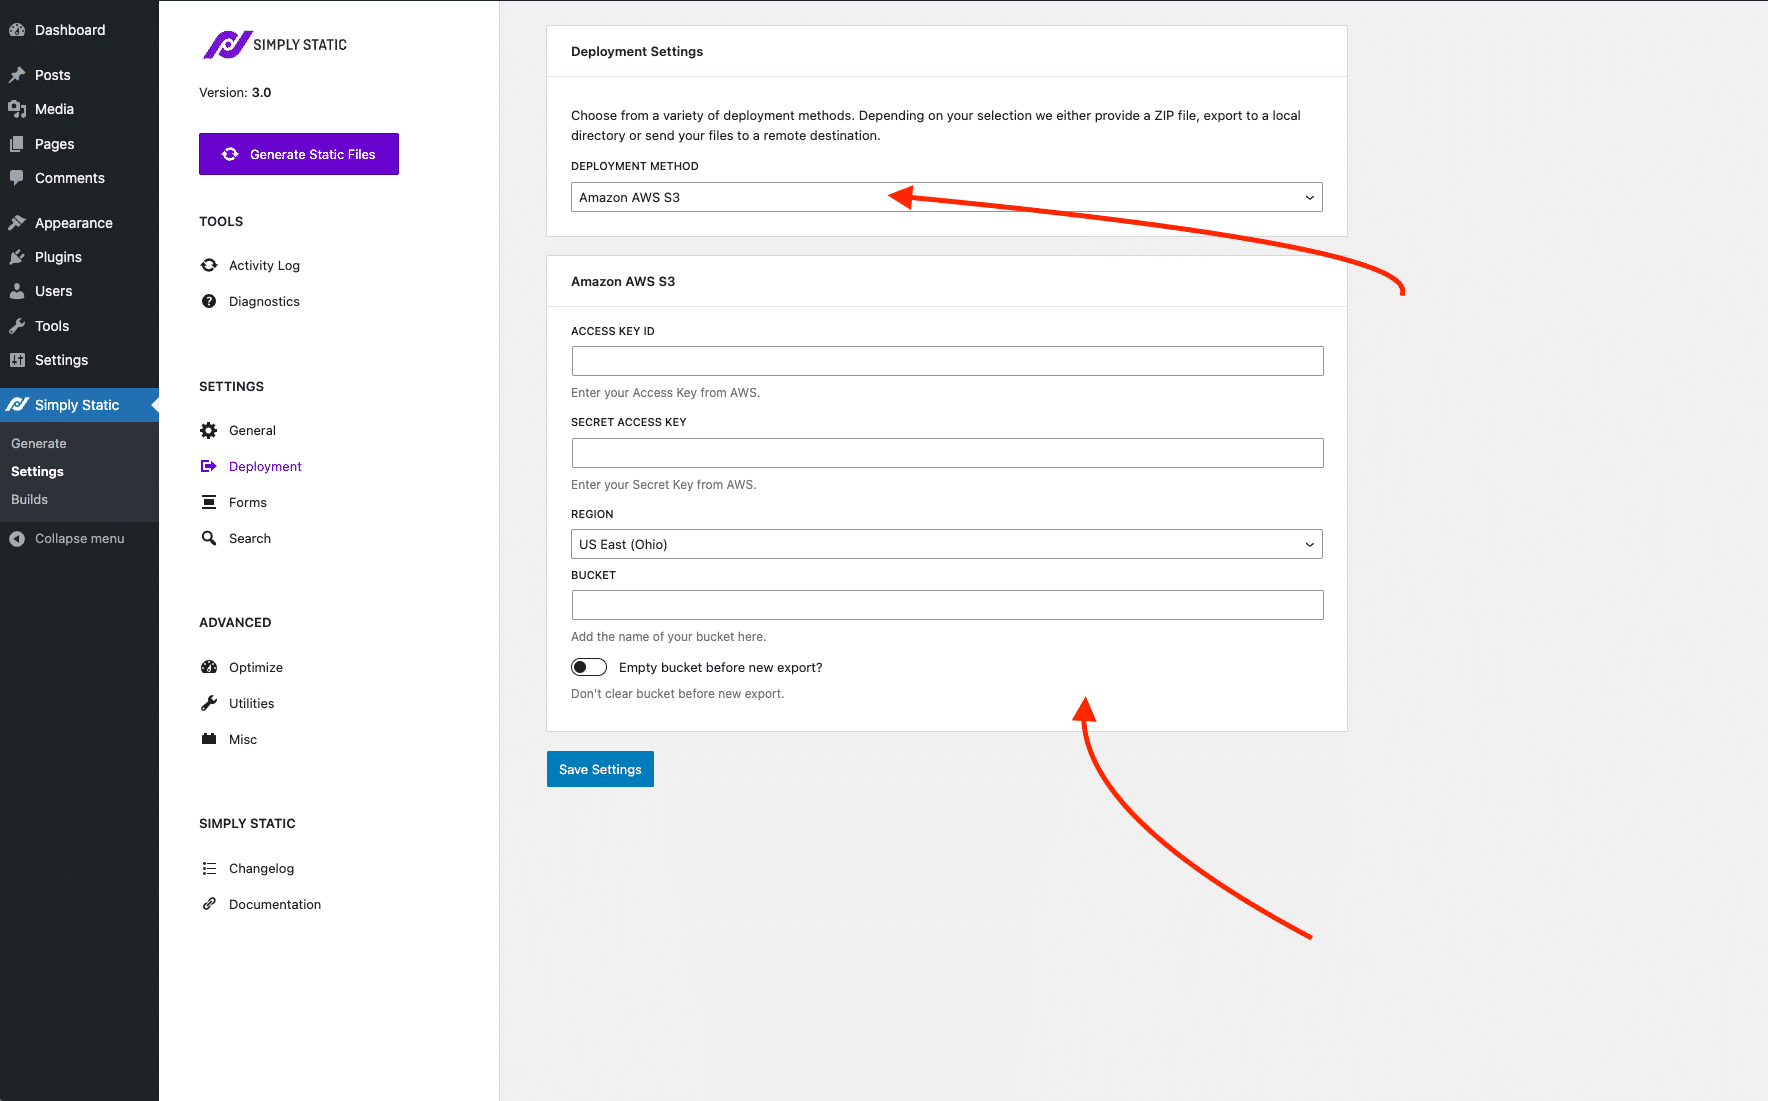
Fill out all the details for your bucket (Access Key IDA unique attribute used to identify a single element on a webpage. It is often used for linking, styling, or scripting., Secret Access Key, bucket name, and the region) and click “Save Settings”.
Export to Amazon AWS S3
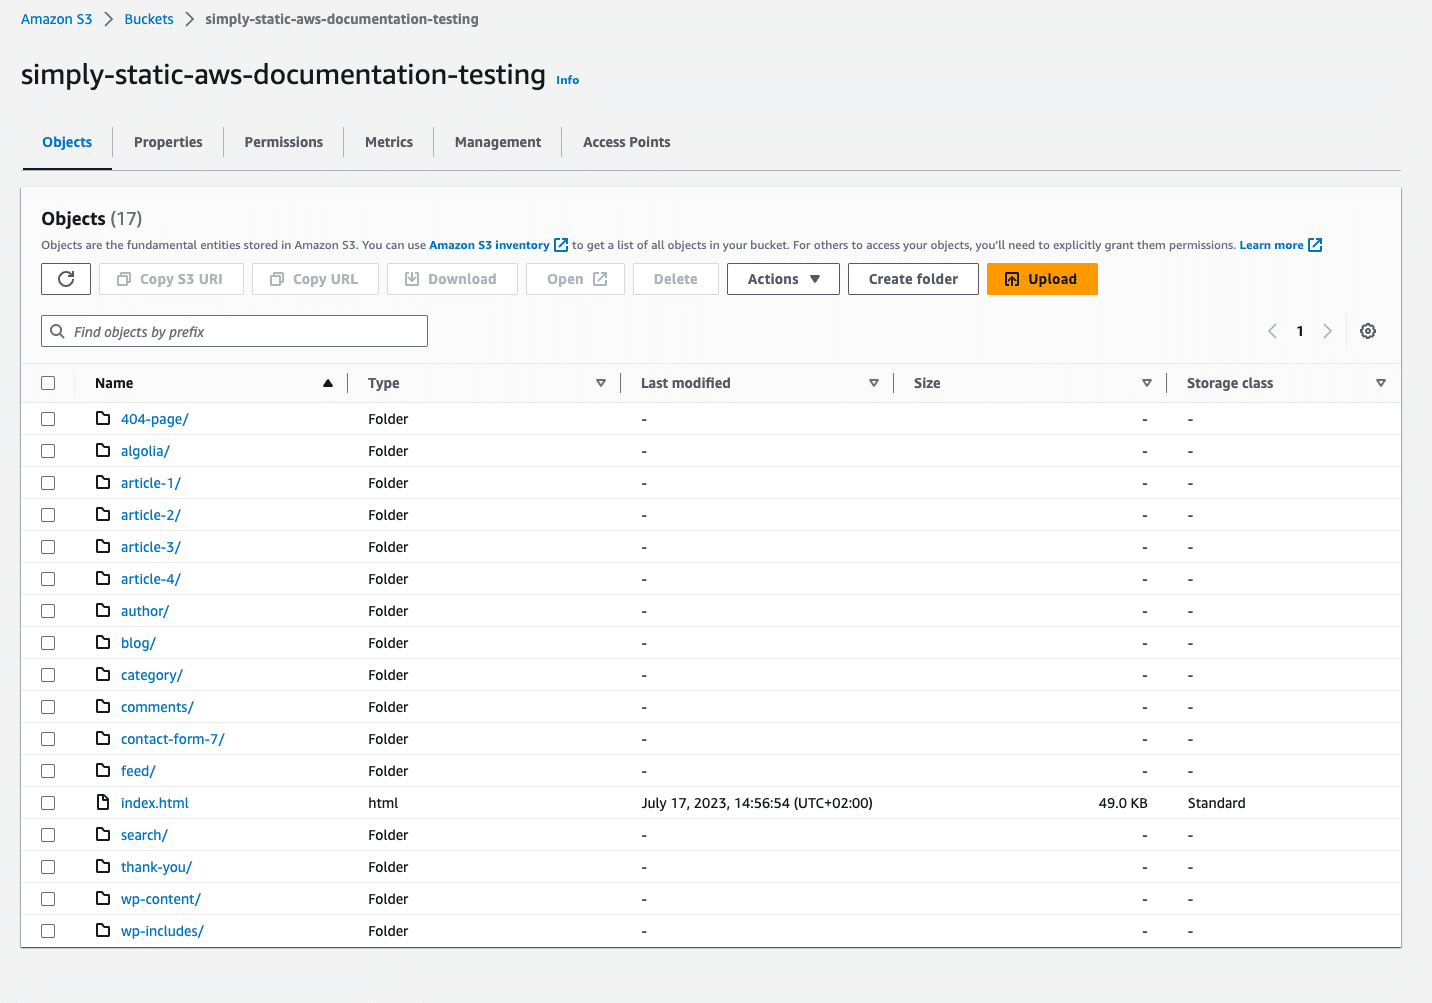
Now that everything is configured, click “Generate Static Files” and switch to “Activity Log” to watch the exportThe process of saving the files and data from your WordPress site to create a static site. progress. Once done, your static files should be uploaded to your S3 bucket, and the result should look similar to this:
Enable Static Site Hosting
To make your static site accessible through an URL, one additional step is required: activating static site hosting for your S3 bucket. Within your S3 bucket, go to “Properties”, scroll down to “Static website hosting” and click on “Edit”:

You will now see the configurationThe setup process where you specify the settings and options for how a software or system will operate. for your static site:
Static website hosting
This setting should be enabled.
Hosting Type
This should be set to “Host a static site”.
IndexA list or database used to make searching faster. document
This will be index.html.
Error document
This is optional, but if you have a custom 404 template, add its relative path here.
Redirection rules
This is also optional, but you can define all kinds of redirects for your static site here. Remember, Simply Static is doing that automatically for you, so this should be only used for global redirects (redirecting entire subdirectories, for example).

That’s it, save your settings, and you get the URL to your static site hosted on Amazon S3.
We don’t cover setting a custom domain via Amazon Route 53 here, but if you want to do that, there is a straightforward tutorial from Amazon.