Table of Contents
Benefits of using GitHub
The GitHubA web-based platform for version control and collaboration, allowing multiple people to work on projects at once. integrationThe act of combining different systems, software, or functionalities to work together as a unified whole. of Simply Static provides a lot of benefits compared to the classic ZIP and local directoryA folder on your computer’s hard drive where files are stored. In the context of Simply Static, this could be the place … exports:
- version controlA system that records changes made to files and directories so that you can recall specific versions later. (no more backups)
- deploymentThe act of pushing the static files generated by Simply Static to a live environment where users can access them. on GitHub PagesA hosting service from GitHub for publishing static websites directly from a GitHub repository., CloudflareA company that provides services like security and website speed improvement. It acts as a protective layer between the … Pages, Vercel, NetlifyA platform for automating web projects that provides hosting and serverless backend services for web applications and st…, FTPFile Transfer Protocol. A method for transferring files between a local system and a server over the internet., AWS, and CDNs
- automatic push-to-deploy changes from WordPress to your static website
Setup
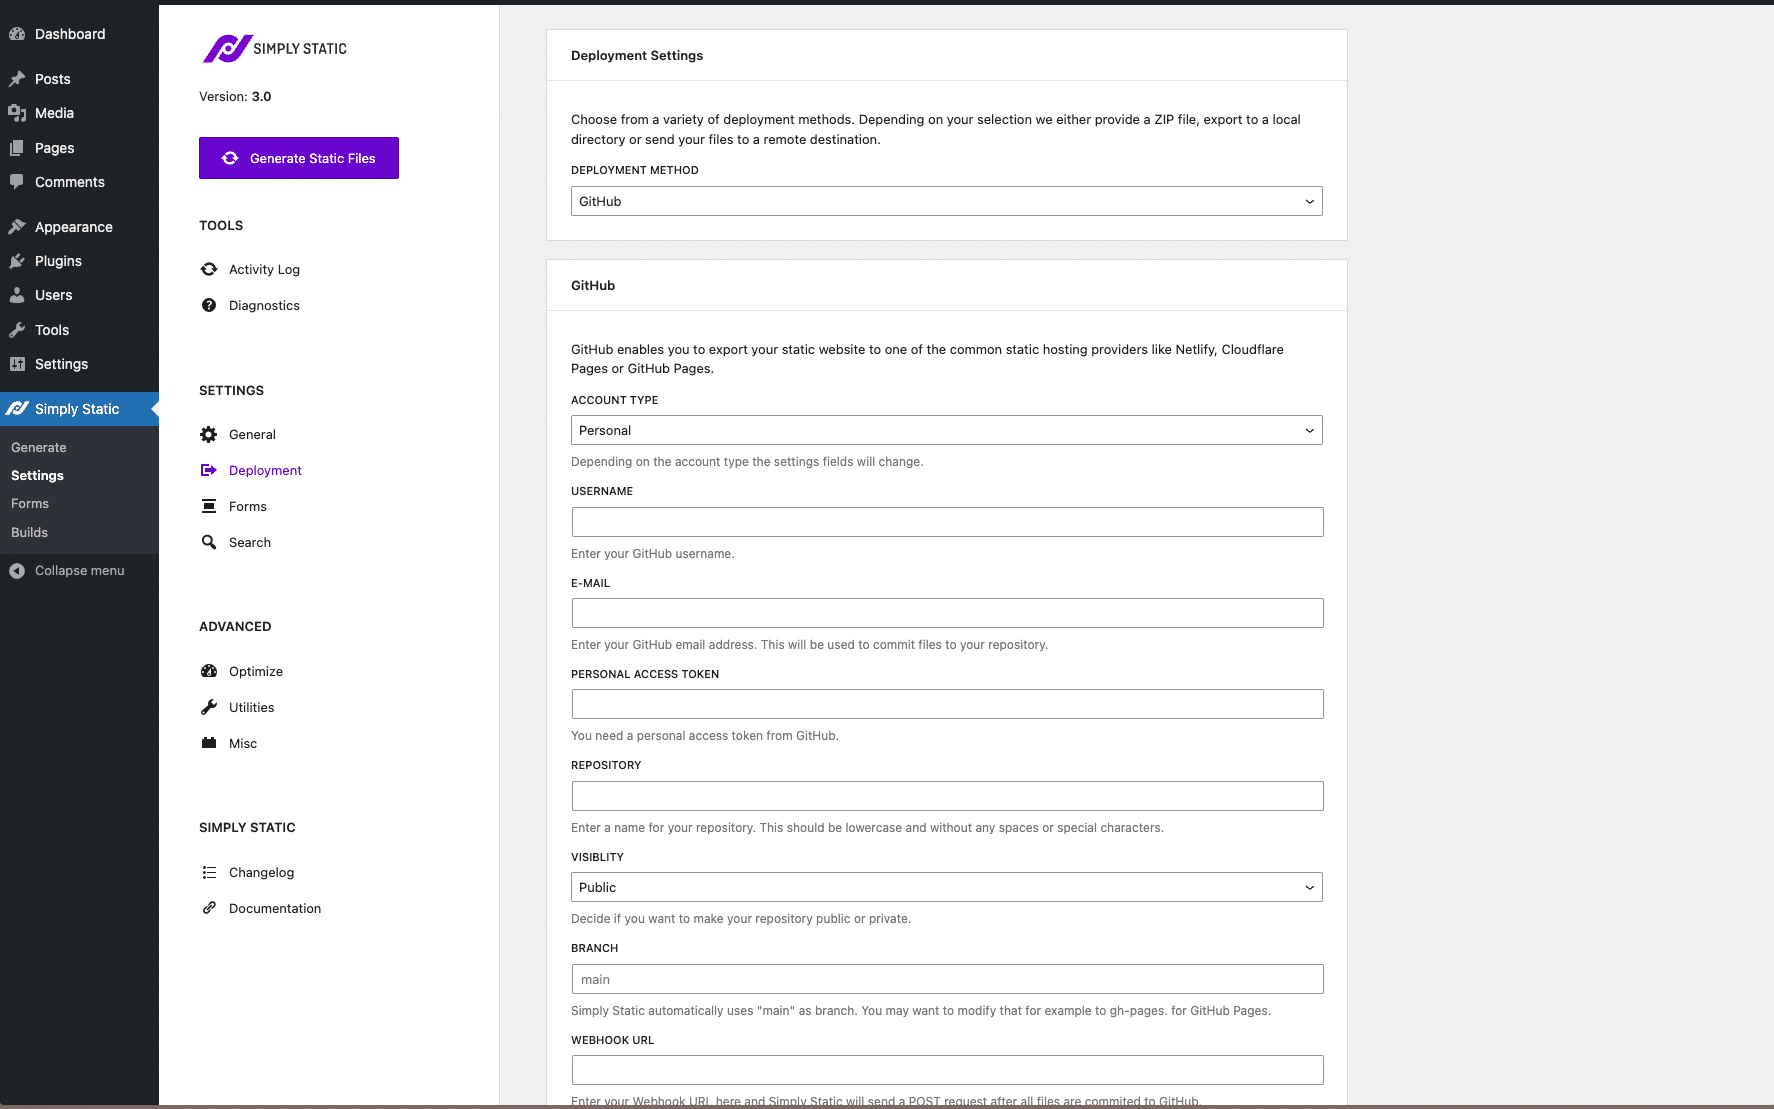
Go to Simply Static -> Settings -> Deployment and choose “GitHub”:
GitHub Account
If you don’t already have an account at GitHub, go and create one at the following link: https://github.com/join
Personal Acess Token
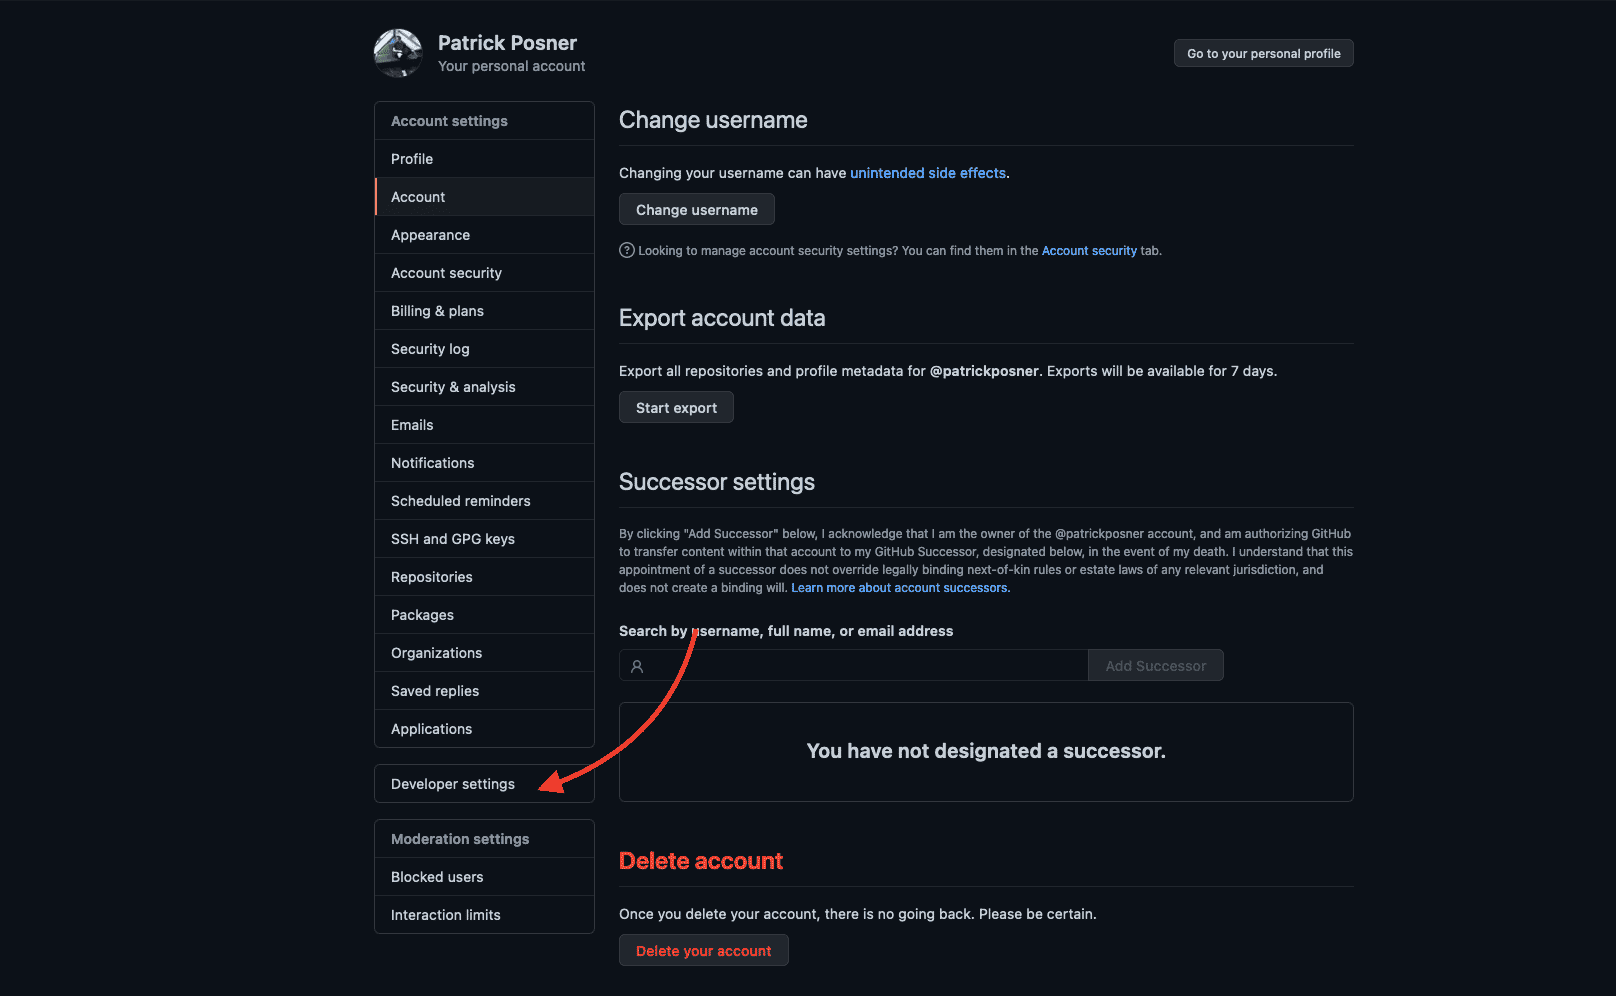
Log in to your GitHub account and click on your profile picture in the right corner of GitHub. A submenu will open.
Click on “Settings”. Then click on “developer settings” on the left sidebar:
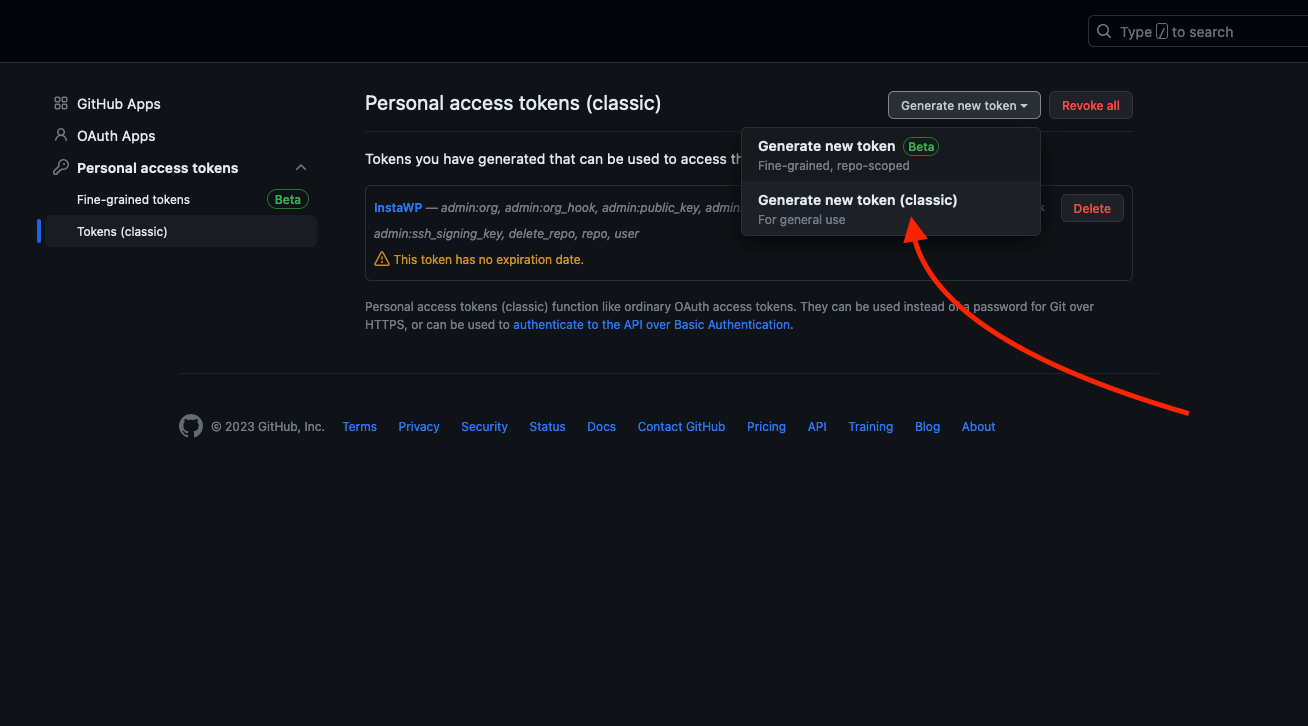
Then click on “Personal Access Token” and “Generate new token”:
Make sure to use the “Classic Token” not the “Fine-grained Token”, which is currently in betaRefers to the testing phase of software before it is officially released. During this phase, users can try out the softw… and not yet supported by Simply Static.
Simply Static needs the privileges to read and write repositories, delete repositories, and the user settings (to verify actions).
The full configurationThe setup process where you specify the settings and options for how a software or system will operate. should look like this:
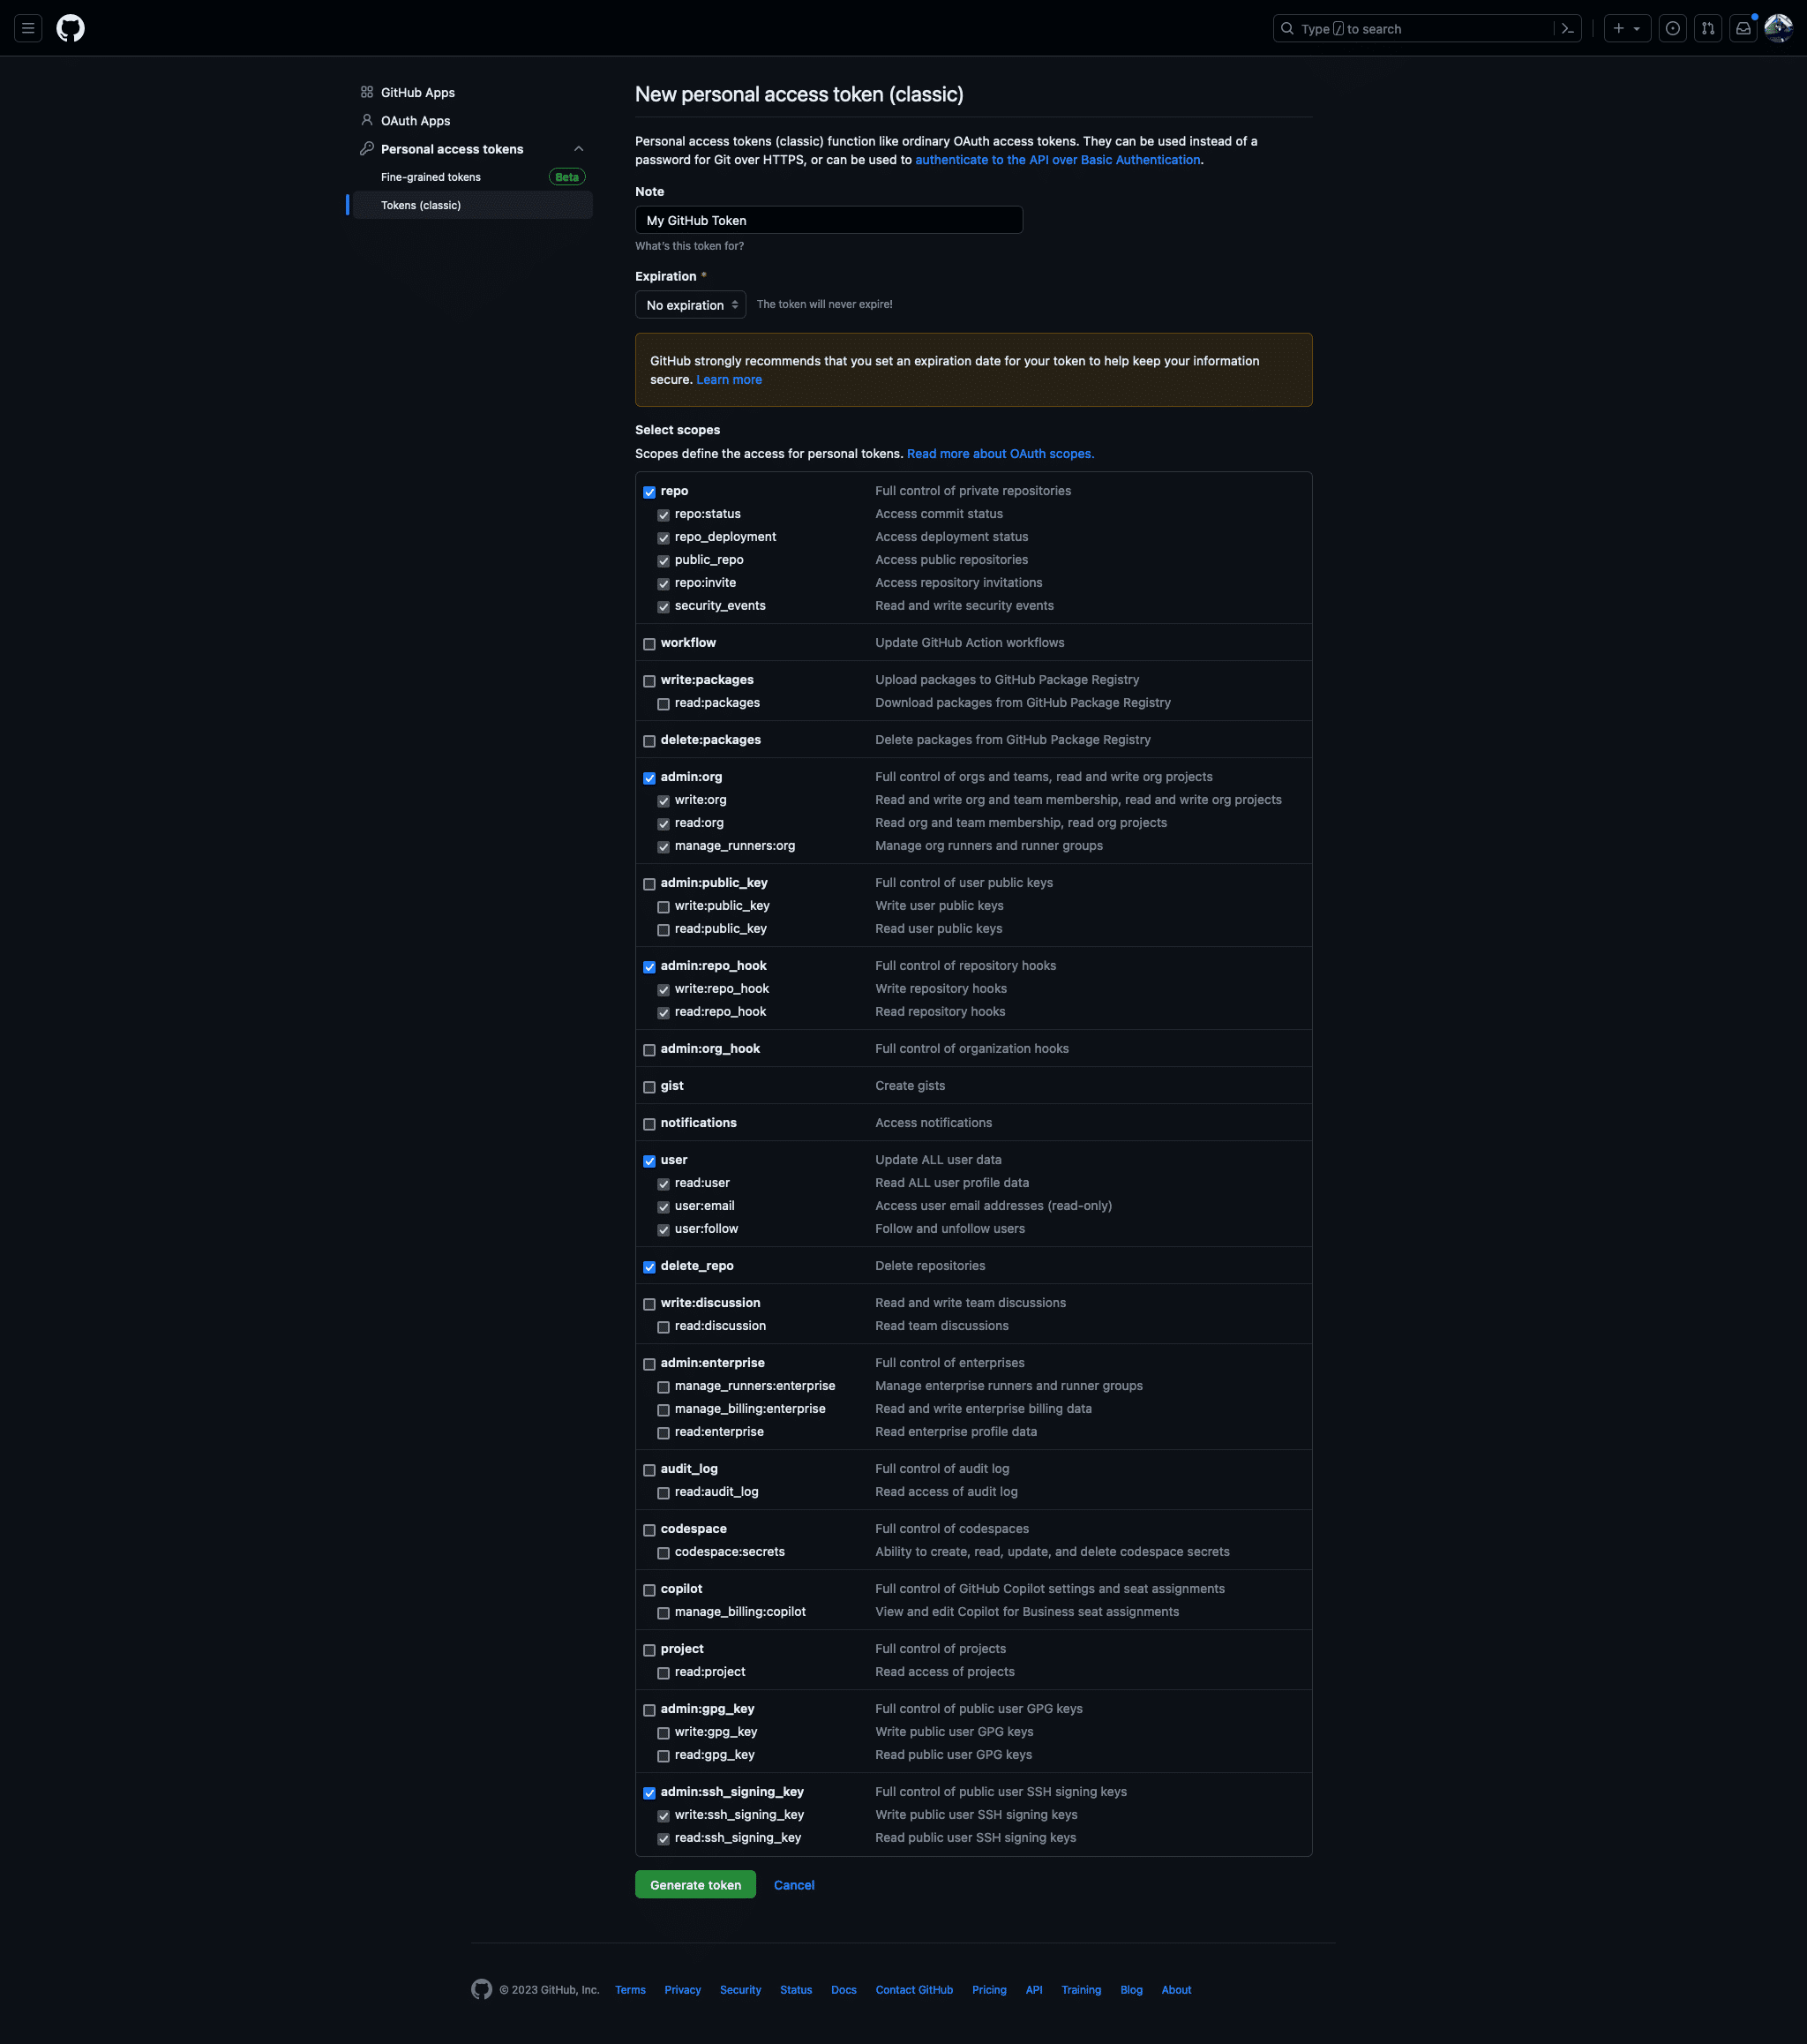
Click “Generate token” and copy the generated code to add it to Simply Static.
Completing the configuration
Back the Simply Static -> Settings -> Deployment -> GitHub, we can add all the necessary details to finish the integration.
Account Type
Select the account type (personal or organization). Based on the settings, the following settings may differ slightly.
GitHub User / Organization
Add the name of your GitHub user. If you use GitHub as an organization, use this account name instead.
GitHub E-Mail
This is the e-mail address of your personal account. This may differ from the one of your organization, so make sure you add the correct e-mail address here.
Personal Access Token
This is the token you generated earlier.
Repository
Add a unique name for your repositoryIn version control systems like GitHub, a repository is the most basic element, a folder where all the files for a parti…. GitHub will tell you if this one already exists or not, so there is not much that can go wrong here.
Visibility
You can decide if your repository should be public or private. Public repositories can be seen by everyone, private repositories are limited to you and everyone you grant access to.
Name your branch
Simply Static uses “main” as the default branchIn version control systems like GitHub, a branch is a separate line of development that can be merged back into the main…, but you can modify that. Depending on your static hosting provider you want to configure that. For example, GitHub Pages requires a branch called “gh-pages”.
Webhook URL
You can notify an external web service once Simply Static committed the update to your GitHub repository. We automatically send a request to GitHub with your credentials if you like to use it within GitHub Actions.
GitHub Repository
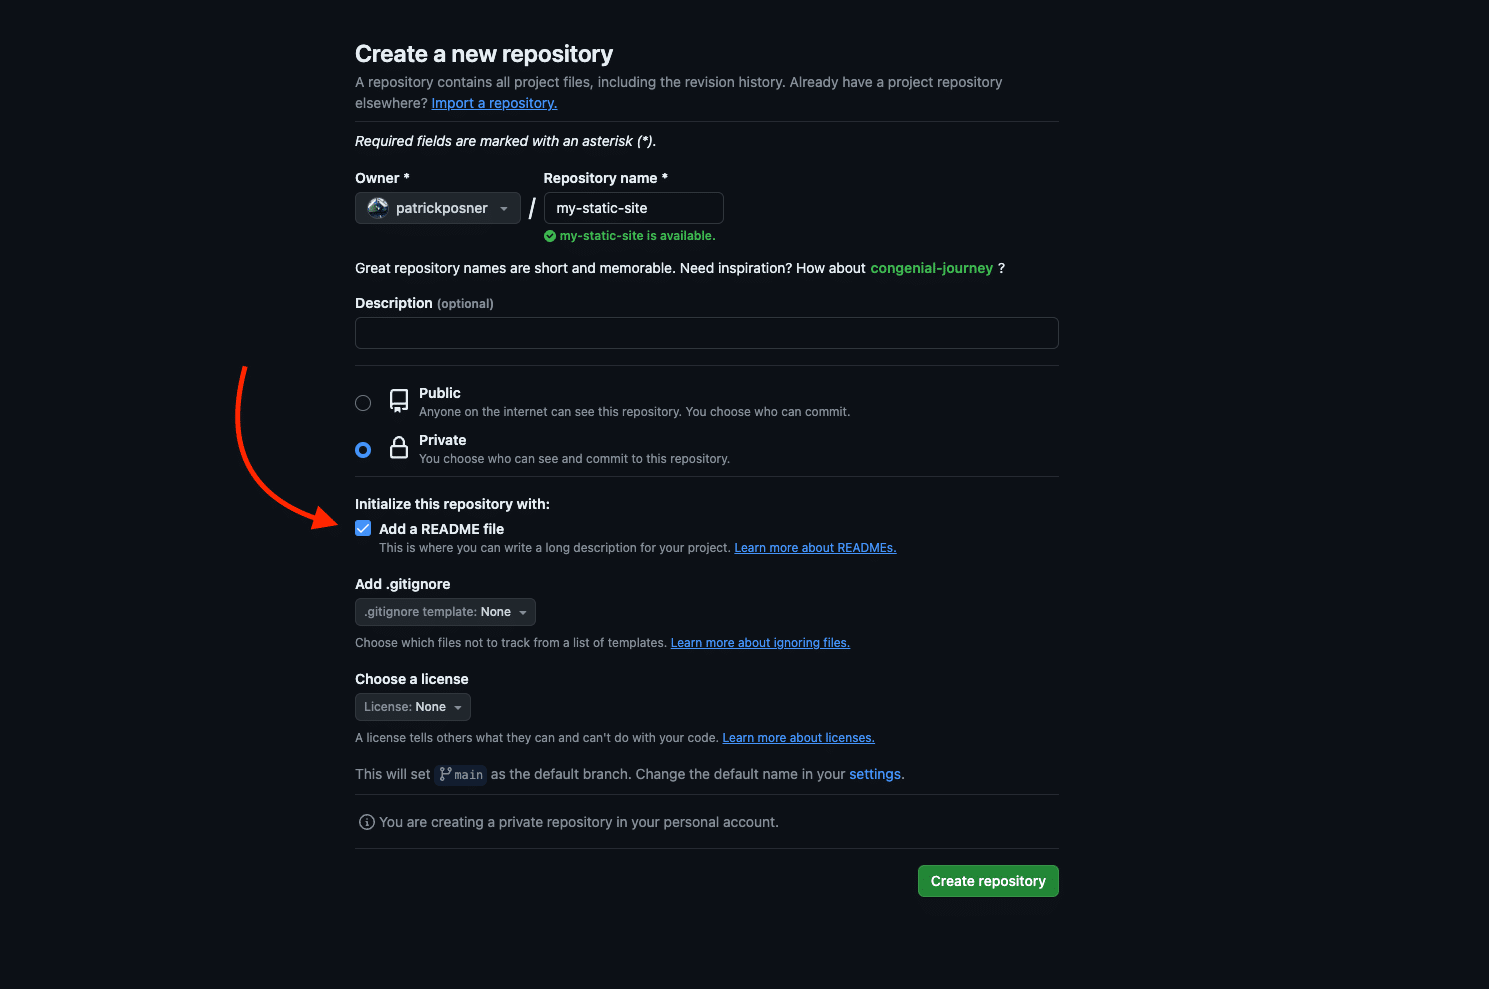
Ensure the repository was created, and a readme file was added before deploying via Simply Static.
You can add a readme file when creating a new repository like so:
We will not create the repository for you; we only have the privileges to push files to it (as configured earlier while creating the personal access token).
GitHub Actions
GitHub Actions are an easy and powerful way to automate your deployment when not using a static hosting provider. There are hundreds of free GitHub Actions you can use to automate the entire process from deployment to code analysis to messaging in Slack and more, but let’s keep it simple here.
For this introduction, we will be using the following GitHub Action to deploy our static website to your SFTP-Server: https://github.com/SamKirkland/FTP-Deploy-Action
Action Settings
Within your GitHub account, go to the repository of your static website, then navigate to Settings -> Actions.
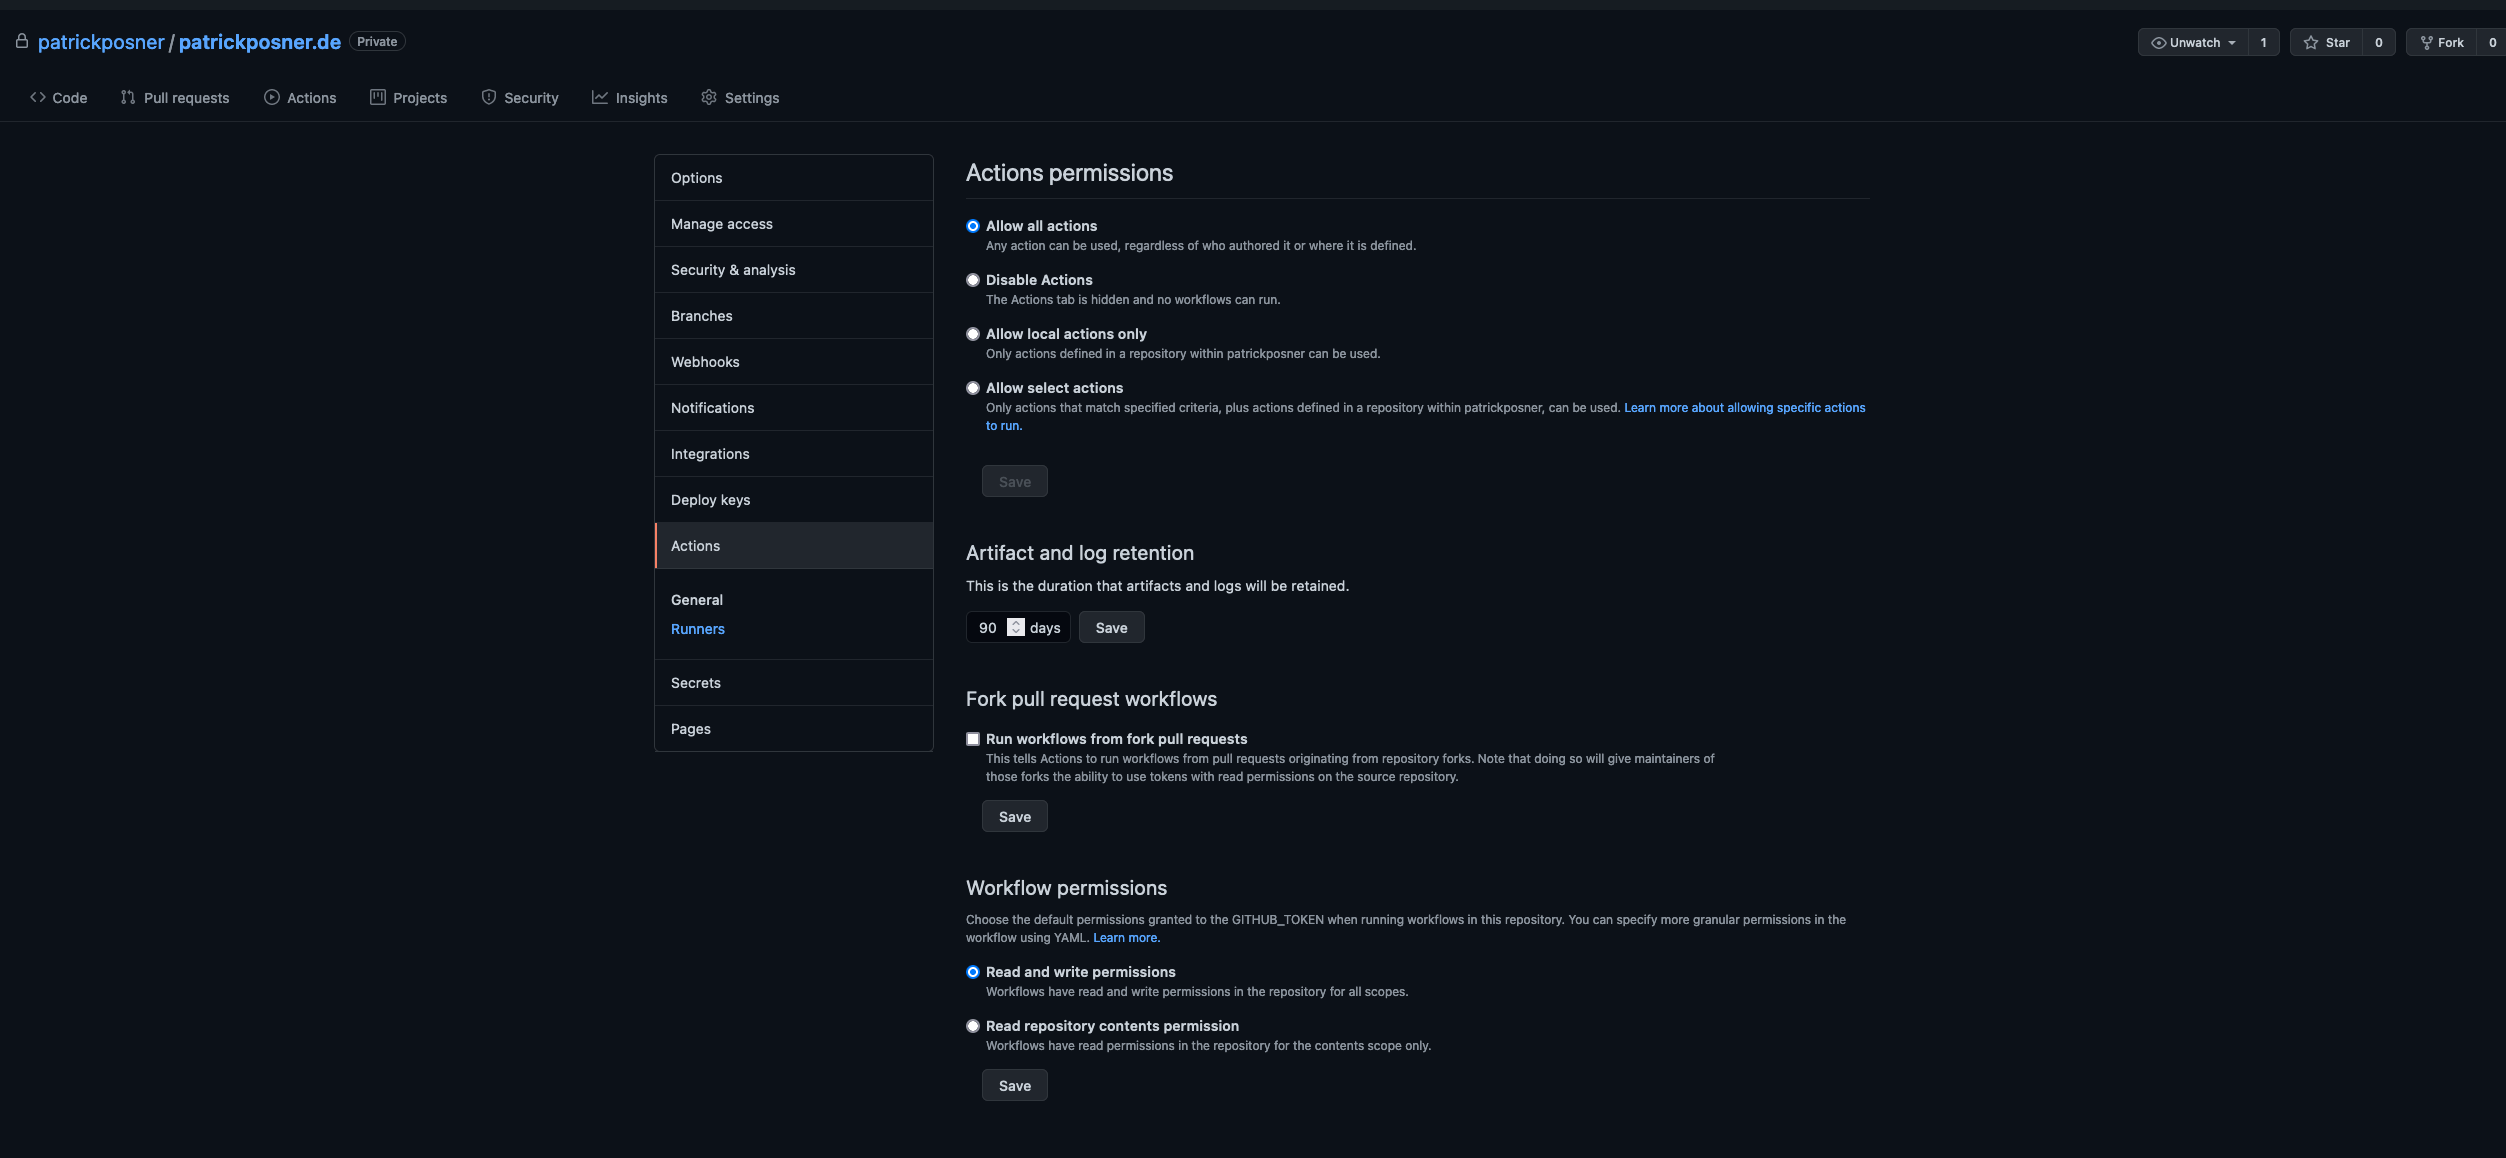
You can leave the settings as default or change the permissions of the actions that are allowed to run.
Create workflows
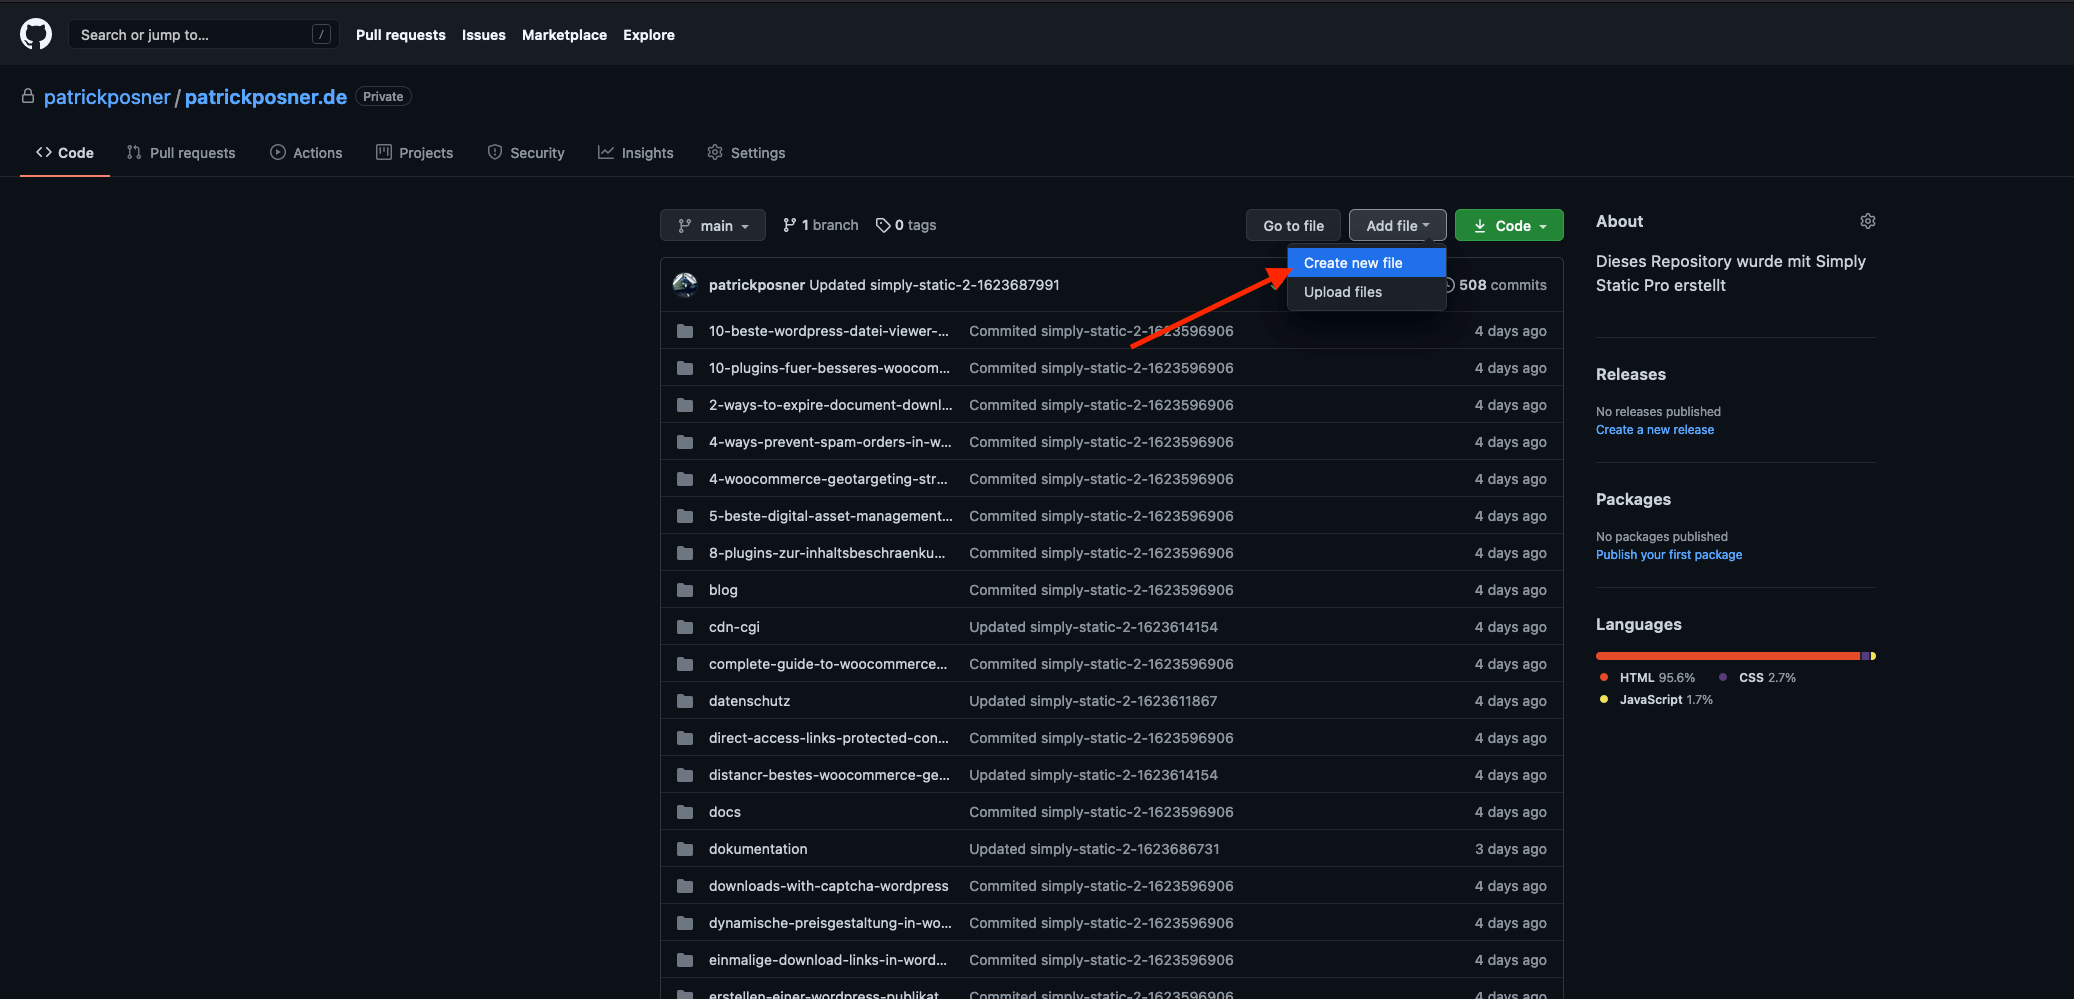
Now head back to your repository and click the button “Add file -> Create new file”.
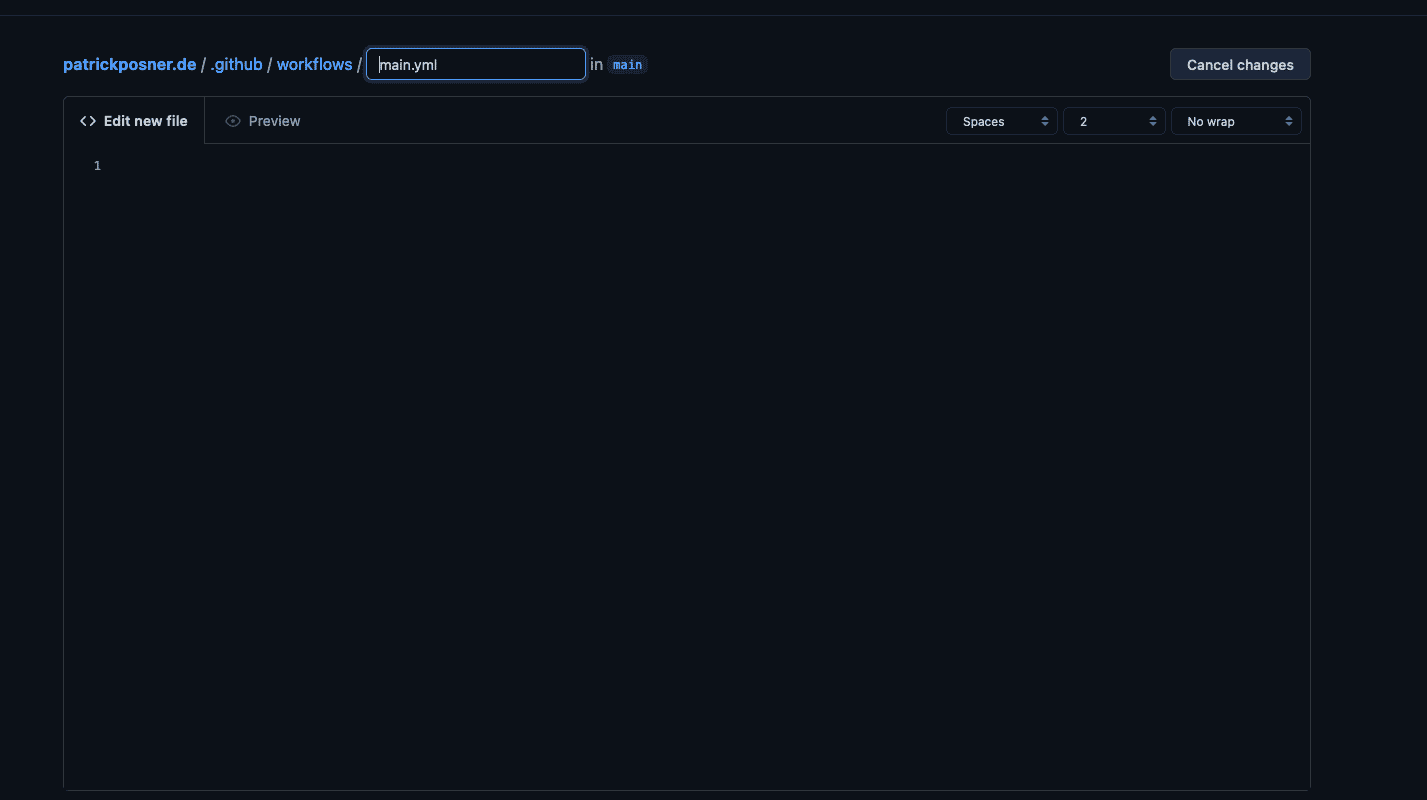
The new file will have the following path:
.github/workflows/main.ymlYou will see that GitHub will autocomplete the breadcrumb to ensure you match it correctly.
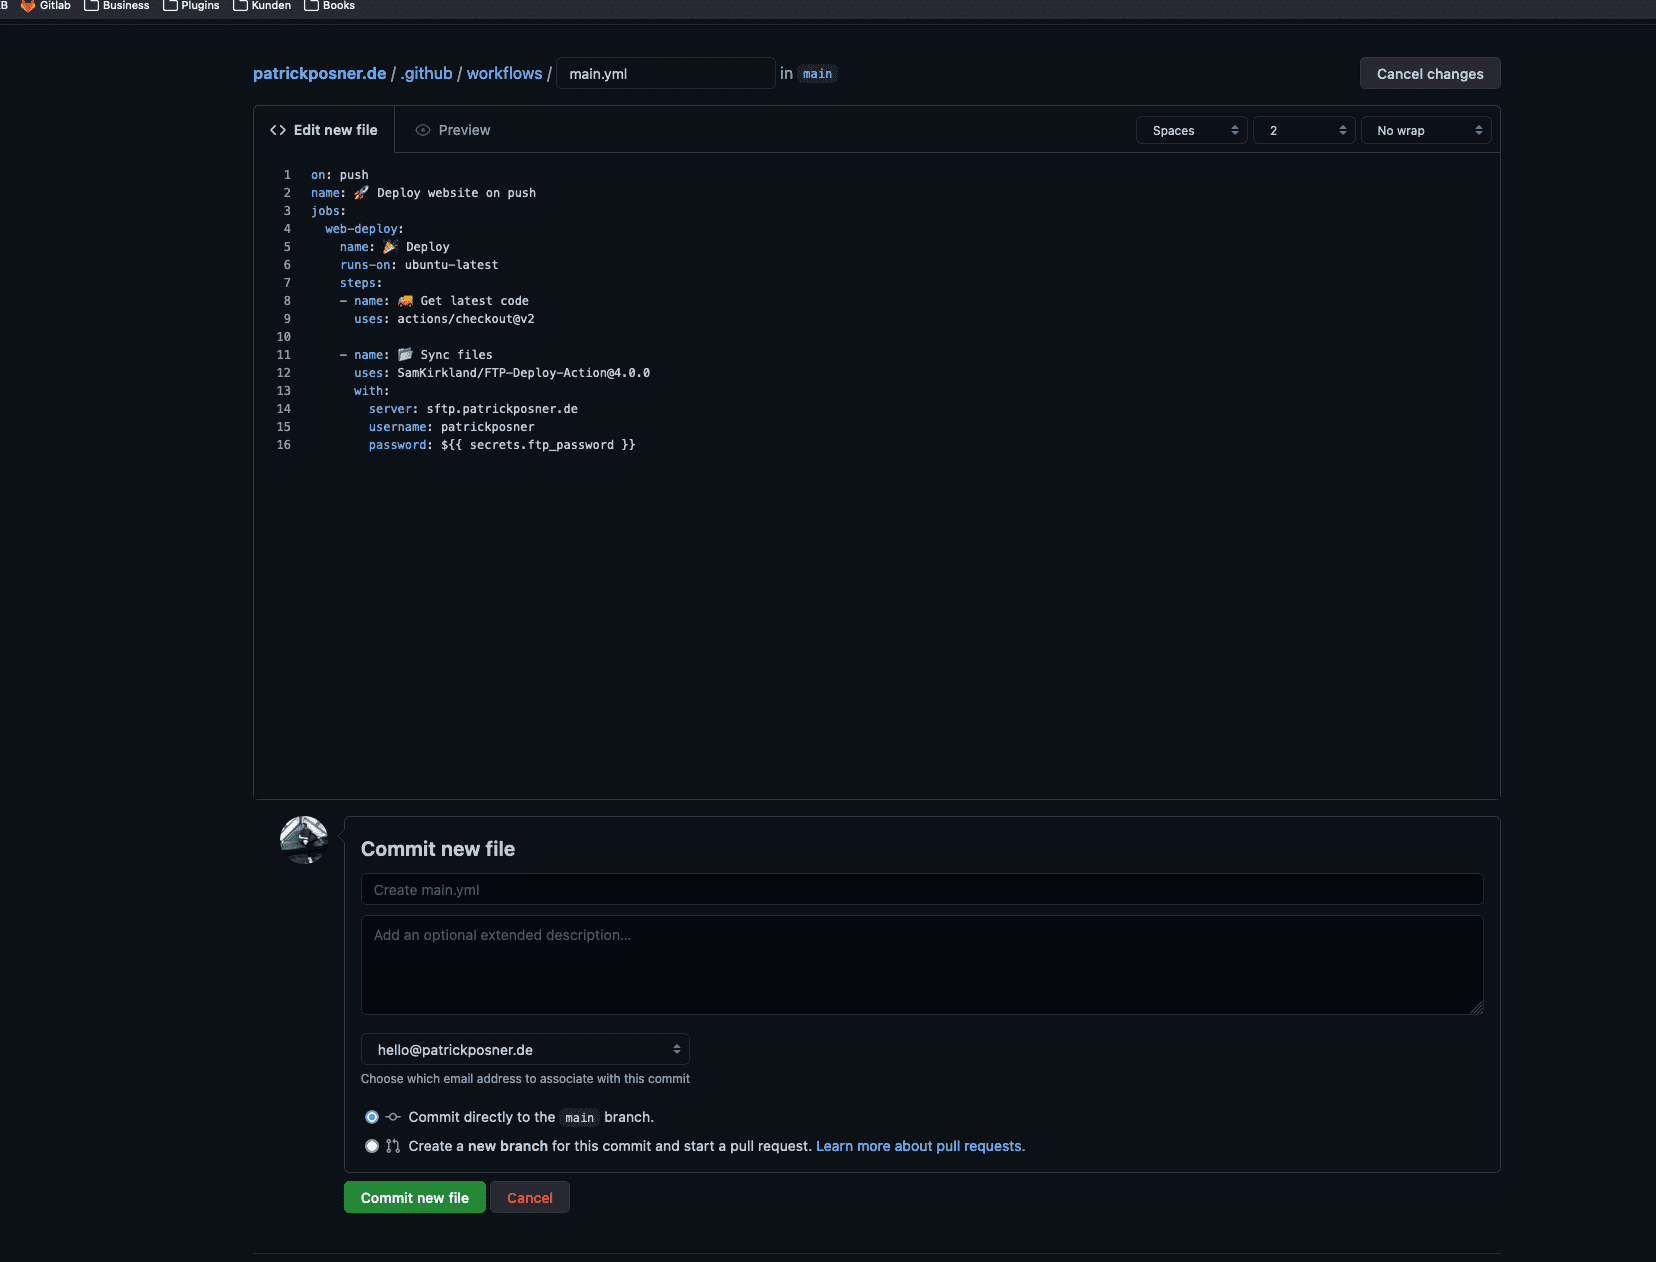
Now we can copy and paste the content of the YAML file provided from the SFTP action as seen in the next screenshot. The only thing we need to change here is the SFTPSecure File Transfer Protocol. A secure method of transferring files between a local system and a remote server. server, the SFTP user, and the SFTP password.
Please do not add your password here directly. We use secrets here (we cover that next). Click “Commit new file” and we can move forward.
Secrets
To store sensitive data (like passwords) in your GitHub repository, you must use secrets. In our example, we used a placeholder called:
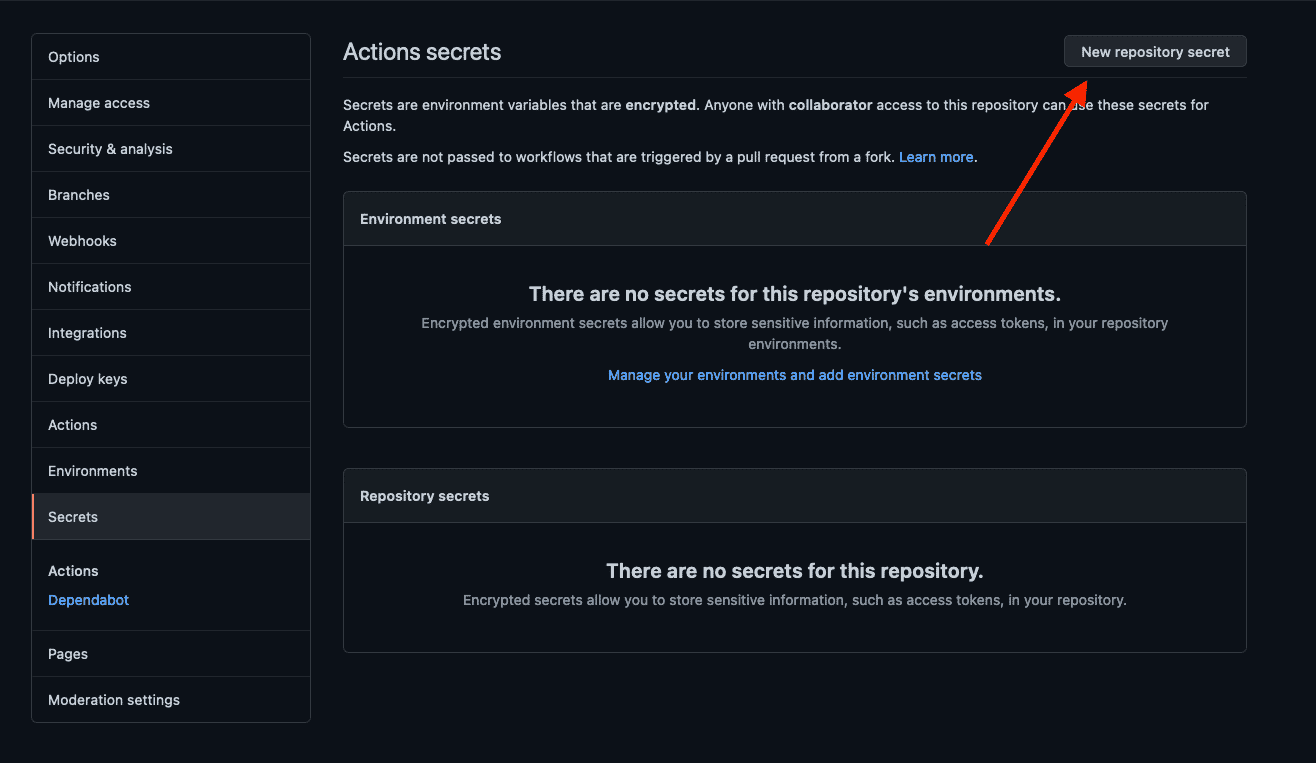
${{ secrets.ftp_password }} Go to your repository, then Settings->Secrets, and click on “New repository secrets”.
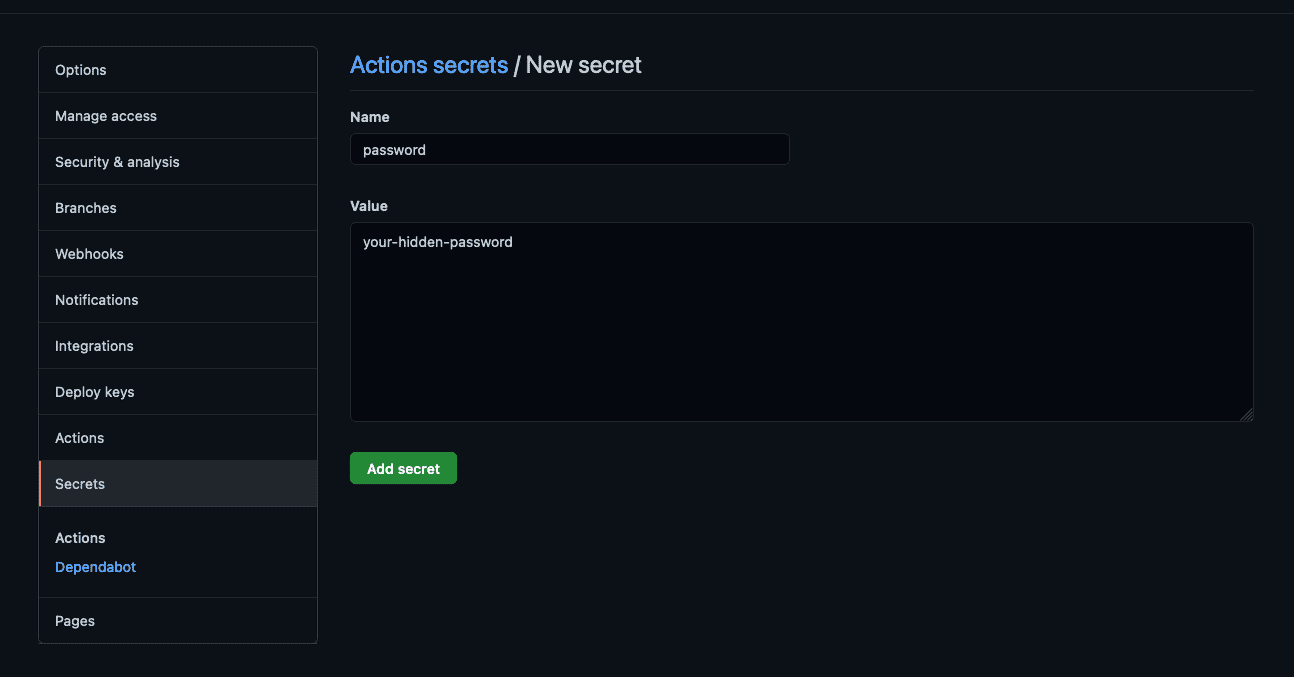
Add the placeholder and the value it should be replaced with, and click “Add secret”
An action gets triggered every time you push to your repository.
Monitor Actions
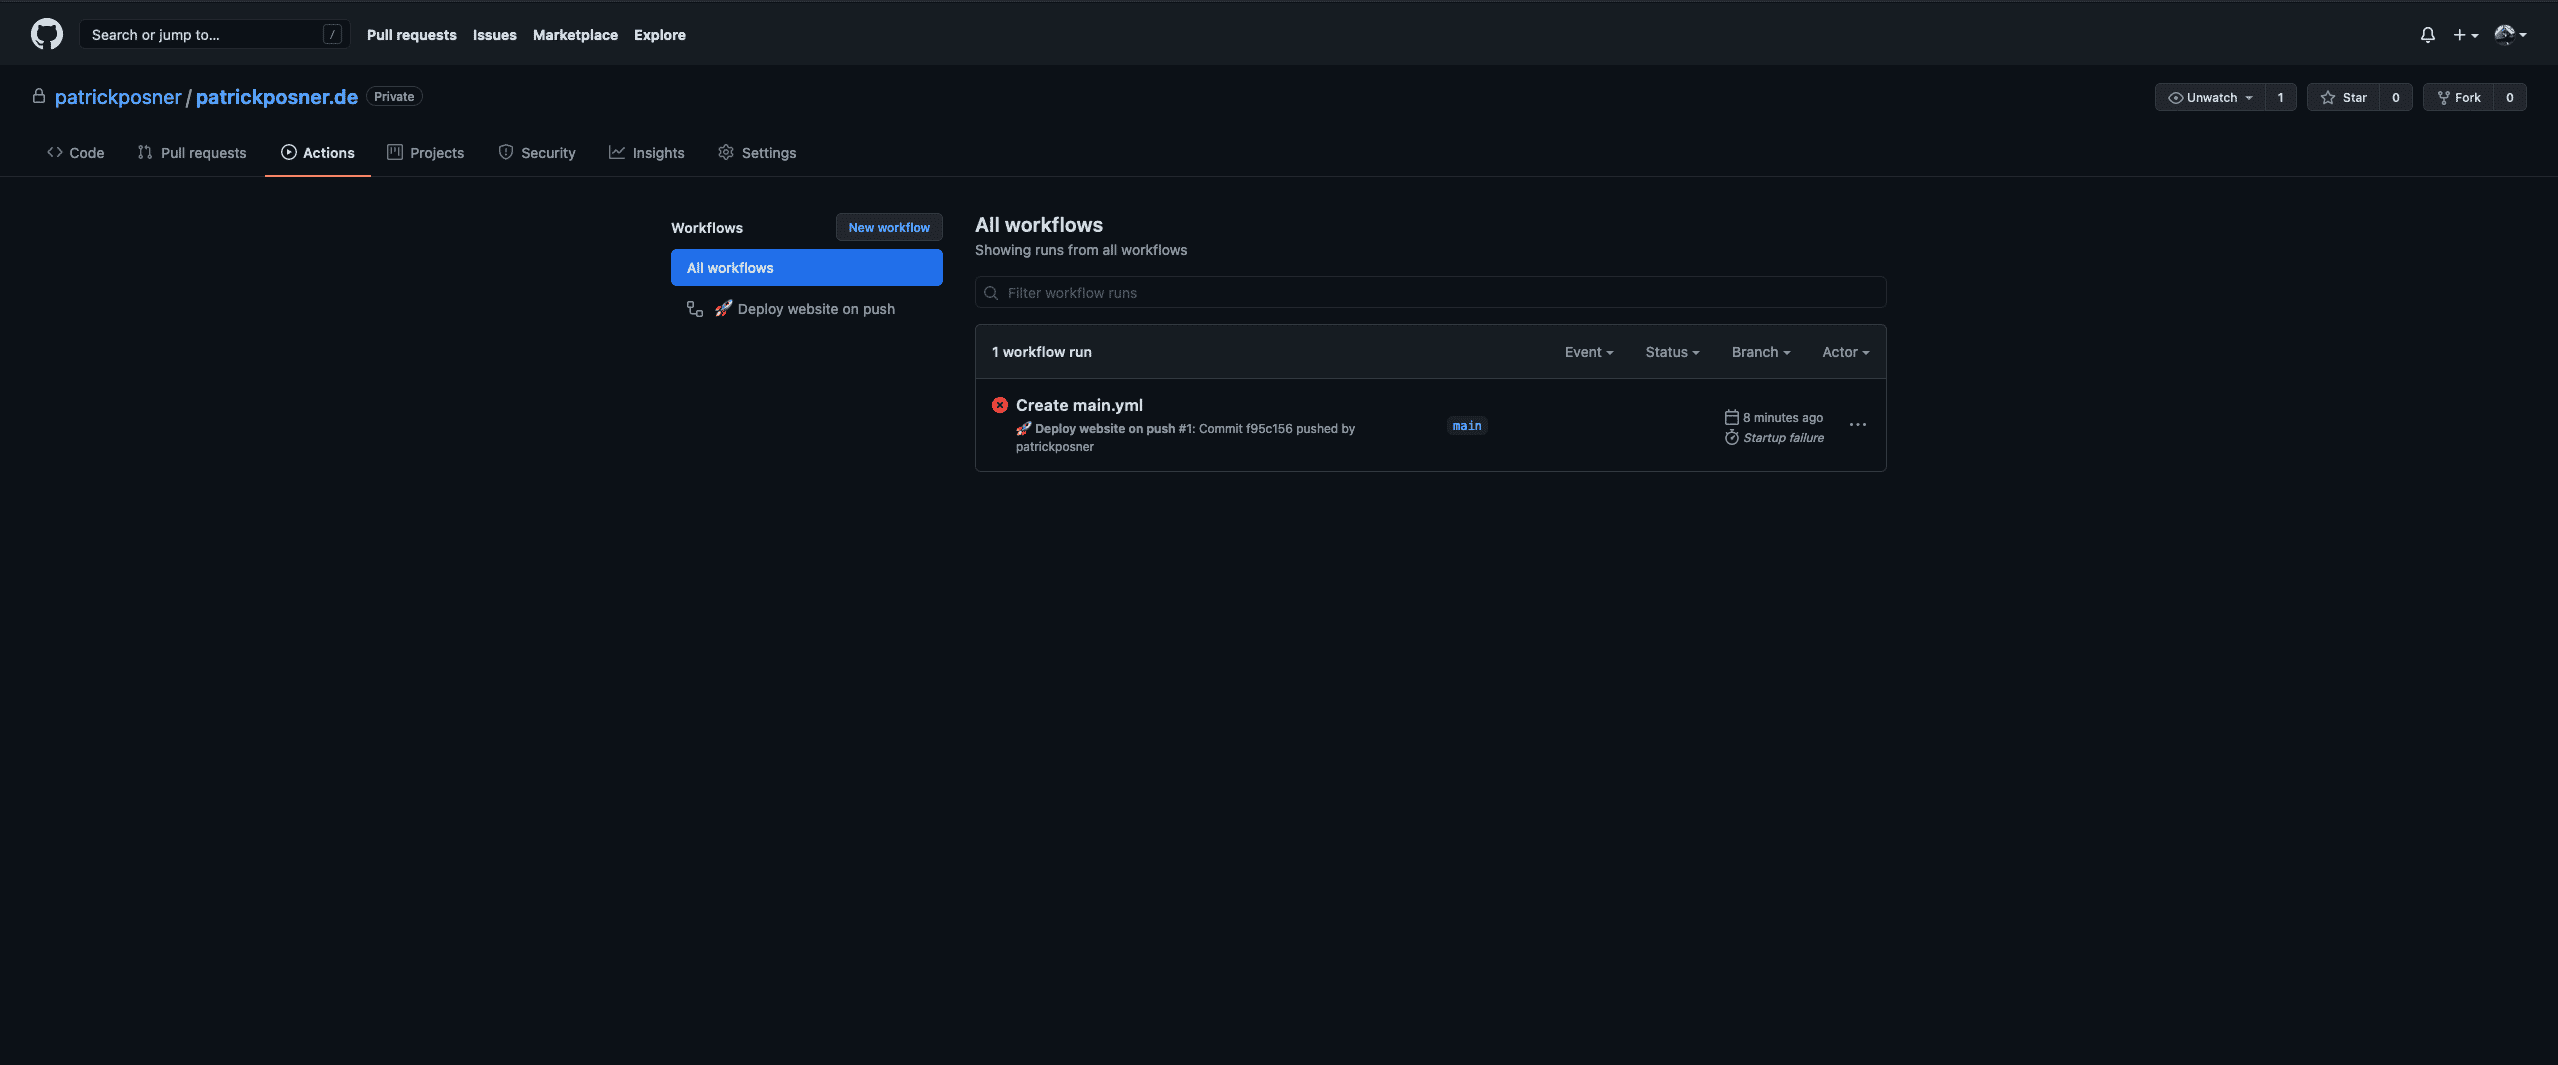
If you like to monitor your actions, you can check the details in the “Actions” tab within your repository. It provides detailed logs, an overview of all running and planned actions, and more:
Useful Actions for Deployment
SFTP
To deploy to an SFTP server, I highly recommend the following action: FTP Deploy Action. To make things a bit easier, I created a simple main.yaml file with a subdirectory, as this will be the most used case for that deployment method:
on: repository_dispatch
name: 🚀 Deploy website on push
jobs:
  web-deploy:
    name: 🎉 Deploy
    runs-on: ubuntu-latest
    steps:
    - name: 🚚 Get latest code
      uses: actions/checkout@v2

    - name: 📂 Sync files
      uses: SamKirkland/FTP-Deploy-Action@4.0.0
      with:
        server: sftp.yourserver.com
        username: youruser
        password: ${{ secrets.ftp_password }}
        server-dir: public_html/www/mysubdirectory
AWS S3
To deploy to AWS S3Amazon Web Services (AWS) is a cloud computing platform that offers various services, including storage solutions like S…, I highly recommend the following action: S3 Deploy. To make things a bit easier, I created a simple main.yaml from the documentation that you can copy, to begin with:
name: Example workflow for S3 Deploy
on: [repository_dispatch]
jobs:
  run:
    runs-on: ubuntu-latest
    env:
      AWS_ACCESS_KEY_ID: ${{ secrets.AWS_ACCESS_KEY_ID }}
      AWS_SECRET_ACCESS_KEY: ${{ secrets.AWS_SECRET_ACCESS_KEY }}
    steps:
        - uses: actions/checkout@v2

        - name: Deploy
          uses: reggionick/s3-deploy@v3
          with:
            folder: build
            bucket: ${{ secrets.S3_BUCKET }}
            bucket-region: ${{ secrets.S3_BUCKET_REGION }}
            dist-id: ${{ secrets.CLOUDFRONT_DISTRIBUTION_ID }}
            invalidation: /
            delete-removed: true
            no-cache: true
            private: true