Simply Static allows exporting your static website to BunnyCDNBunnyCDN is a service that helps your website load faster by storing copies of your site’s files in multiple locations. without using GitHubA web-based platform for version control and collaboration, allowing multiple people to work on projects at once.. This is one of the easiest ways to get your static website online.
Table of Contents
BunnyCDN
BunnyCDN is quite a popular choice for a CDNStands for Content Delivery Network. It’s a system of distributed servers that deliver web content quickly to users base… as it combines fair pricing with incredibly good performance and 99.99% availability across the entire globe. It serves your website for a fraction of the costs of a traditional web host and provides also better performance and a lot more security due to the static deploymentThe act of pushing the static files generated by Simply Static to a live environment where users can access them. with Simply Static.
ConfigurationThe setup process where you specify the settings and options for how a software or system will operate.
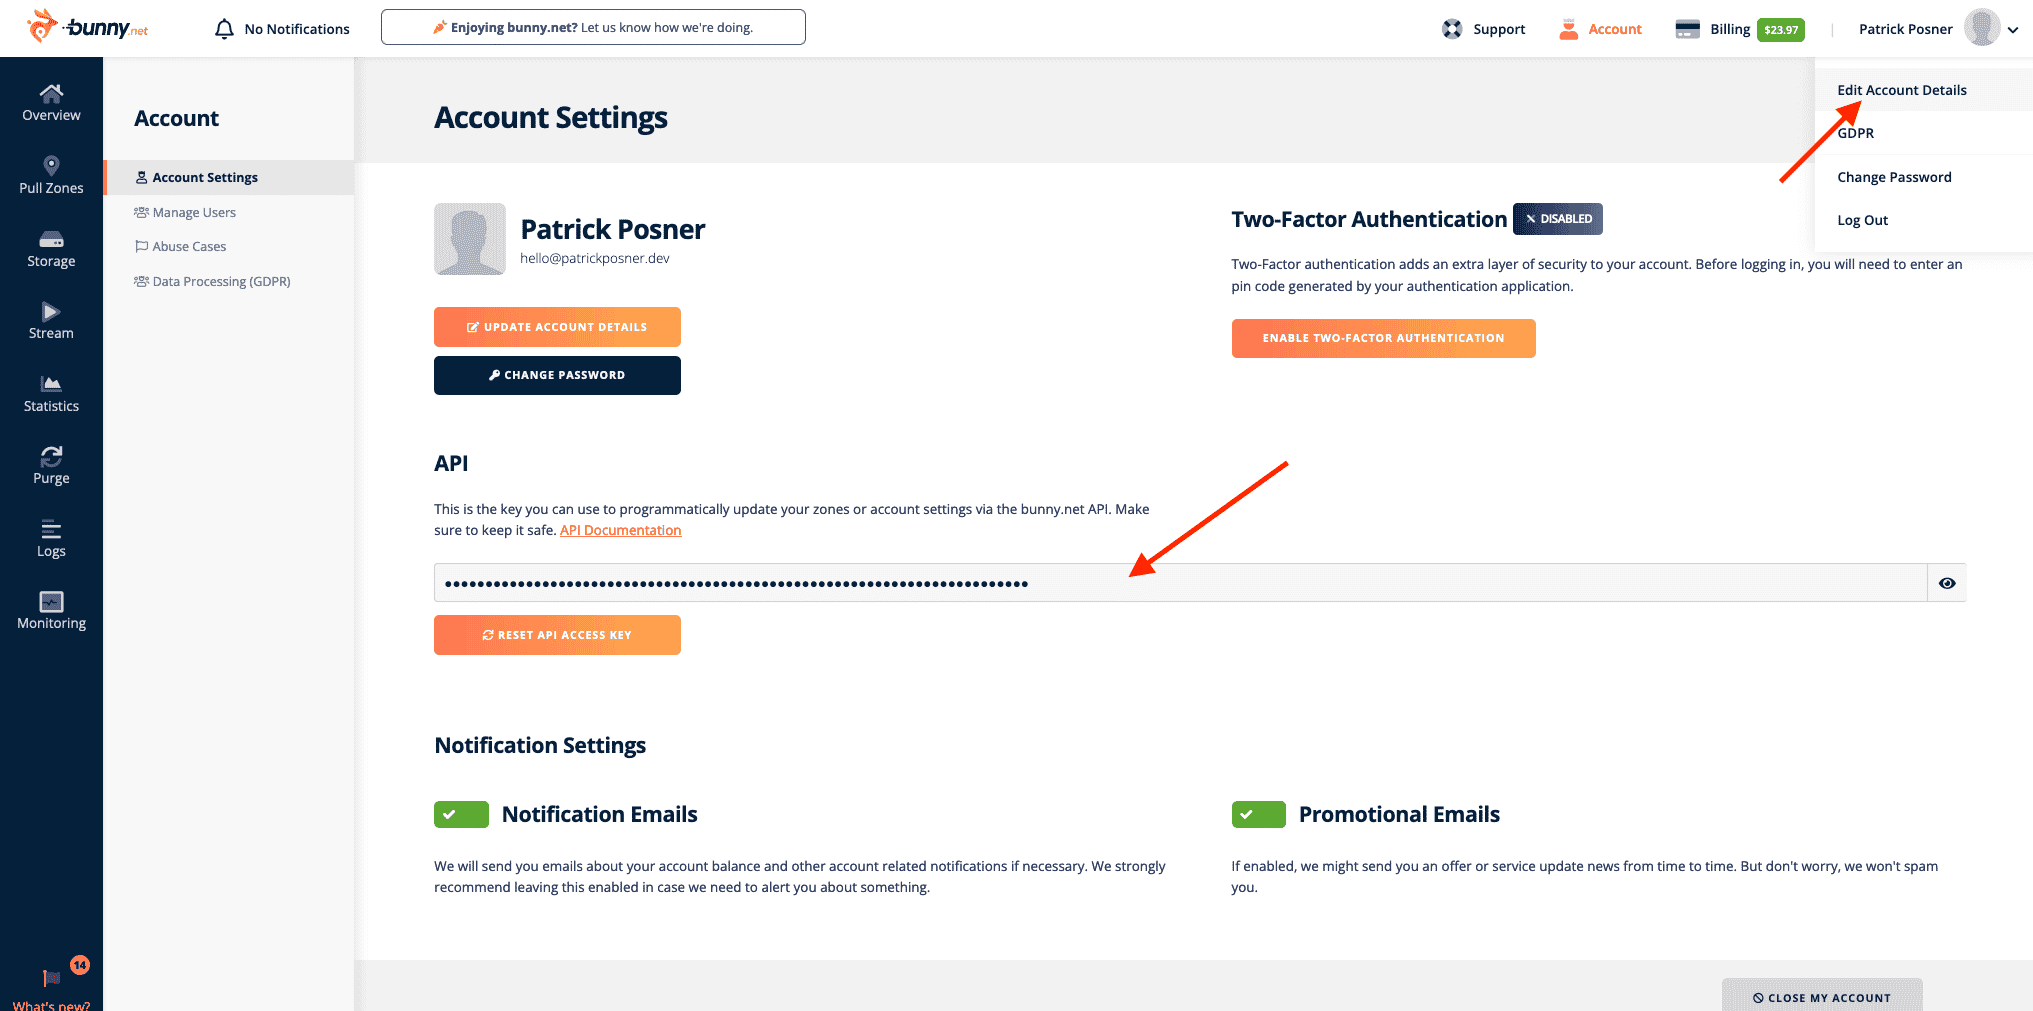
You can create a free account at bunny.net. Once you have on, go to “Account Details” to grab your API keyA unique code that allows different software applications to communicate with each other. It’s used for identification a…:
Pull Zone
Before we head back to the Simply Static settings, let’s move to “Storage Zones” and create one:

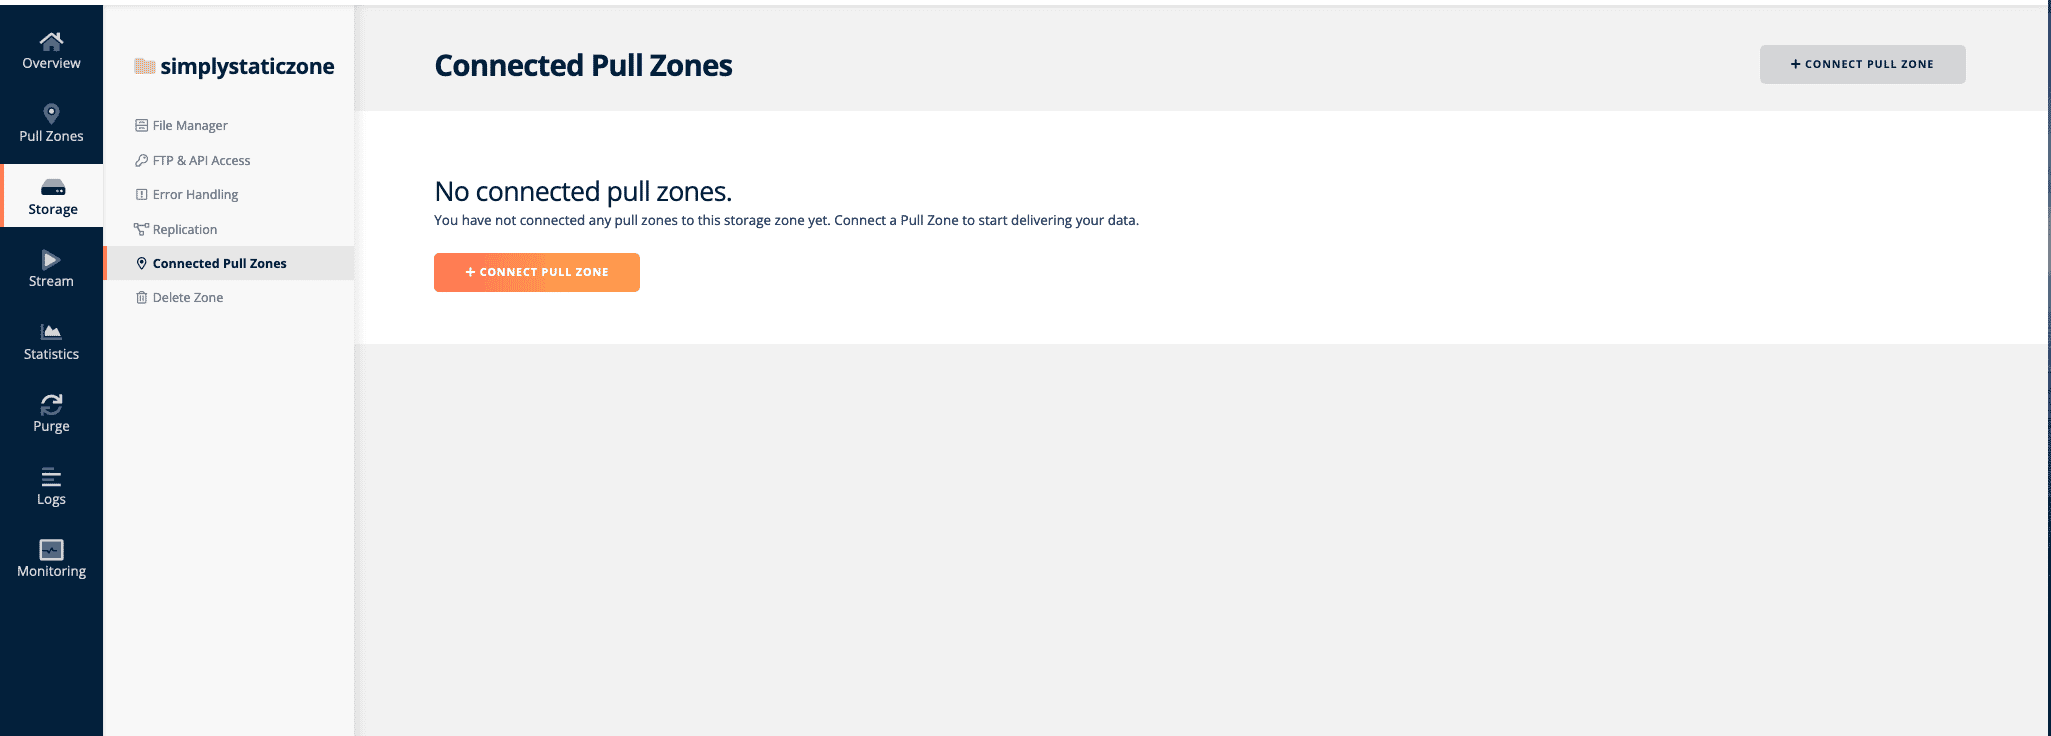
Connect Pull Zone
This will take a short moment, but once it’s finished we click on “Connected Pull Zones”, add a name for the new pull zone and save the settings.

Copy the Access Key
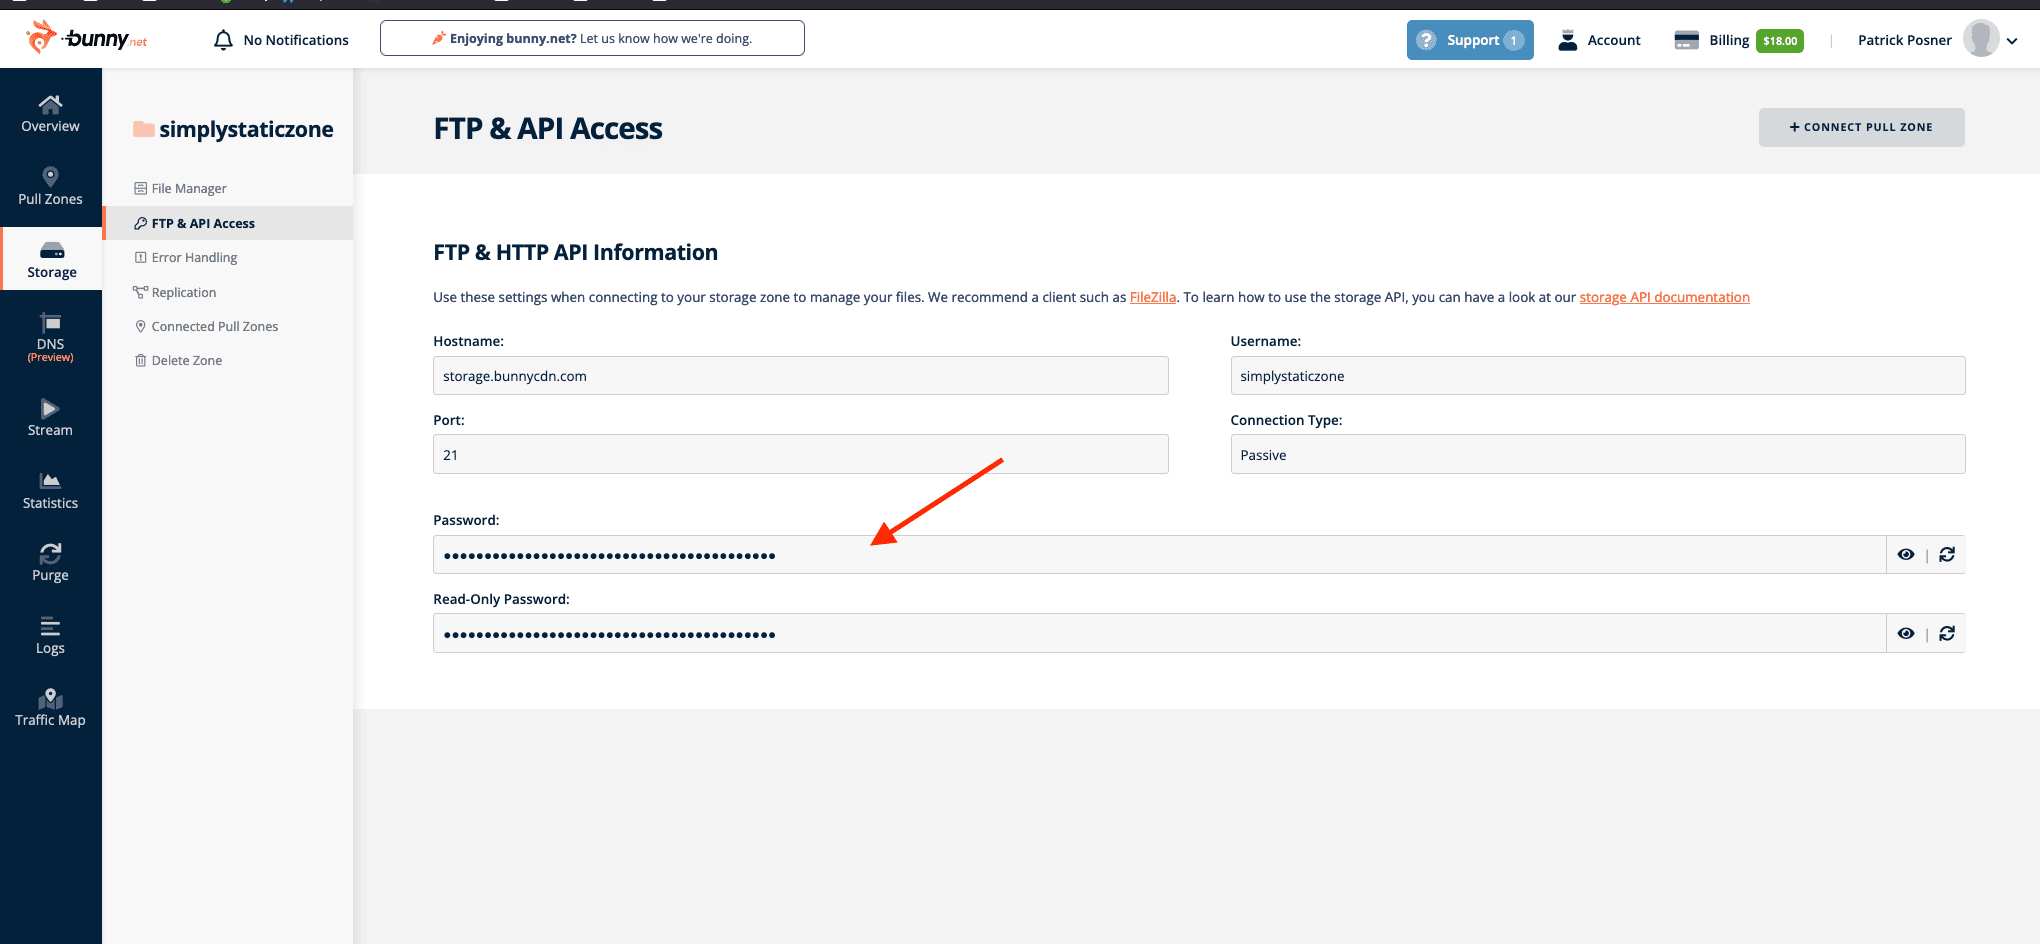
The last bit of information we need is the Access Key. Go to your storage zone and click on “FTPFile Transfer Protocol. A method for transferring files between a local system and a server over the internet. & API access”. You will find two passwords here “Password” and “Read-only Password”, make sure you get the value from “Password”:
Setup in Simply Static
Now we have everything set up in BunnyCDN, and we can move back to Simply Static. Head over to Simply Static -> Settings -> Deployment-> BunnyCDN and fill out the details:
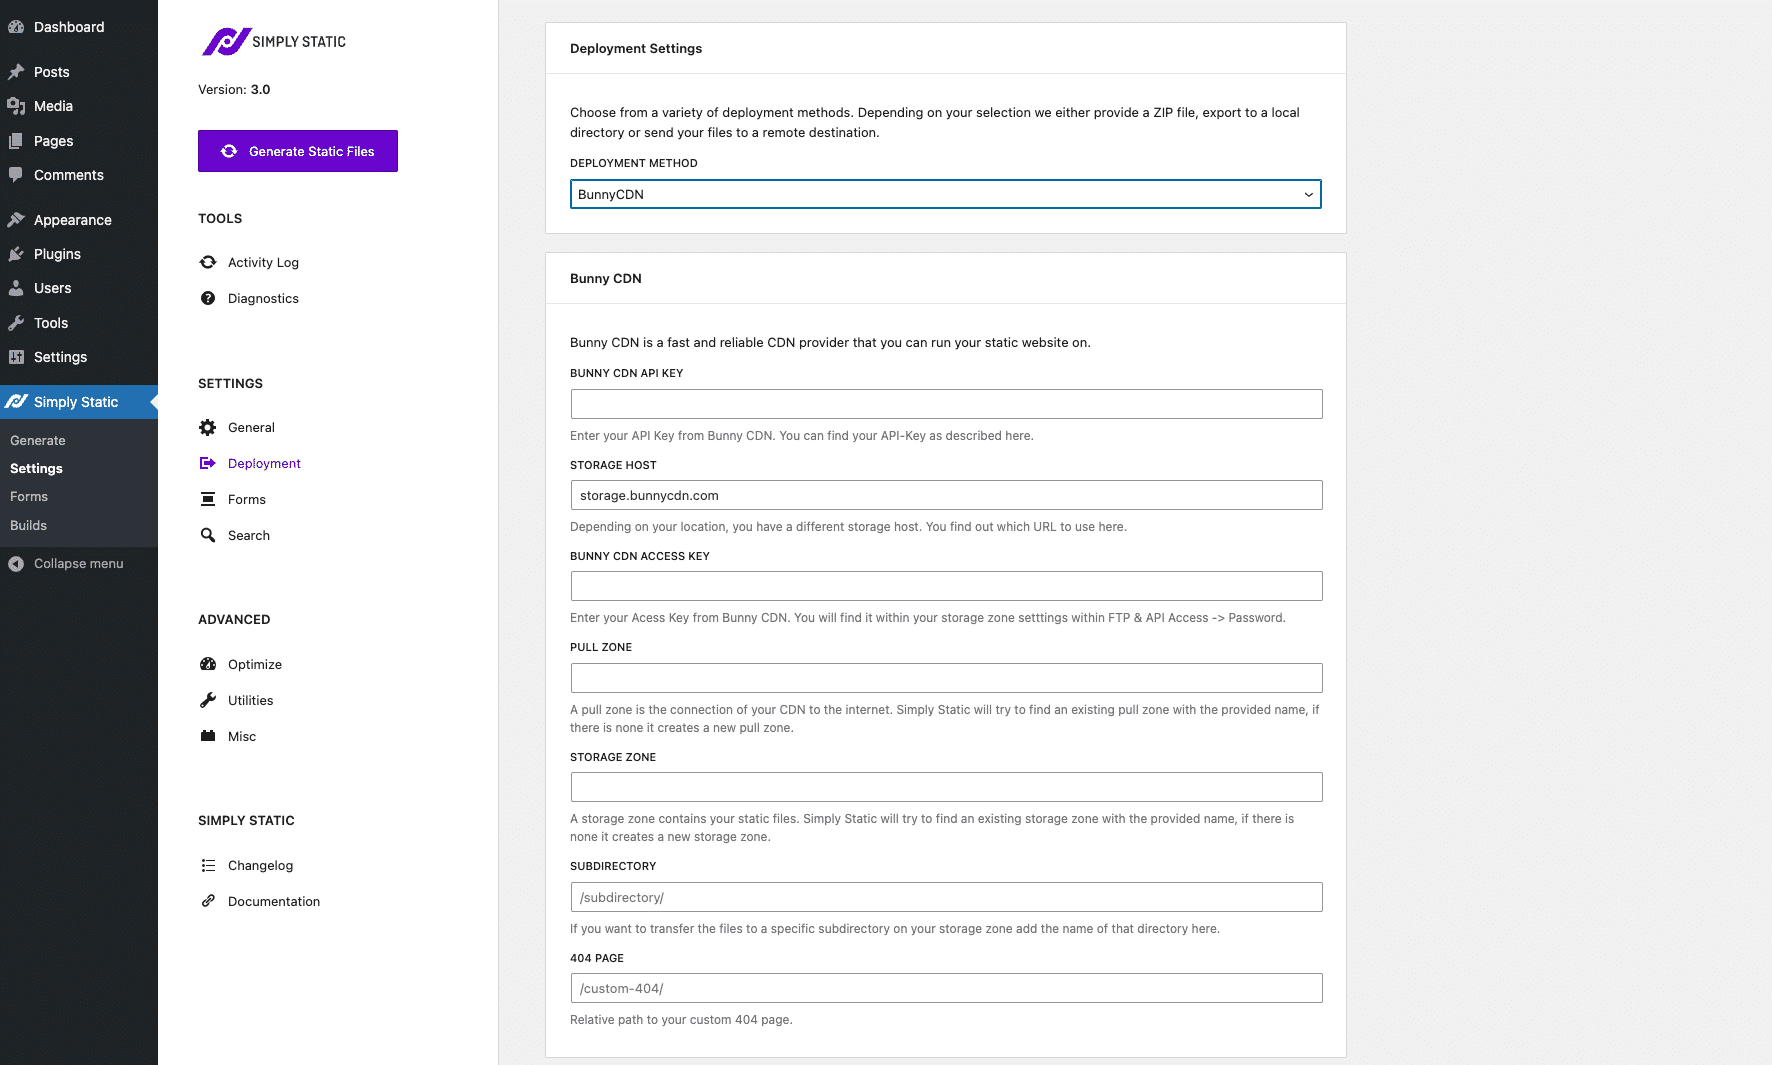
CDN API Key:
This is the general API key from BunnyCDN. You can get this from the account area of your BunnyCDN account.
Storage Host
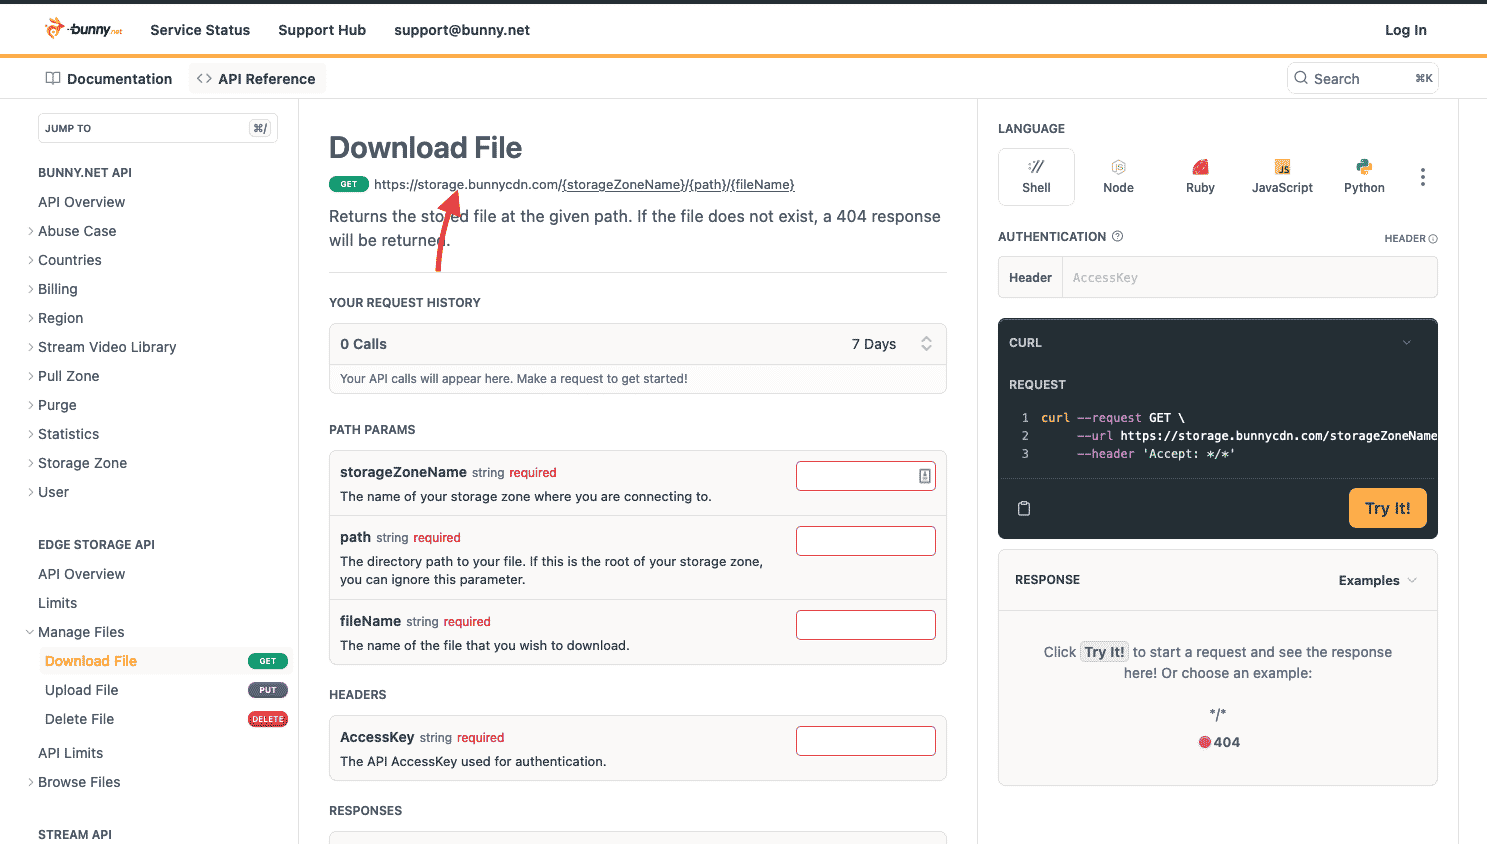
Depending on your geographical location, the storage host may differ from what you can see on the screenshot. You can quickly find out the correct storage zone in the BunnyAPI docs here: https://docs.bunny.net/reference/get_-storagezonename-path-filename
You will find the correct storage host in the example at the top:
CDN Access Key
That’s the “Password” value you copied from your storage zone -> FTP & API access. The Access key is required to upload and modify files in your BunnyCDN storage zone.
Directory:
This is optional. If you like to store your website in a subdirectory, add it here. You don’t need to add any slashes, just the directory’s name.
404:
If you have created a custom 404 error page in WordPress, you can add the relative path to it here. Simply Static will automatically transform it to a readable file for BunnyCDN and configure the settings accordingly.
Once you complete all the details, save the settings, and you are ready to run an exportThe process of saving the files and data from your WordPress site to create a static site..